Today we are completing our FREE SoapUI tutorials series. In this SoapUI training series, we covered SoapUI Beginner testing concepts and in detail with easy to understand practical examples.
Mainly these SoapUI tutorials are very helpful for all level SoapUI users. Today to complete with SoapUI series we are covering last article in the series “10 Tips for the SoapUI Beginner“.
10 Tips for the SoapUI Beginner:
(1) Magical Right Click:
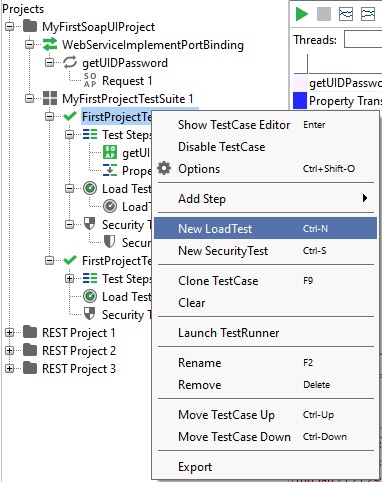
SoapUI is a robust tool and there is much functionality embedded within it than they are visible on the SoapUI dashboard. The foremost tip for the SoapUI Beginner is that using the SoapUI tool becomes simple by using the right-click option as everything cannot be put on the dashboard. On the SoapUI tool dashboard you may not find much of the options but after navigating on the objects and doing the right click on them will provide you many options to work with. Therefore, wherever you are in SoapUI interfaces just explore more options by using the right-click option and check what shows up and how it is useful in our test. In the below screenshot when you right-click on TestCase in SoapUI, you will see below options to add New Security Test, New Load Test, etc.

(2) Adding TestCase to TestSuite:
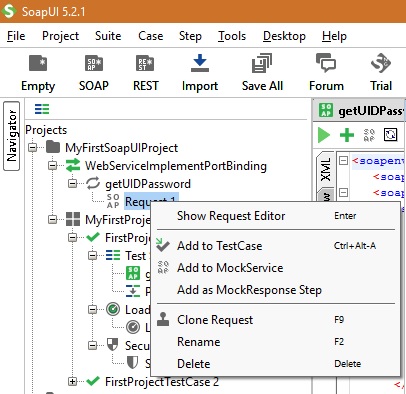
SoapUI developer after doing lots of research comes around a structure that is obeyed by many testers so it is implemented that way in SoapUI. The structured approach is very simple. We have a TestSuite which clubs a number of tests known as TestCase. Each test case can have one or many steps known as TestSteps. This structure is simulated in SoapUI as follows. Right-click on the SOAP request (Refer Tip 1) and click on “Add to TestCase”. The system will ask you to name the TestSuite first if it is the first time TestCase is added to a SOAP request. Once TestSuite is added then you can name the TestCase and then TestStep. Also, the story does not end here, SoapUI also provides functionality to clone the TestCase from one request to another request, or even it can be moved by drag and drop feature of SoapUI. Below screenshot demonstrates right-click on request, SoapUI in drop-down menu showing feature to Add TestCase, Add to MockService, etc.
(3) Naming Conventions:
There is no naming convention in SoapUI that is followed to name TestSuite or TestCase. However, SoapUI provides flexibility to name the TestCase and TestSuite so that they will be understandable to the testing team. As a simple example, SoapUI will take the default as Test Suite 1 and keep on adding as Test Suite 298, etc. now suppose a newbie is to be given the transition that what does this suite number does, it will be very hard for him or her to remember but if each test suite is named as “Test Suite for Login” or “Test Suite for Product Lookup”, etc. This is more informational and easy to remember to a newbie as compared as Test Suite numbers. Therefore just forget about default TestSuite or TestCase numbers and give a proper meaningful name to each TestCase and TestSuite.
(4) Assertions are an essential part of SoapUI:
Testing a web Service in SoapUI is all about use of assertions. In the above tips we learned to right-click on request and add the TestCase and TestSuite with meaningful name on them. Let’s understand the use of assertions, suppose we created a web service in which we send a request message with required input arguments for account lookup and in response message we expect to receive UID and Password. Therefore by adding the “contains” assertion for “UID” and “Password” our TestCase will check whether these tokens are present there or not and show the Assertion as VALID or INVALID.
Now to add an assertion to a TestCase, it is very simple and is demonstrated below in the example step by step.
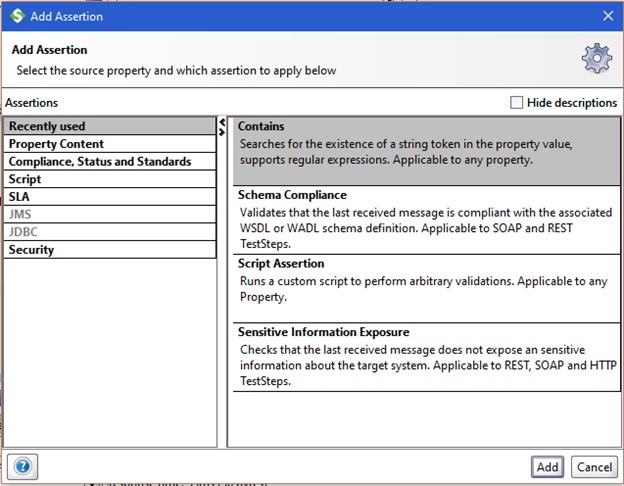
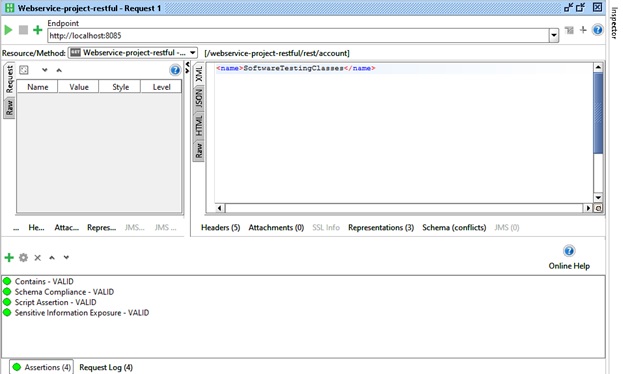
Step 1: Let’s add the required assertions to this test case on RESTful web service XML Response. Just open the assertion window and select “Contains” assertion and click on Add button.
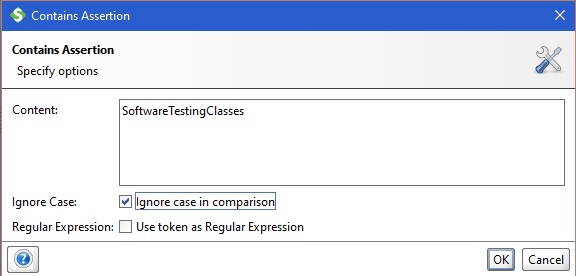
Step 2: On the below “Contains Assertion” window add the string “SoftwareTestingClasses” and after that click checkbox to Ignore Case and then click OK button to proceed.
Step 3: From the left-hand project window, run the TestCase and check for the response message and all assertion should pass as VALID as shown in the screenshot image below.
(5) SoapUI Transfer Properties:
Property transfer is the most important property of SoapUI. Using this property SoapUI allows to take a value received as a response to the further request to Web Service again. E.g. while login into a web application, the response returns a unique session id which is required in the further requests to web service in the same session. This is made very simple in SoapUI as compared to other testing tools. Let’s understand how to use the ‘Property Transfer’ feature in SoapUI.
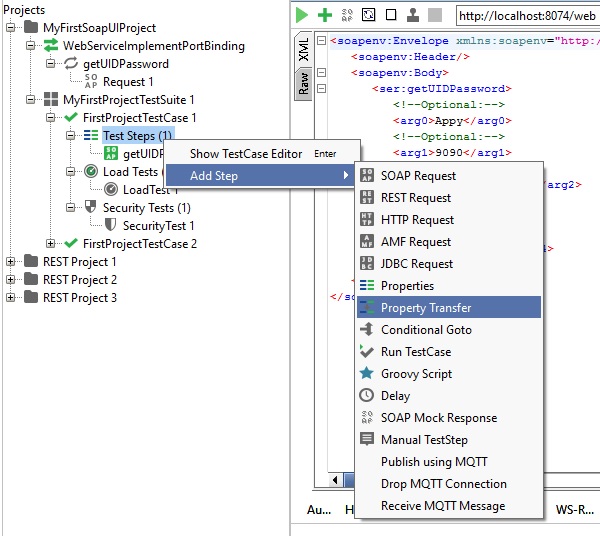
Step 1: Using the tip 1, right-click on Test step whose response value is required to be used as ‘property transfer’.
Step 2: from the drop-down menu select Add Step, which will result in a further drop-down menu where ‘Property Transfer’ tab will be visible.
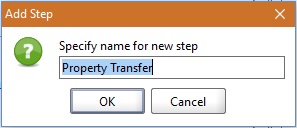
Step 3: Click on it, a pop-up window will open asking for name of the Property Transfer step. Enter the name there.
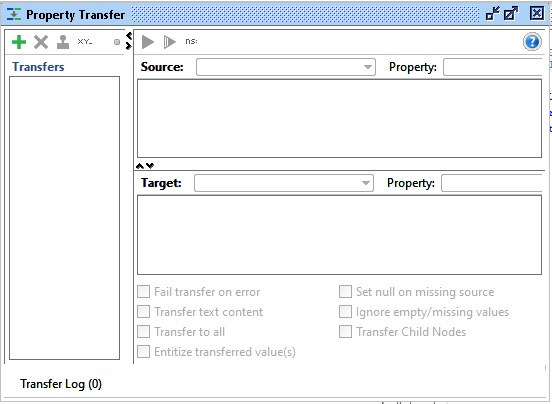
Step 4: Click OK button, you will see the Property Transfer window as shown below where you can set and Transfer value between Source and Target using SoapUI.
(6) Go through SoapUI TestSuite and TestCase logs:
This log will give you a quick walk-through of your Test Suite that how well it gets executed. It will indicate you time that it took to complete its execution and what was its status. Moreover it provides you a link on each step on which you click you see the request SOAP and response SOAP XML message along with its properties.
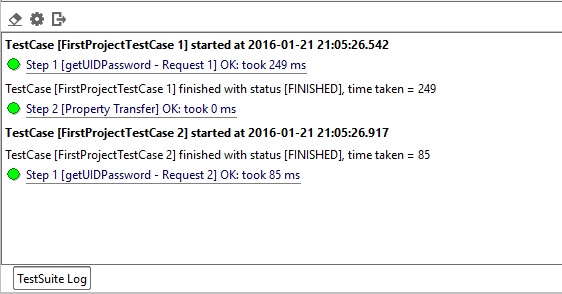
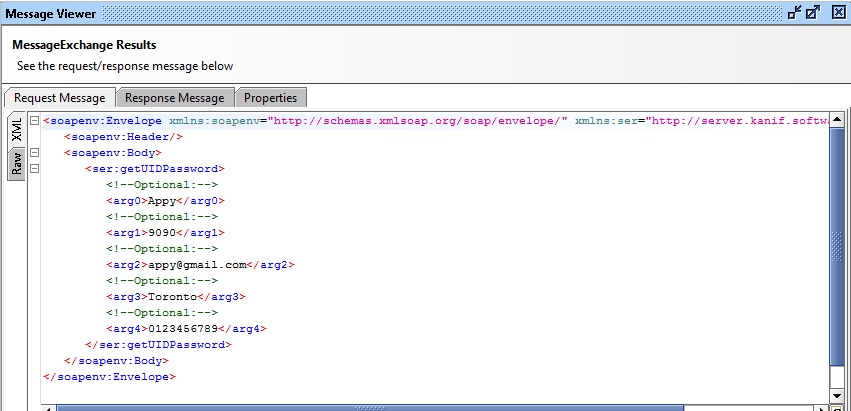
Below is the SOAP XML request message on Step 1 for FirstProjectTestCase 1.
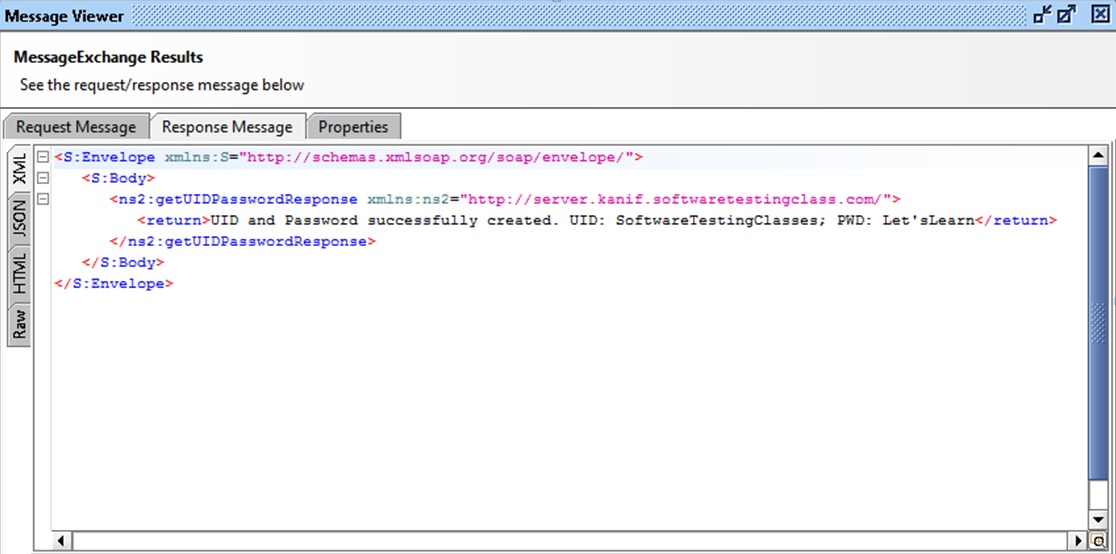
Below is the SOAP XML response message on Step 1 for FirstProjectTestCase 1.
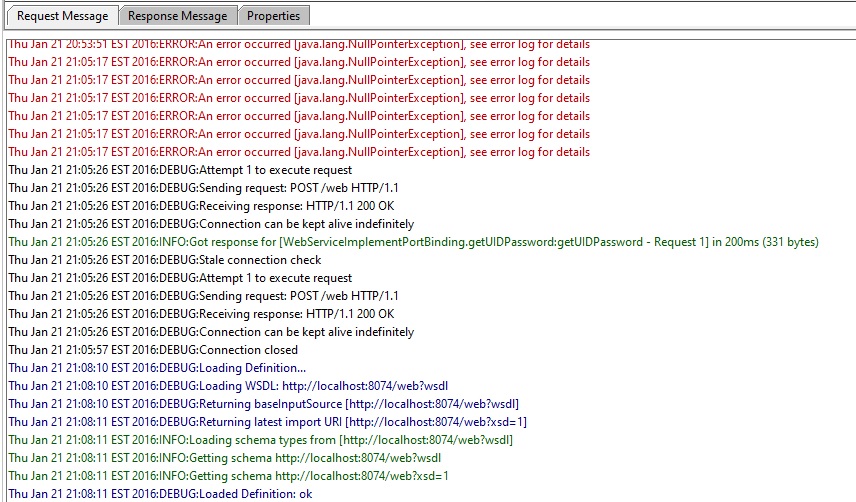
(7) SoapUI logs:
SoapUI tool provides logs were shows all the errors, debug, and info thrown while executing test cases on the SoapUI tool. Provision is provided to view logs alternatively for Request Message and Response Message. This is a powerful mechanism to analyze the actual internal processing of underlying Web Service while testing requests and response messages on SoapUI.
(8) Easy to Load Test:
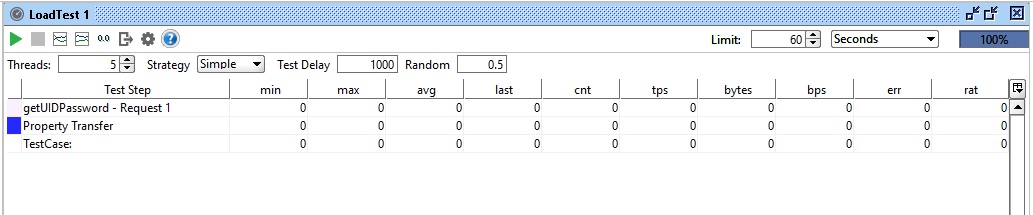
With the SoapUI tool, the load test is very simple and it completes in a very short time and you need not spend week effort to set up a load testing environment. As discussed in the above tips, right-click on any test case and select the New Load test option to create a new load test. The load test is very simple to trigger by clicking on the top left corner green arrow button as shown in the screenshot below.
Below is the screenshot showing the Load Test result.
(9) Be ready to practice this tutorial:
If you have gone through this tutorial thoroughly from class 1 till this useful tips tutorial then practicing all the exercises will make you the master of SoapUI tool and many opportunities would be waiting for you.
(10) Get Updated:
Knowledge of IT testing and testing tools is never enough, so it is our suggestion to go through https://www.softwaretestingclass.com/ website for new updates on testing tools and testing related subject and be up to date. Please leave us feedback on how we are doing here. Do share useful articles with your other team members.
Conclusion:
SoapUI is most commonly used as API Testing Tool in the market. Hope above tips posted in this article for the SoapUI Beginner are useful for your SoapUI testing.
Today we are announcing that we are planning to post “Atlassian JIRA Project Tracking Software and Issue tracking tool” tutorial series.
If you missed any article in the SoapUI training series then you can refer the below list:
Tutorial 1 – Introduction to SoapUI – Why SoapUI?
Tutorial 2 – What is Web Service and How it is tested?
Tutorial 3 – Web Service Sample Project and it’s Testing
Tutorial 4 – Installation and configuration of SoapUI
Tutorial 5 – Your First SoapUI Project
Tutorial 6 – How to do Functional Testing in SoapUI?
Tutorial 7 – Simple guide to creating Load Testing using SoapUI
Tutorial 8 – Mock Services Testing in SoapUI
Tutorial 9 – How To Perform Security Testing In SoapUI?
Tutorial 10 – REST Testing using SoapUI
Tutorial 11 – REST Sample Project
Tutorial 12 – Sample Web API Project Testing Using SoapUI
Tutorial 13 – Schema Inference
Tutorial 14 – 10 Testing Tips for the SoapUI Beginners

⇓ Subscribe Us ⇓
If you are not regular reader of this website then highly recommends you to Sign up for our free email newsletter!! Sign up just providing your email address below:
Happy Testing!!!
