Using JIRA as a project tracking tool, it is possible to breakdown a parent task into a number of smaller sub-tasks. Sub-tasks can be assigned to the individual team member so that his effort and the sub-task progress can be tracked separately. Similarly, the other team members which are working on other sub-tasks of the same issue together with make the overall tracking of parent issue very smooth and it provides a better picture of its progress. Using such an approach it is very easy to understand which sub-task has a backlog and which sub-task is holding off the progress of the other subtasks within a parent issue or in the entire project.

In JIRA, all sub-tasks associated with parent issues are summarized on the parent issue’s main page. Since sub-tasks belong to a parent issue therefore both belongs to the same project in JIRA. Like a standard JIRA issue, sub-tasks have same fields such as Summary, Description, Reporter, Assignee, Status, etc. Sub-tasks may have a different issue types set than a standard-issue type. Sub-tasks cannot have their own sub-tasks, but to do so covert the sub-task into a standard JIRA issue and break it into a number of sub-tasks.
In JIRA, we can do the following operations with sub-tasks.
1) Creation of a Sub-tasks in JIRA:
To create an issue, you should have a create issue permission in JIRA. Below are the steps to create sub-tasks.
- Open a parent issue for which you want to create a sub-task.
- From the menu present at the top of the parent issue page navigate as “More -> Create Sub-Task” as shown in the below screenshot.

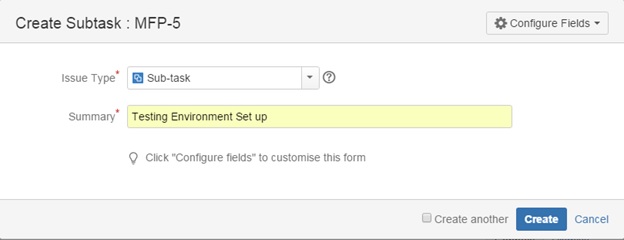
- It will open up a sub-task dialogue box as shown in the below screenshot. Enter the details into the summary field and click on the create button to create the sub-task.
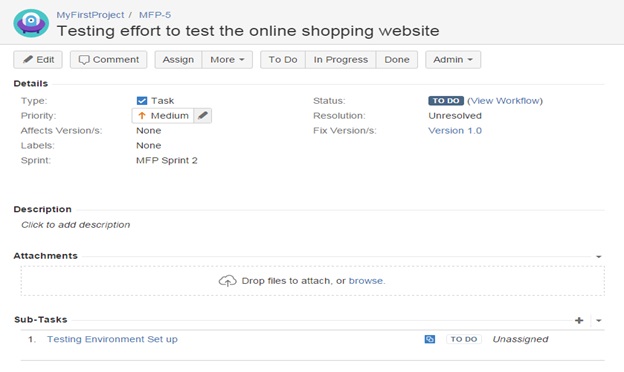
- Sub-task will be visible on the parent issue page after its creation as shown in the below screenshot.
2) Working with Sub-tasks in JIRA:
All sub-tasks are listed on the parent issue screen. You can track the progress of the sub-tasks from the parent issue screen itself. Below are the operations you can do with the sub-tasks.
- You can quickly add the new sub-task to the parent issue by clicking the “+” icon present at the left corner of the Sub-Tasks heading.
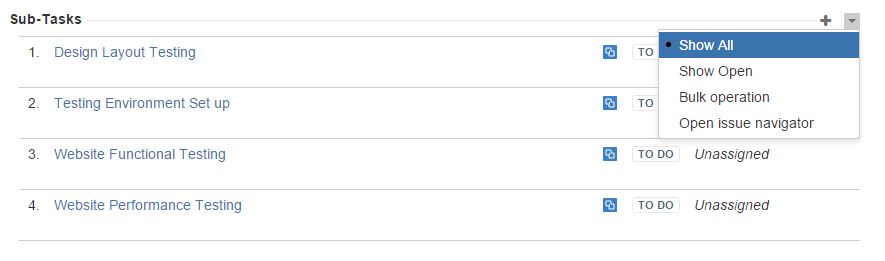
- Under the sub-tasks heading, click on the right corner arrow link as shown in the above screenshot. It will show the dropdown menu from which we may choose to show all sub-tasks, only show open sub-tasks, bulk operations, and open issue navigators.
- When you choose the option as show all sub-tasks then it will list down all the sub-tasks present on the parent issue page. Similarly, to show open sub-tasks, it will display only the open issue on the parent issue screen.
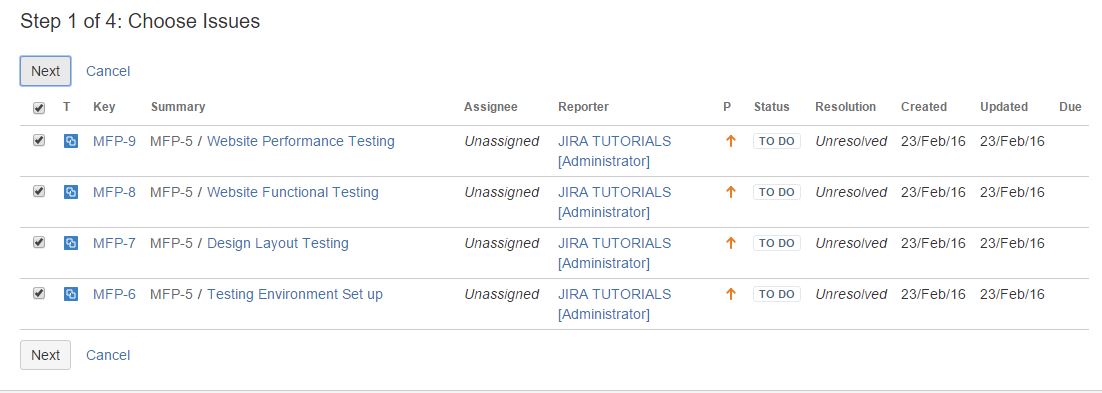
- When you click on the bulk operation, JIRA will open up the screen as shown below. Here JIRA permits to do the bulk operation on the sub-tasks like edit issues, delete issues, move issues, transition issues, watch issues, stop watching issues, push to a remote system, synchronize with a remote system, and push changes to the remote system.
- When you will click on the open issue navigator option, it will list down all the sub-tasks associated with the parent issue on the navigator screen as shown below.
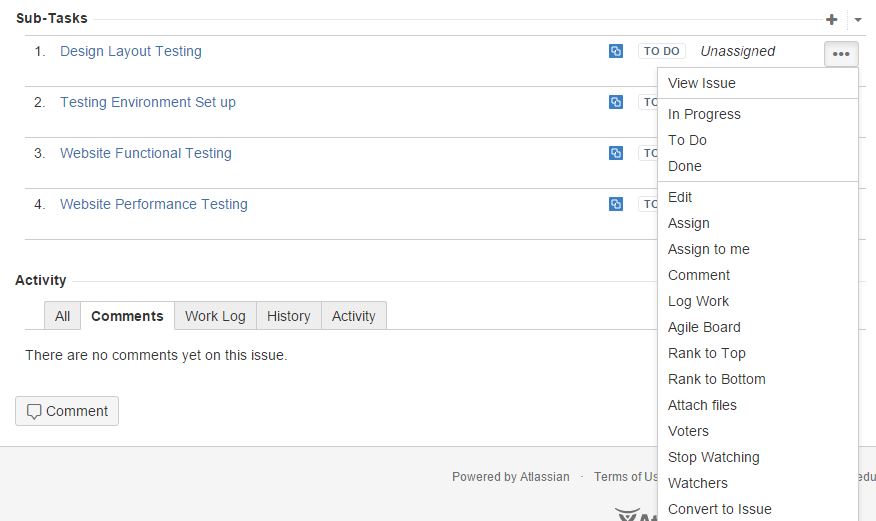
- Further action on sub-tasks can be performed just by clicking on the (…) icon of the individual sub-task present on the right-hand side of the sub-task division, you can see the dropdown menu as shown in the below screenshot where you can change the status of the sub-task from TODO to IN-PROGRESS or DONE. Also, you can view the sub-tasks details, edit the issue details, assign the issue to yourself or other team members, comment on the issue, and attach files and lots of other such actions on sub-tasks.
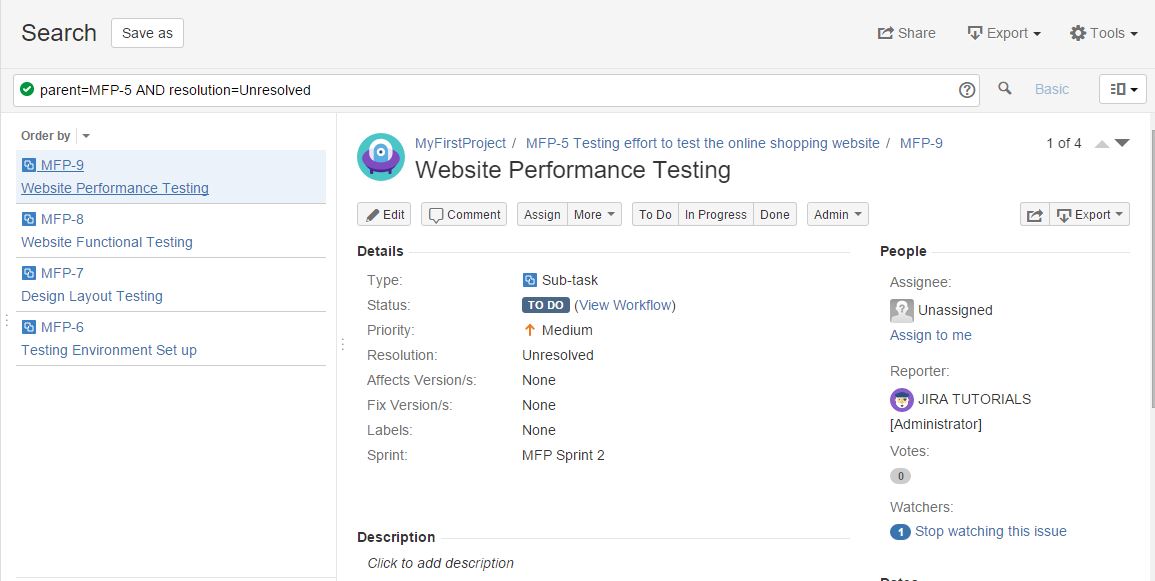
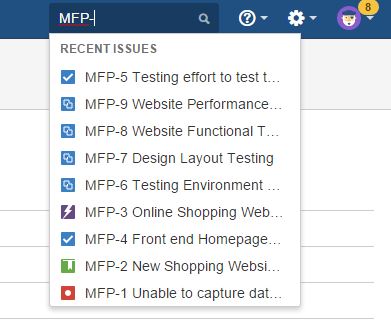
3) Searching for sub-tasks:
Like any other issue in JIRA, Sub-task can be searched with their reference number through search panel present on the right-hand side of the JIRA header as shown in the below screenshot.
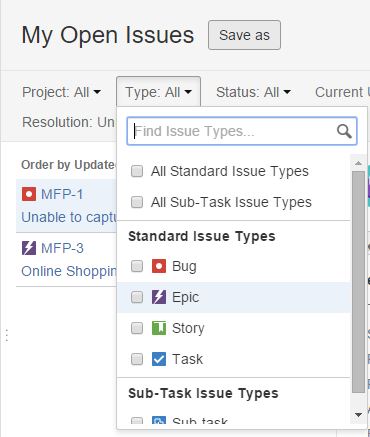
Alternatively, under the issues dropdown menu present on the JIRA header click on the option “My Open Issues”, you will see the below screen where you can click to filter issue type from All to “All Sub-Task Issue Types” to view all your open sub-tasks in JIRA.
4) Converting a standard issue to a sub-task:
In JIRA, if you want to convert any issue as sub-task then follow these steps.
- Search and navigate to the issue which you would like to convert it to sub-task.
- From the issue, screen navigates as More > Convert to Sub-Task as shown in the below screenshot.
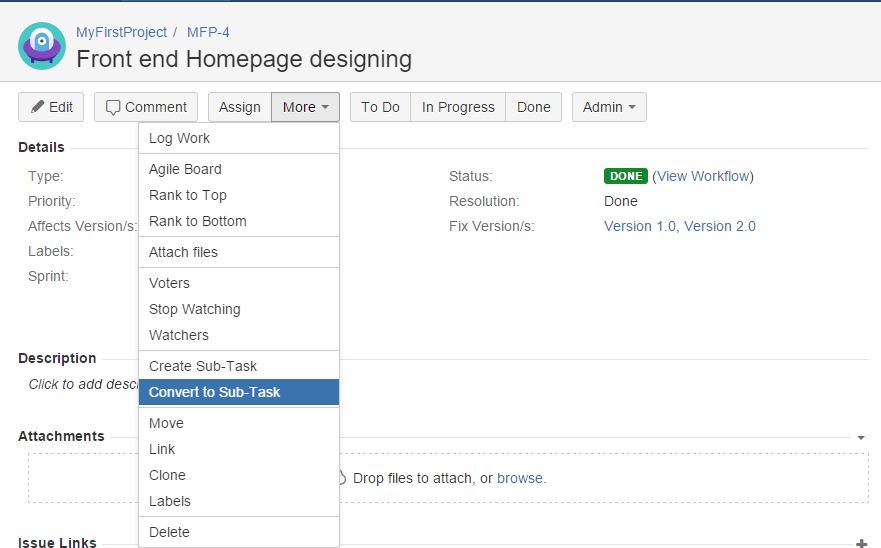
- After selecting the option as “Convert to Sub-Task” below screen will appear.
- It will ask to select the Parent issue identification number for this sub-task. Here I selected it as MFP-3 (which is an issue) then click on the next button to proceed.
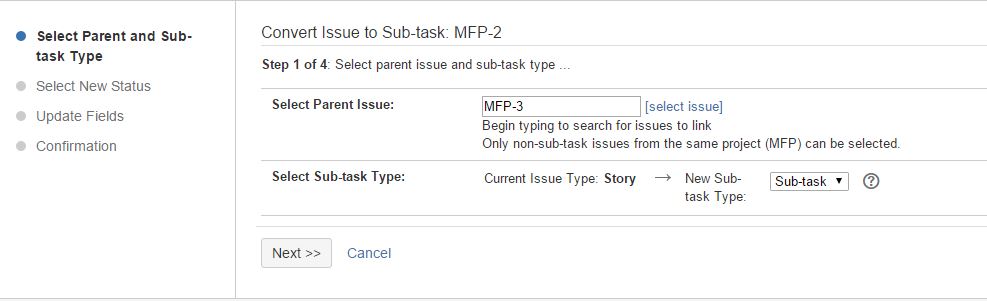
- Next will ask you to select the new status for sub-task as step 2 and then to update fields as step 3. Click the next button to proceed for confirmation of changes as shown in the below screenshot.
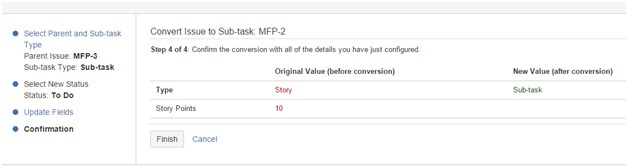
- Click on the finish button to commit the changes for the converted sub-task. This should be noted that you cannot convert an issue to sub-task if that issue has one or more sub-tasks associated with it. If you still want to convert such an issue to sub-task then you need to first convert all the issue’s sub-tasks to standalone issues (discussed below) and then convert them to sub-tasks of another issue as Sub-tasks cannot be moved from one issue to another directly.
5) Converting a sub-task to a standard-issue:
In JIRA, if you want to convert any sub-task to an issue then follow these steps.
- Search and navigate to the sub-task which you would like to convert it to an issue.
- From the issue, screen navigates as More > Convert to Issue as shown in the below screenshot.
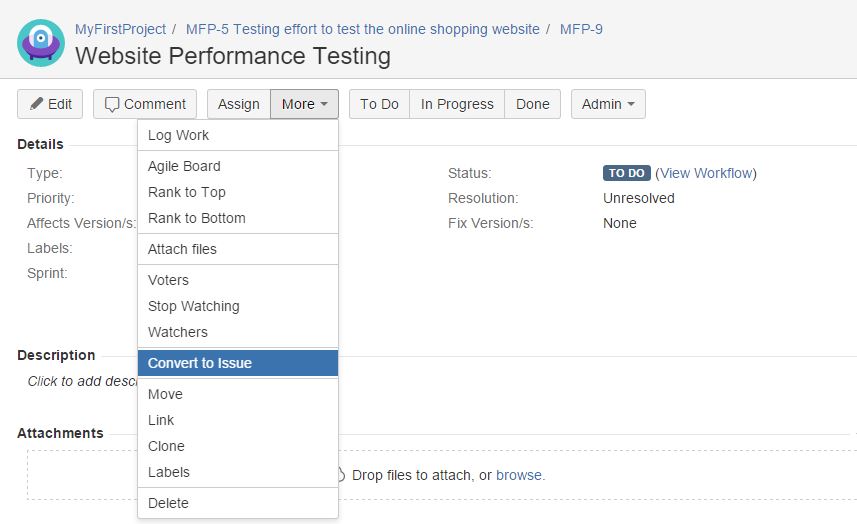
- After selecting the option as “Convert to Issue” below screen will appear. It will ask you to select the new issue type as task, story, epic, bug etc.
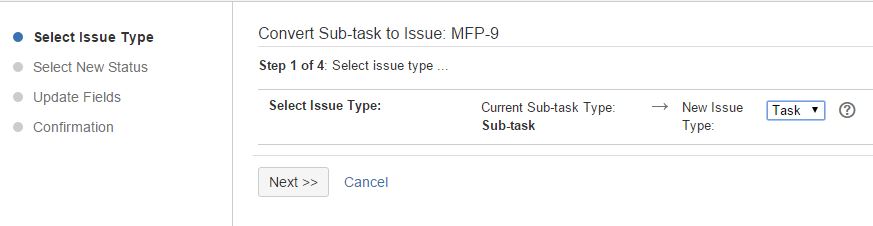
- Select a new issue type as a task and click on the Next button.
- Next, it will ask you to select the new status of the issue, choose the new status, and then click the next button to proceed.
- Next, it will ask you to update fields. After completing the update click on the next button to proceed on the final confirmation step as shown in the below screenshot.
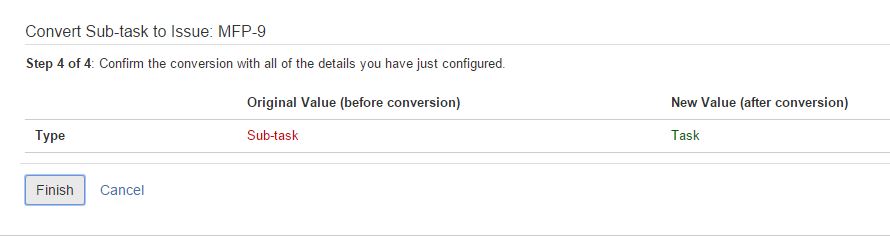
- Click on the finish button to commit all the changes for the new converted issue. Such sub-task once converted to issue will no longer be associated with existing parent issues.
Conclusion:
Here we walk through about how Sub-tasks in JIRA works and its basic features. Jira is a powerful tool that allows us to create tasks, sub-tasks, issues, covert issues into sub-tasks, convert sub-tasks into issues, etc.
Overall the JIRA system shows quite a good interface along with easy user experience. It has many more features that the test team really needs.
Hope this article helps you to understand basic concepts about Sub-tasks in JIRA. Many readers must have hands-on experience using the JIRA tool. Let us know if you have a unique experience to share about JIRA.
⇓ Subscribe Us ⇓
If you are not regular reader of this website then highly recommends you to Sign up for our free email newsletter!! Sign up just providing your email address below:
Happy Testing!!!
