Getting Started With First FitNesse Project – This is the 3rd FitNesse Tutorial in our FitNesse training series.
In this tutorial, we are going to develop our First FitNesse Project to test the basic addition and subtraction mathematics operation on two numbers as a first project on FitNesse testing tool. In the last tutorial we were able to download and install the FitNesse server. After that the embedded FitNesse server was enabled to run at port 80 using command line prompt. Below are the steps required to develop the first test case on FitNesse testing tool.
Step 1: Edit the FrontPage in FitNesse
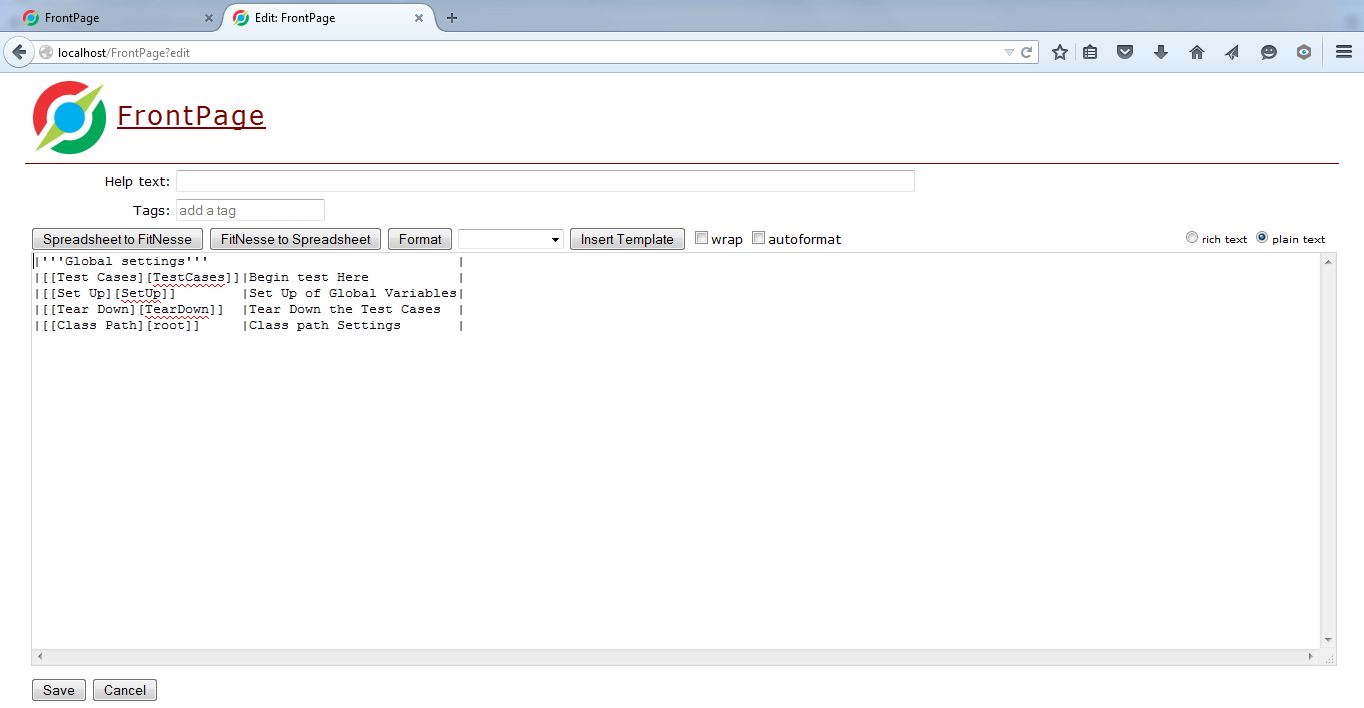
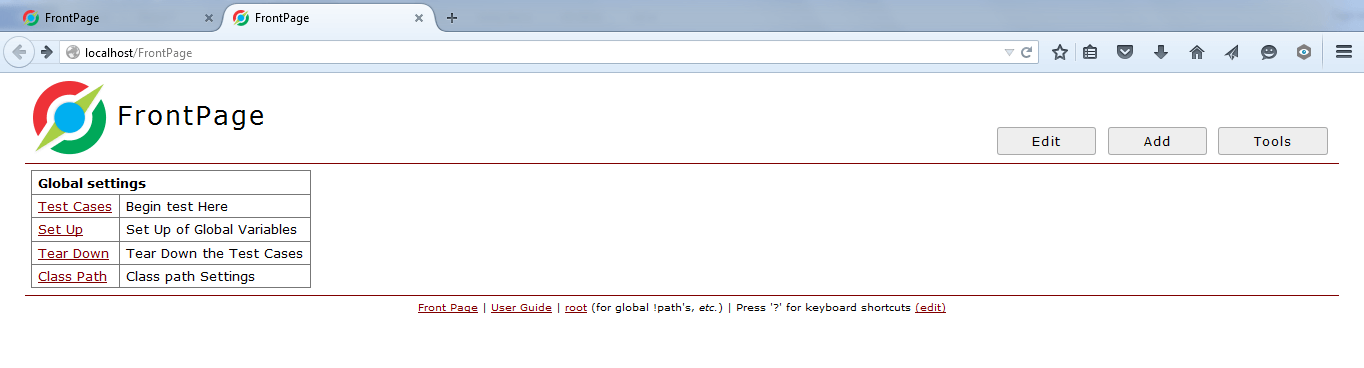
Remove the default content from the FrontPage and prepare it for global settings. Click on the Edit button of the FrontPage and remove the existing content. Add the contents as shown in the below screenshot. It has the test Case page which we are going to test on FitNesse server, Set Up page which is used to import the Java class fixtures, Tear down page to act after the test is executed successfully and the most important one is the setting up of the Java Class path and definition of the various FitNesse variables. Once these four pages are defined, click on the save button to generate these FitNesse pages.
Step 2: Creating and defining the page properties for 4 FitNesse Pages
This step involves creating and saving above 4 FitNesse pages and defining their properties. “Test Cases” page has page type as Test while the remaining 3 FitNesse test pages have page type as Static.
Step 3: Adding content to root page in FitNesse
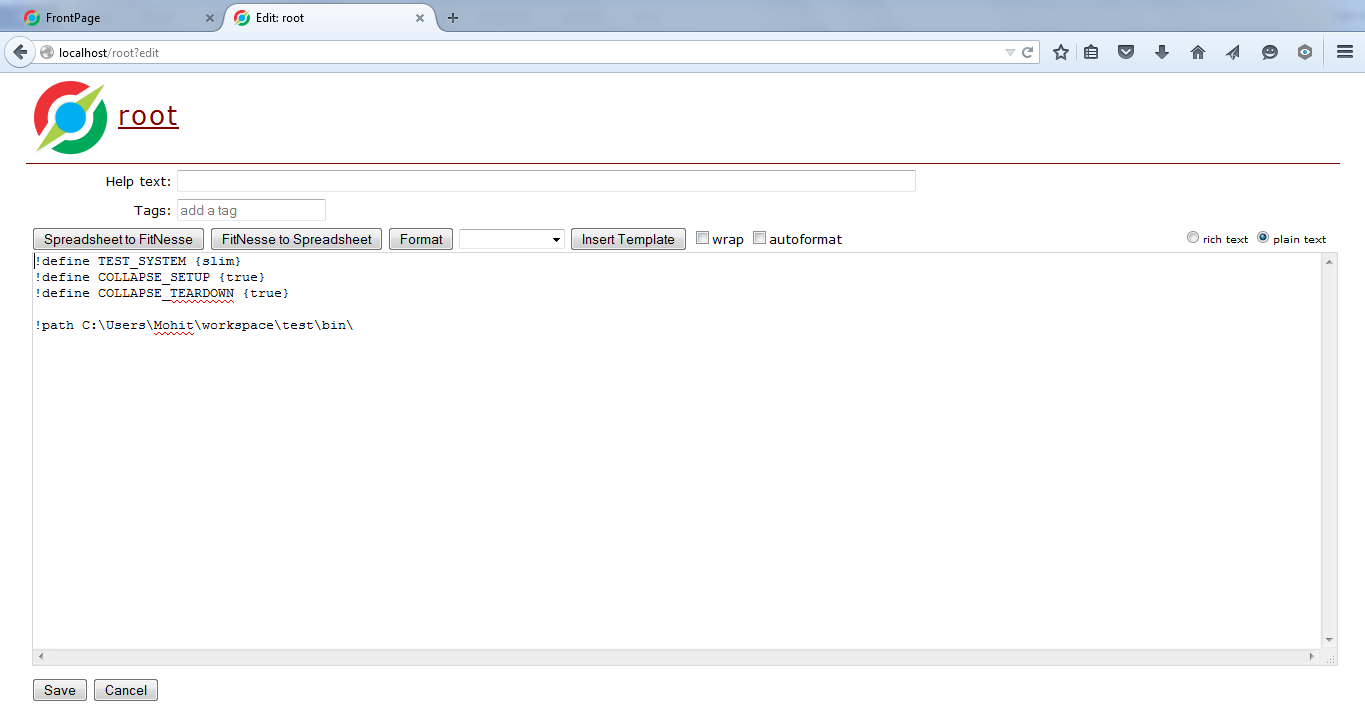
Root page is the very important page in FitNesse as all the system variable definitions are defined here along with the classpath for Java fixtures. For the current example to test the mathematics operations, we need to define the Java classpath where fixtures are located. Also we need to define basic FitNesse variables such as TEST_SYSTEM as slim (Testing engine used), COLLAPSE_SETUP as true and COLLAPSE_TEARDOWN as true. Below screenshot demonstrates how to define a variable and classpath in FitNesse as script.
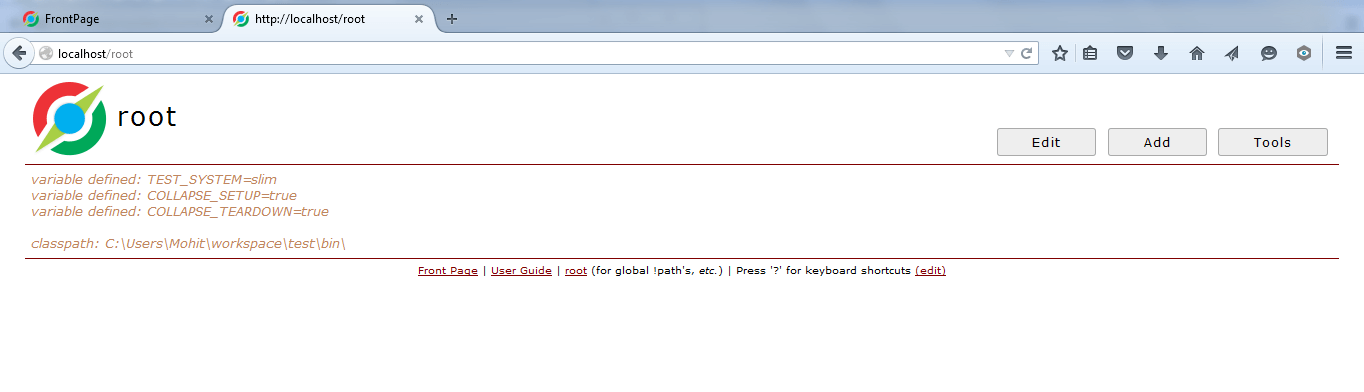
After writing above script, click on the Save button to commit the page contents. Root page will look like as shown in the below screenshot.
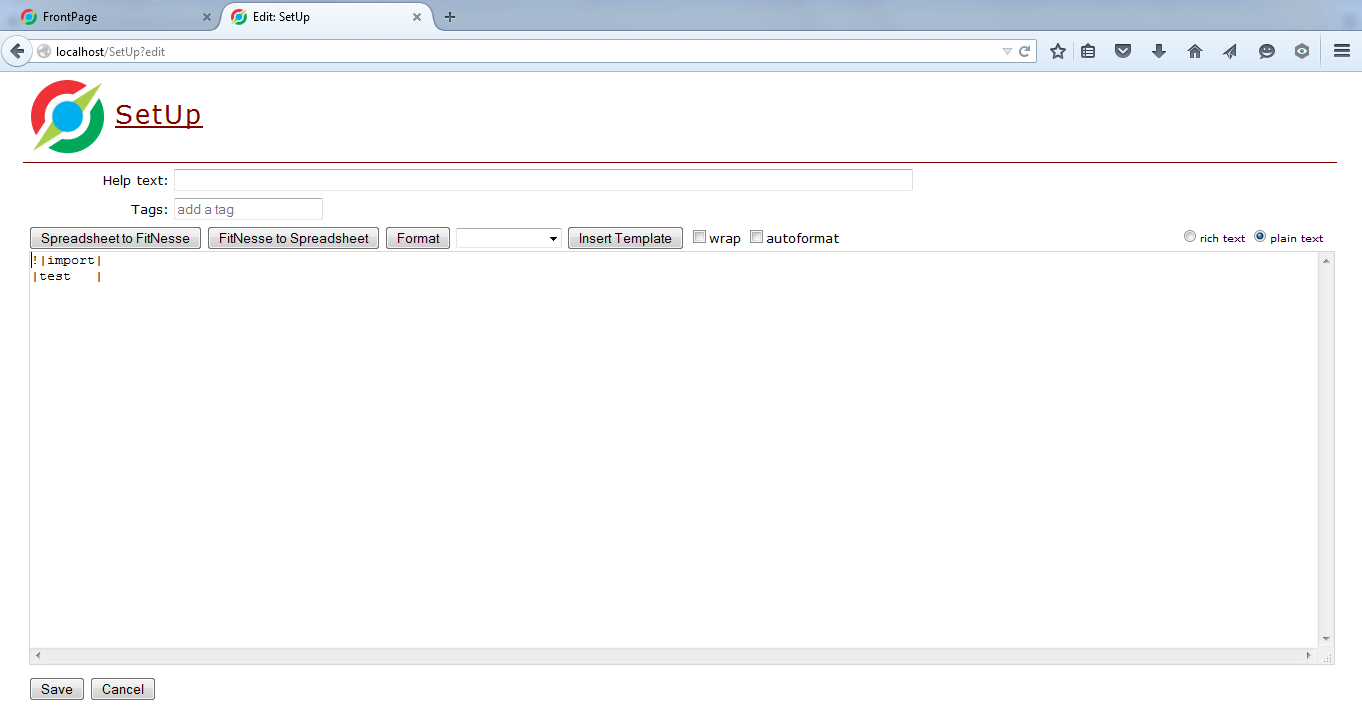
Step 4: Adding content to Setup page in FitNesse
Click on the Edit button and add the script as shown in the below screenshot. This script imports the package where Java class fixtures are found. In the current example we are going to develop and compile Java classes into package name as test.
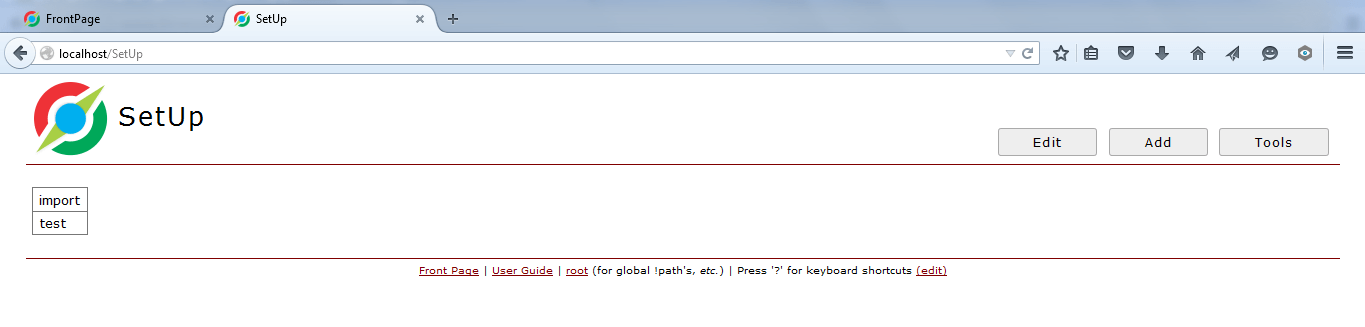
After you click the save button, the Setup will display the import decision table as shown in the below screenshot.
Step 5: Adding content to Teardown page in FitNesse
FitNesse test scripts present on the Teardown page are executed after any FitNesse test or entire suite is executed successfully. For example, if you need to clear the database after current test is completed in order to execute the next test. It is best to call that fixture directly by writing a script on this page. Below screenshot demonstrates how a TearDown FitNesse page looks like.

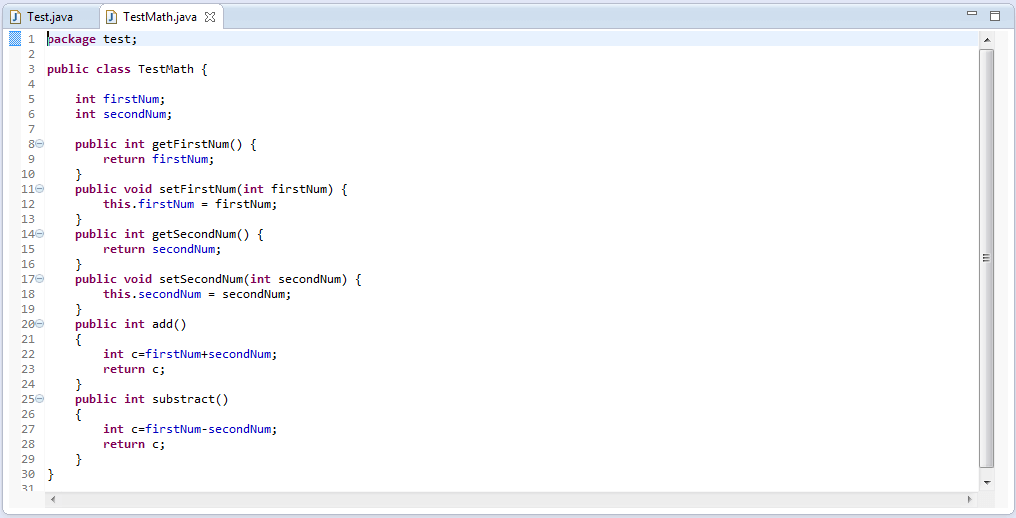
Step 6: Let’s write First Java fixture
It’s very simple, we just need to write a POJO in Java with class name as TestMath. In the Java class we need to define two variables as first number and second number which have the datatype as integer. Then we need to define the corresponding getter and setter methods. Next we need to define the actual test methods as add and subtract which do the actual mathematics addition and subtraction operations. The entire TestMath Java fixture is defined in the below screenshot. This is to be noted that these test methods should always return a value and can never be void as FitNesse server is going to compare this result output against the expected output mentioned in the FitNesse test scripts in the decision tables.
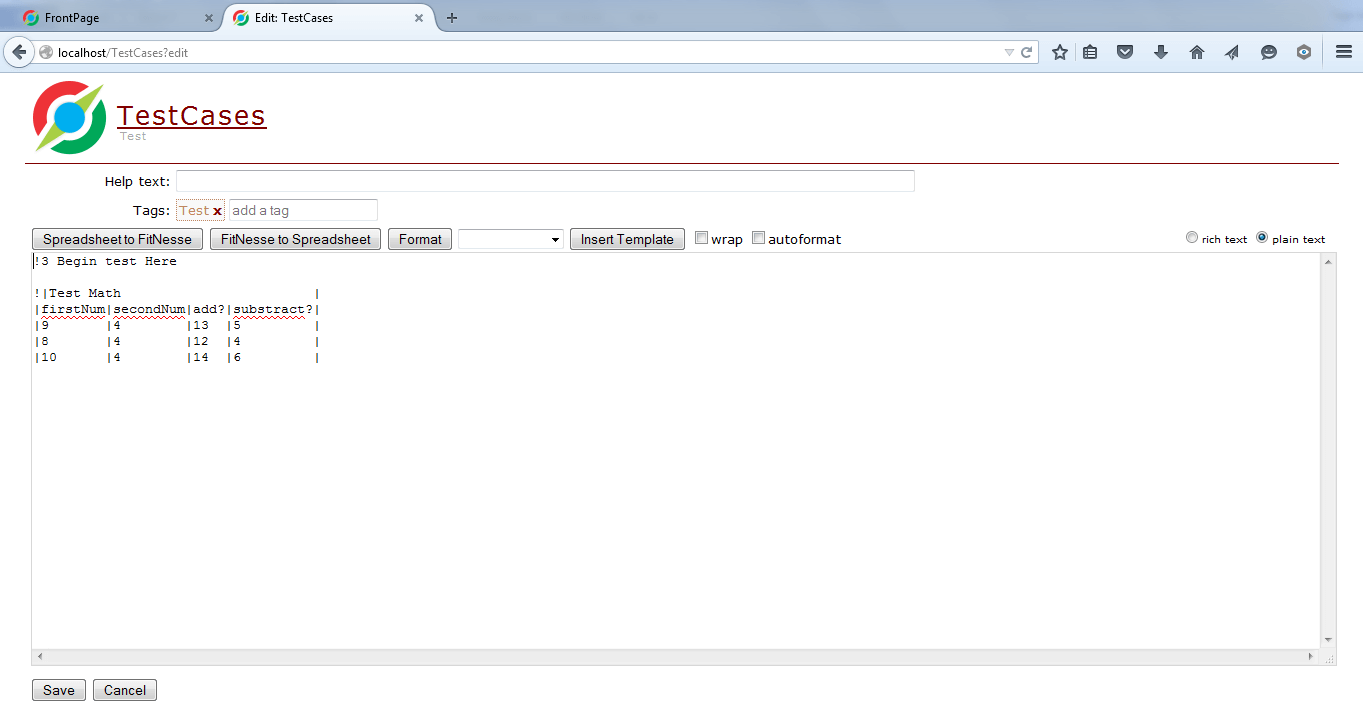
Step 7: Let’s write First FitNesse Test Case Script
After setting up the complete Java classpath for fixtures, this is the time to write the actual FitNesse test script. FitNesse script has its unique pattern for definition. On the first line define the Java fixture class name to be called and on the next line define the setters and getter methods for the Java class. Columns without question marks are the setters where FitNesse automatically appends set as prefix to the method name and on the other hand the columns with question marks are the getter methods of the class which compares the returned result against the pre-set output entered into the decision table. After writing the formatted script as shown in the screenshot, click on the Save button.
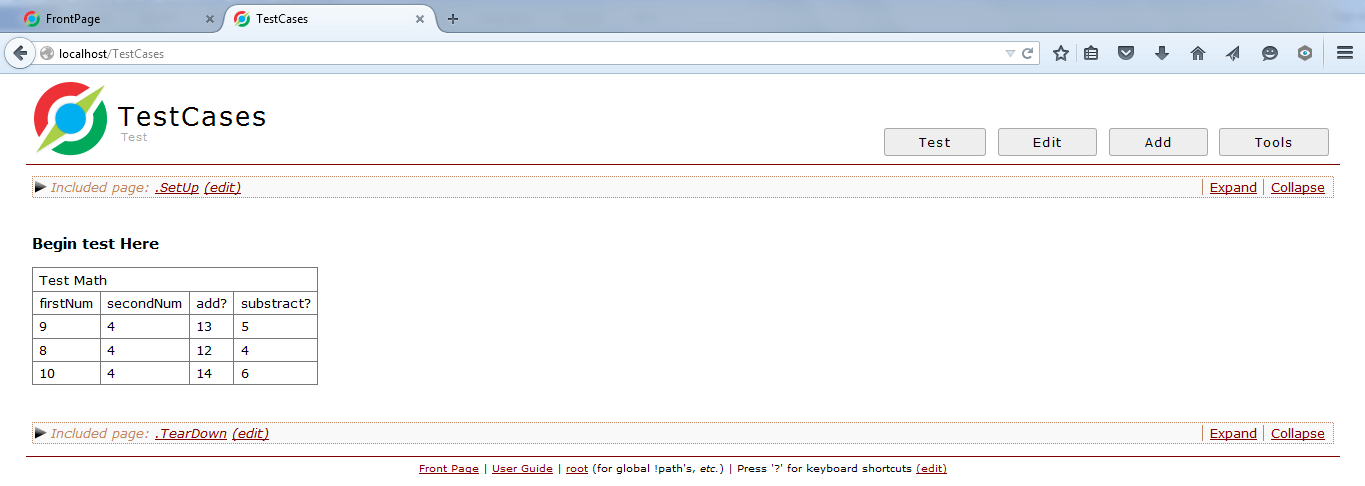
Once script contents on this page are saved, a decision table will be visible as shown in the below screenshot. We have entered values for the first number and the second number as input and we are going to do the mathematics operations such as addition and subtraction on these numbers. Java fixtures will return the result after doing mathematics operations at their methods,the output is compared against the expected values present in the decision table.
Step 8: All set, it is the time to trigger the Test button on the FitNesse page
At this point, you are all set to execute your first test case in FitNesse. All you need to do is just click on the Test button. Below screenshot demonstrates the Test page when it is executed successfully. When the result returned by Java fixture matches with the expected output, FitNesse shows such test case success as green color. If the returned result from Java fixtures does not matches with the expected output, FitNesse shows such test case failure as red color.
At the top of the page, FitNesse will display right, wrong, ignored and exceptions count both for the test pages in a suite and the assertions on the current page.
Test Pages: 1 right, 0 wrong, 0 ignored, 0 exceptions Assertions: 6 right, 0 wrong, 0 ignored, 0 exceptions (1.081 seconds)

Let’s validate above tests.
- First number is 9 and the second number is 4 when added the new number becomes 13 and when subtracted the new number becomes 5. As test success indicated with green color, since the returned result matches with the expected output present in the decision table.
- First number is 8 and the second number is 4 when added the new number becomes 12 and when subtracted the new number becomes 4. As test success indicated with green color, since the returned result matches with the expected output present in the decision table.
- First number is 10 and the second number is 4 when added the new number becomes 14 and when subtracted the new number becomes 6. As test success indicated with green color, since the returned result matches with the expected output present in the decision table.
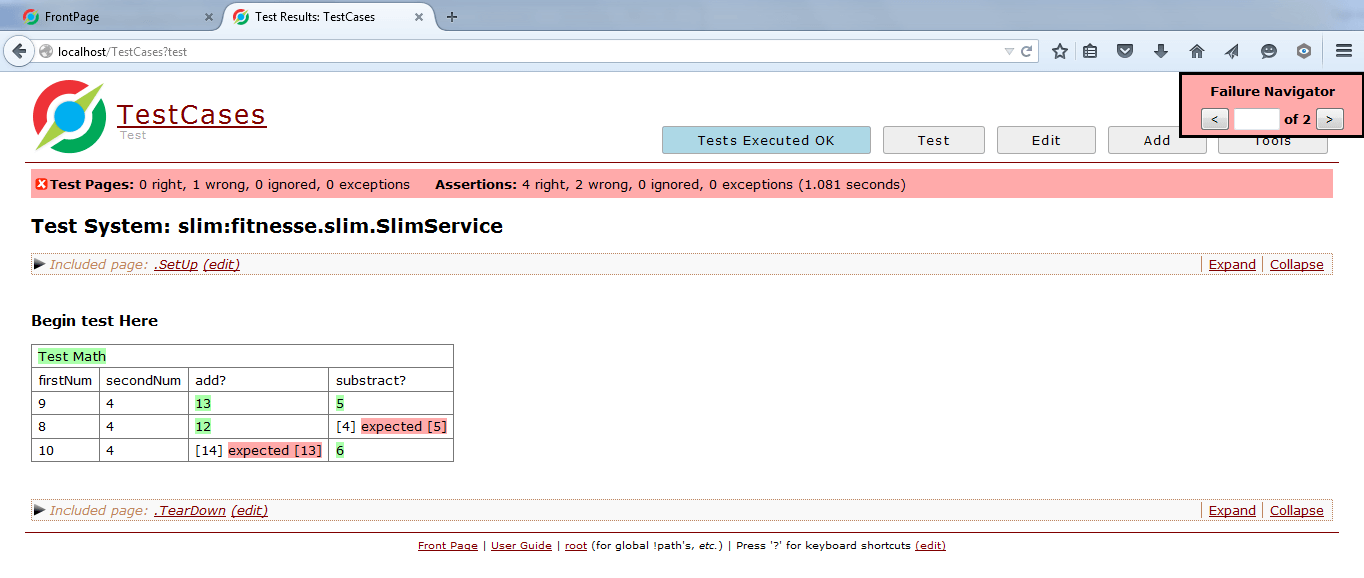
Let’s take a look on how the FitNesse page looks like when tests fails. You can see the red color around the tests those failed where the returned output does not match with the expected output.
That is all for today on First FitNesse Project! We will continue with the other articles in further session. Please feel free to post your questions.

⇓ Subscribe Us ⇓
If you are not regular reader of this website then highly recommends you to Sign up for our free email newsletter!! Sign up just providing your email address below:
Happy Testing!!!

1 thought on “Tutorial 3: Getting Started With First FitNesse Project”
Do you give private lessons we might have few students.