In this chapter, we are going to learn the Installation Of Selenium WebDriver using JAVA language and configure it with the Eclipse MARS.1 version. Check out the full Selenium Tutorial series here.
Below are the steps.
Step 1: Install Java on your computer:
Check if your system already has a Java runtime environment (JRE) or (Java Development Kit) JDK installed on your machine. If not, then it could be downloaded and installed from the below link.
http://www.oracle.com/technetwork/java/javase/downloads/index.html
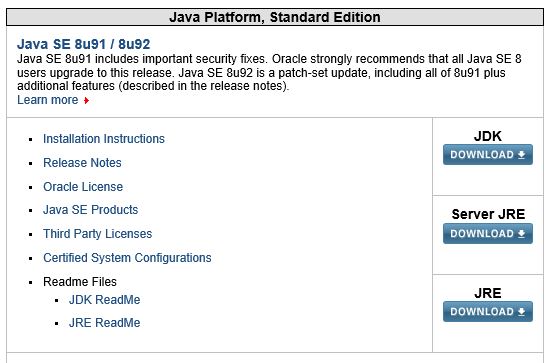
It is recommended to install JavaSE-1.8 and higher version to work with Eclipse IDE and Selenium Java Client Driver
Difference between JRE and JDK
JDK (Java SE Development Kit) includes complete JRE libraries as well as tools for developing, debugging, and monitoring Java applications. Therefore JDK is the superset of JRE.
Step 2: Install Eclipse IDE:
- Enter the URL (http://www.eclipse.org/downloads/packages/release/Mars/2) in the web browser and click on the download link to download eclipse IDE. We are using the Eclipse MARS version here.
- Unzip the eclipse package and provide the system with installed JRE 8/JavaSE-1.8 (Java Runtime Path) for javaw.exe file for the eclipse to work. The file eclipse.ini present in the eclipse directory has the javaw.exe path which helps in starting the eclipse IDE.
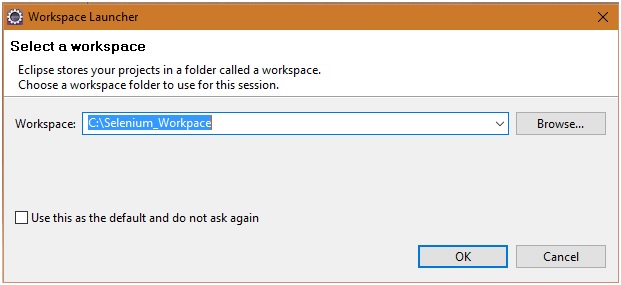
- When eclipse MARS.1 starts, it will ask you to choose a workspace. Select an appropriate location such as “C:\Selenium_Workpace” and click OK to complete this step as shown below.
- At this point Eclipse IDE is ready to use.
Step 3 – Download the Selenium Java Client Driver
Selenium Java Client Driver is the number of JARS file which could be downloaded from the below link.
http://docs.seleniumhq.org/download/
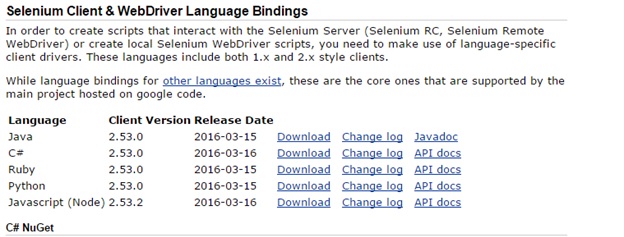
Click on the ‘Download’ link present against Java language for the latest version available as 2.53.0 as shown below. Keep all the downloaded jar files at one place which will be referred by the Selenium tests during runtime.
Step 4: Configure Eclipse IDE with WebDriver
In the Installation Of Selenium WebDriver tutorial, we have downloaded and installed JRE, Eclipse MARS.1, and Selenium WebDriver client jars. Now, we need to configure Eclipse IDE with downloaded WebDriver. The following are the steps to do so.
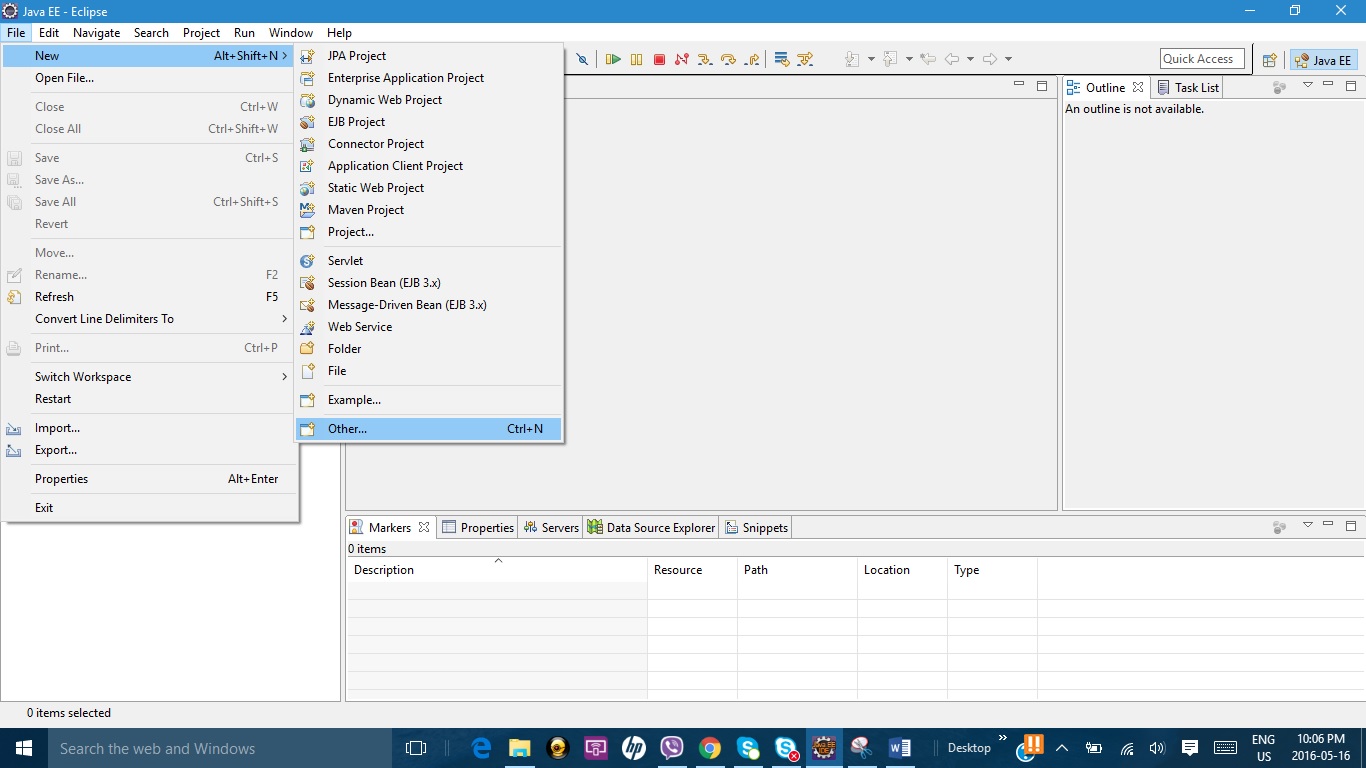
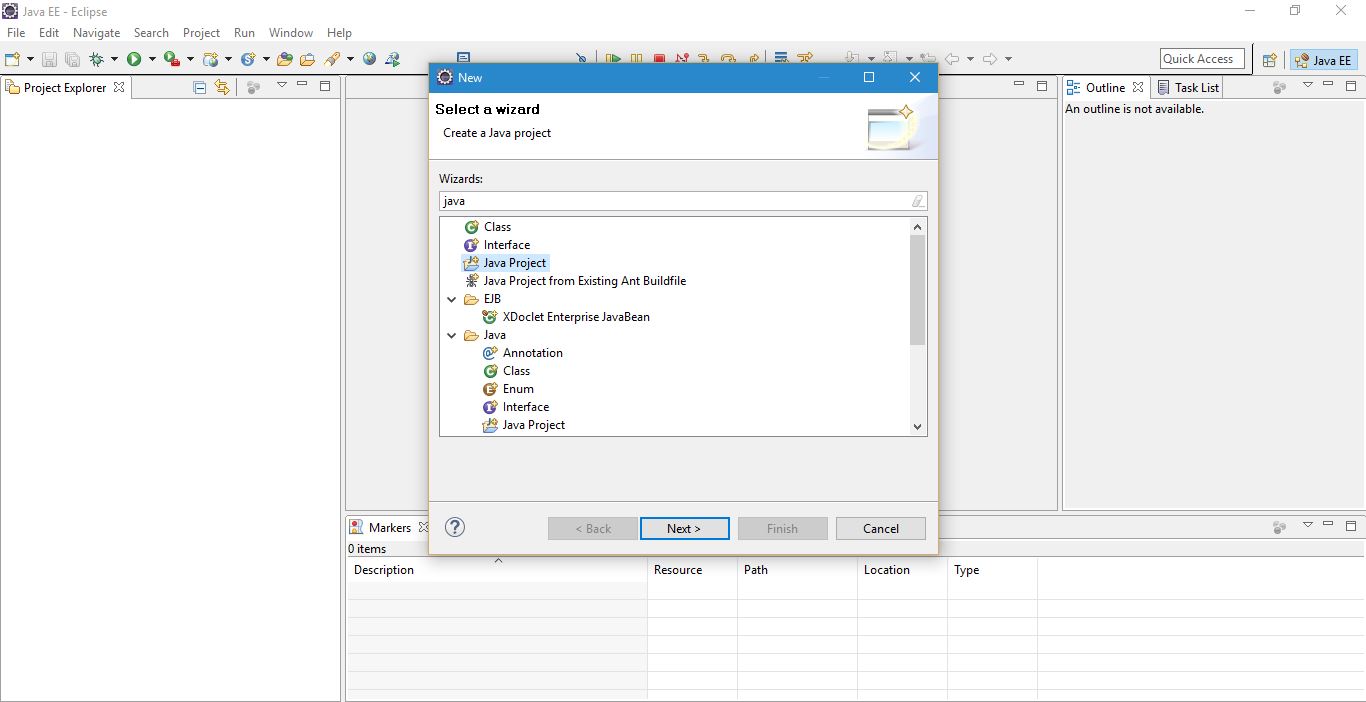
- Click on the ‘File’ link present at the top menu and navigate through links as New ->Others… as shown below.
- On completion of the above step, a dialogue box will be opened as shown below. Type Java to filter the available options present in the wizard and select ‘Java Project’ and then click on the Next button.
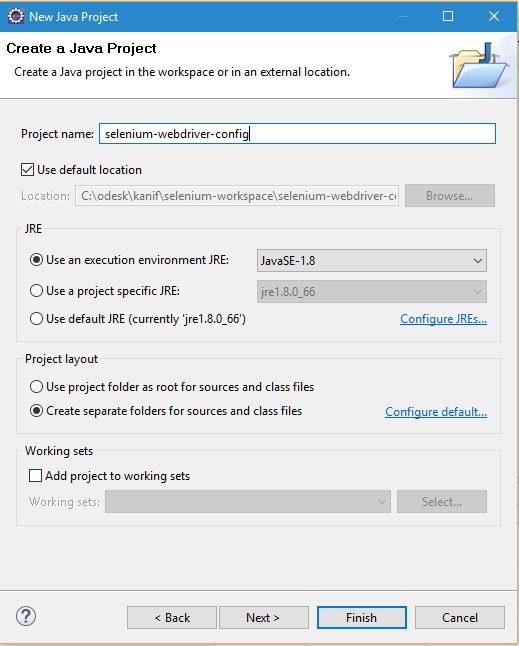
- On completion of the above step, the system will display another dialogue box asking you to provide the project name. Here, we are giving the project name as ‘selenium-webdriver-config’ as shown below. Choose the default workspace location and installed JRE/JavaSE-1.8 as the Java runtime environment and then click on the ‘Next’ button.
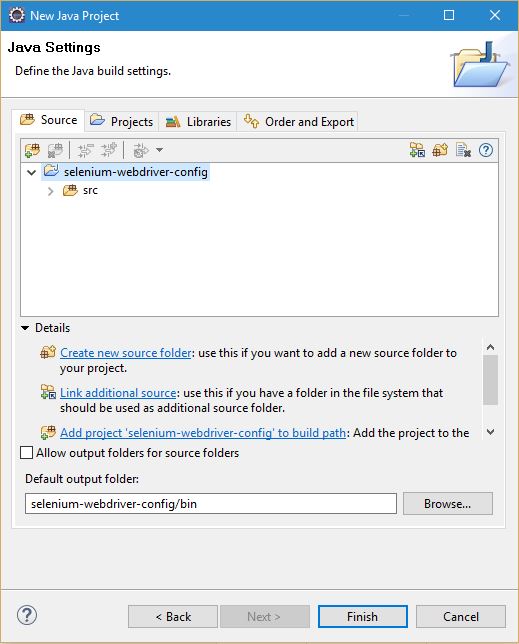
- On the completion of the above step, the system will open up Java Settings dialogue box as shown below. Keep the default settings and click on the Finish button.
- The series of above steps will create a Java project with the given name and the Java JRE/JavaSE-1.8 as the runtime environment. Next, we need to create a Java class in the Java project which will refer ‘Selenium webdriver’ for the actual test.
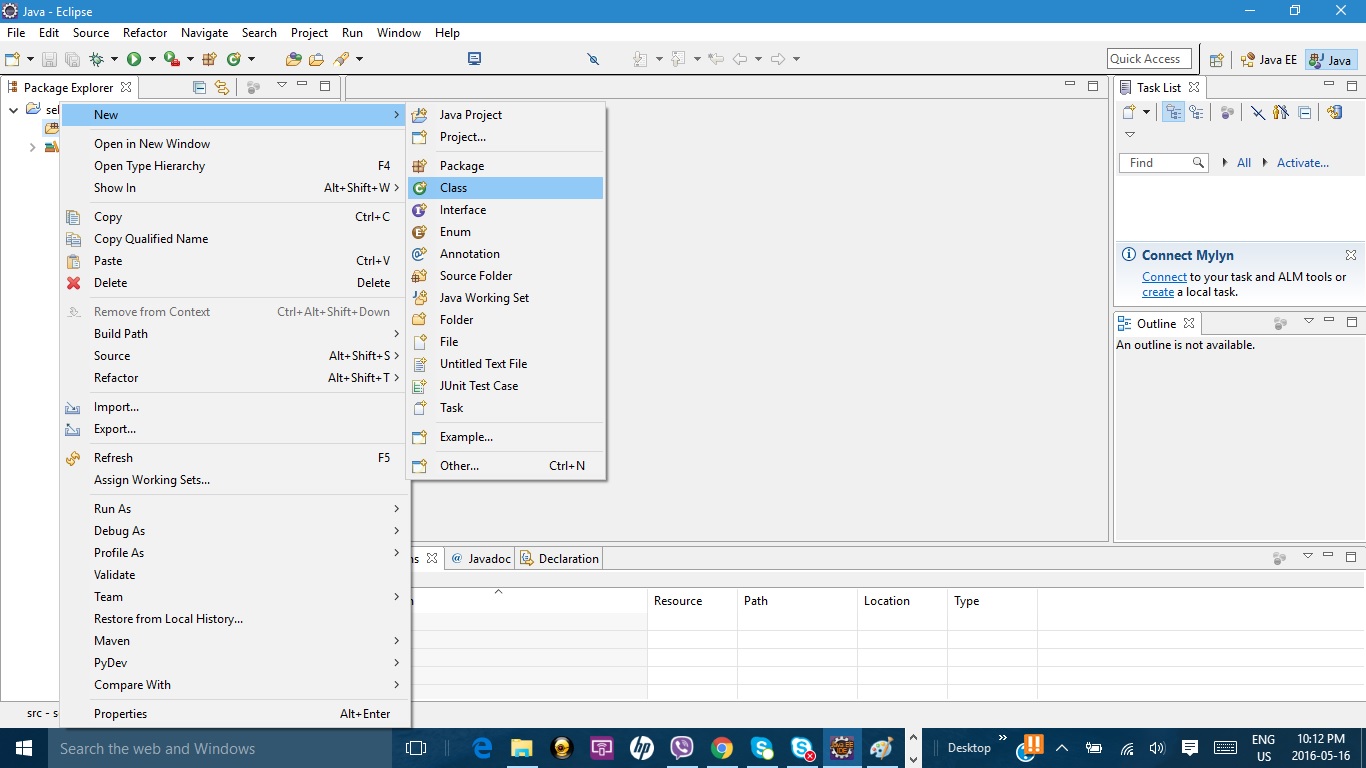
- Right-click on the Java project name that was created before and navigate through links as New >> Class as shown below.
- On the completion of the above step, it will open up the ‘New Java Class’ dialogue box. Enter the Java package and class name. Here, we have entered the package name as ‘seleniumpackage’ and Java class name as ‘SeleniumTestClass’.Rest keep the default settings and click on the ‘Finish’ button to commit the current developments.

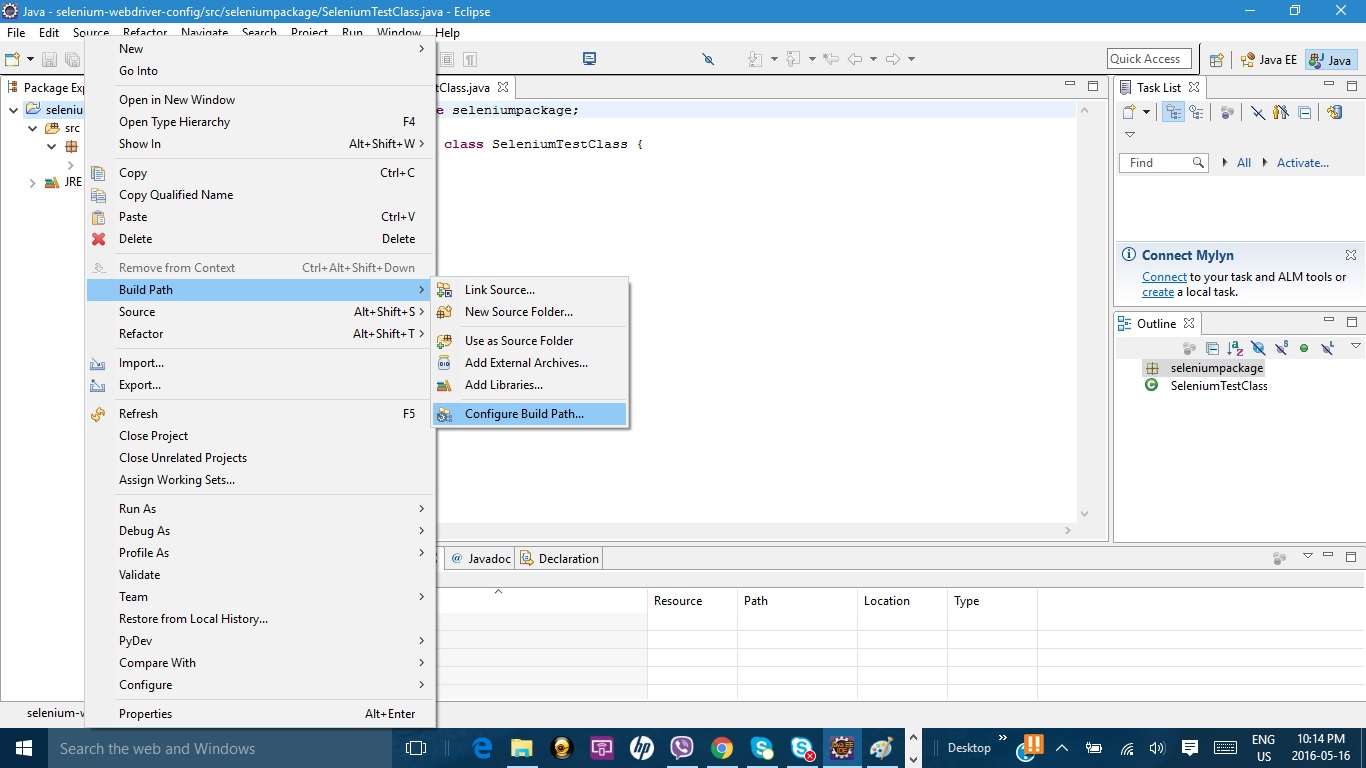
- Next, we need to configure the build path by adding the WebDriver client jars at the java classpath. To do so, right-click on the Java project and navigate through links Build Path a Configure Build Path… as shown below.
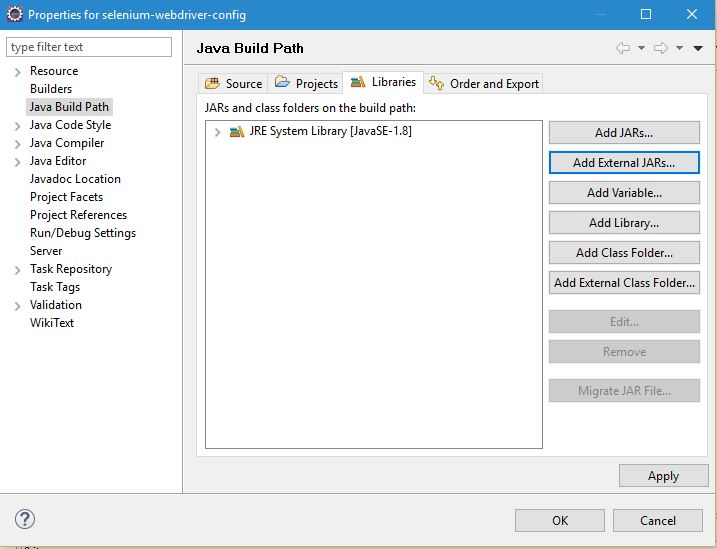
- On the completion of the above step, the system will open up a ‘Java Build Path’ dialogue box as shown below. Click on the ‘Add External JARs…’ button to add WebDriver client JARs.
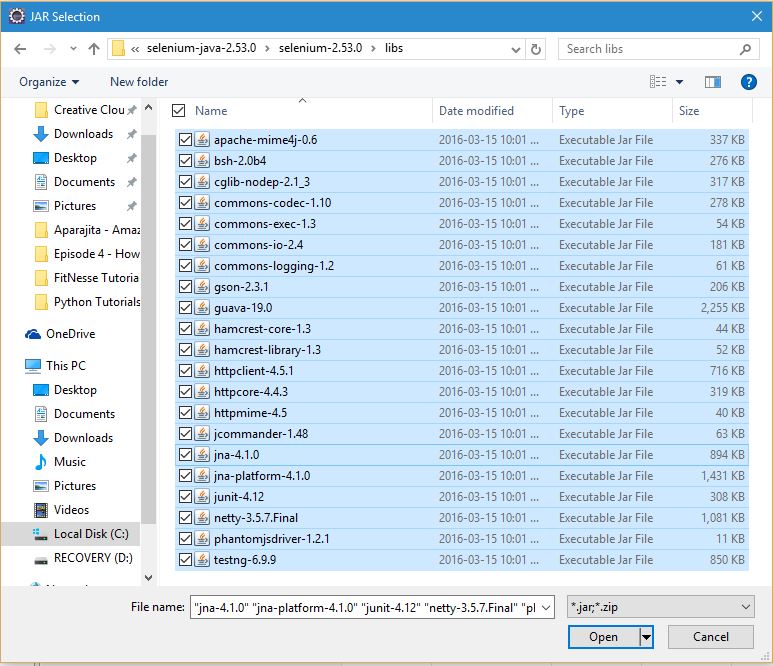
- On clicking that button, the system will ask for JAR Selection. Navigate into your machine to the directory where Selenium WebDriver JARs were downloaded before, select all of those JARs and click on the Open button as shown below.
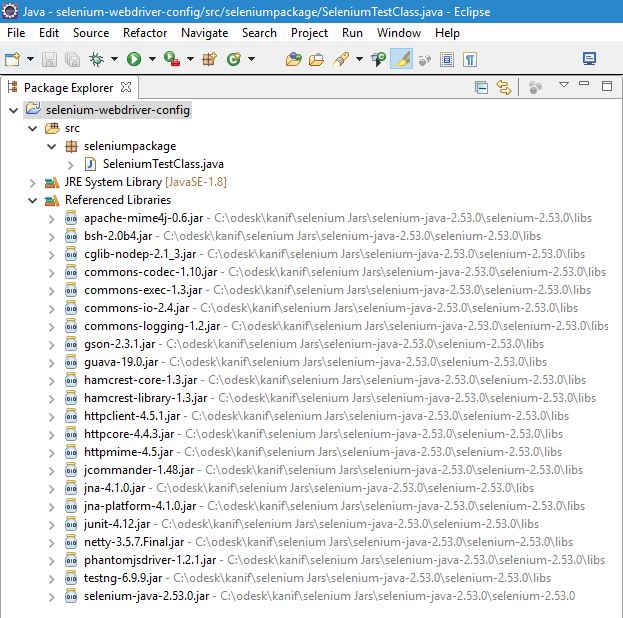
- At this point, the Build Path is set as it has all the required Selenium WebDriver JARs. When you expand the Referenced Libraries icon present in the Package Explorer, you can see all the Selenium WebDriver client JARs present at the classpath as shown below.
At this point, your system is ready to work with Selenium Webdriver which is configured with eclipse IDE running with JavaSE-1.8.
Different Commonly Used WebDrivers:
Using Selenium WebDriver, we can directly automate tests using web browsers such as HTMLUnit and Firefox as these browsers do not require any other separate component to be installed while executing tests. However, in order to execute tests using other web browsers we need to install additional components for WebDriver to work smoothly. Such a component is known as Driver Server. Each browser other than HTMLUnit and Firefox has a different driver server. Following is the list of driver servers.
| Browser | Driver Server | Description |
| HTMLUnit | Not Applicable | WebDriver can drive tests without any additional component with HTMLUnit browser. |
| Firefox | Not Applicable | WebDriver can drive tests without any additional component with the Firefox browser. |
| MS Internet Explorer (IE) | Internet Explorer Driver Server | IE driver server is available in 32 and 64-bit versions. This is to be noted that use the driver server version that corresponds to your IE architecture. |
| Google Chrome | ChromeDriver | ChromeDriver is a Driver Server that can support versions higher than Chrome v.21. |
| Opera | OperaDriver | OperaDriver is a Driver Server, not just a driver. |
| PhantomJS | GhostDriver | This browser is just like HTMLUnit, though it requires GhostDriver as the Driver Server. |
| Apple Safari | SafariDriver | SafariDriver is a Driver Server, not just a driver. |
All of the above Driver servers mentioned above can be downloaded from the below link.
http://docs.seleniumhq.org/download/
Conclusion:
We need JavaSE-1.8 or Java Runtime Environment, Eclipse MARS.1 IDE, and Selenium Webdriver that works default with HTMLUnit and Firefox web browsers. If we want to test the web applications on different web browsers other than these then we need to download and install an additional component known as Driver server as explained above. With all these software are components, our Selenium WebDriver test environment is ready to use.
⇓ Subscribe Us ⇓
If you are not regular reader of this website then highly recommends you to Sign up for our free email newsletter!! Sign up just providing your email address below:
Happy Testing!!!
