SoapUI is an open-source testing tool that is used to test web services built on both SOA (Service Oriented Architecture) and REST protocol (REpresentational State Transfer). As discussed in earlier tutorials, SoapUI is a robust testing application that can allows testers to conduct automated functional testing, regression testing, compliance testing, security testing, and load testing. It also have functionalities that cover inspection, development, invoking, simulation, and mocking of web services. SoapUI tool is available in two versions: SoapUI and SoapUI Pro. We will compare the features present in both SoapUI and SoapUI Pro version below in this tutorial before that let’s dig into little history of the SoapUI tool. It was first released in the year 2005 at Source Forge, licensed under the terms of the European Union Public License. This tool is completely built-in Java Platform using Java Swing as UI. It can be integrated using Eclipse IDE, NetBeans, etc.
In this tutorial, we are going to discuss on the installation and configuration of the SoapUI.
Downloading and Installation of Soap UI:
SoapUI installer can be downloaded from below link. Depending on the type of operating system, a suitable installer can be downloaded for Linux, Windows and Mac OS. In this tutorial, we are going to download and install 32-bit windows OS installer for SoapUI.
http://www.soapui.org/downloads/latest-release.html
Follows the below steps:
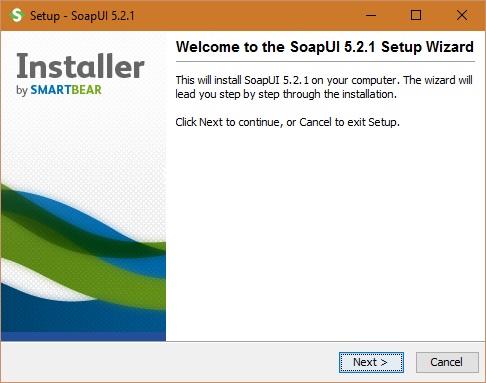
Step 1: Once file ‘SoapUI-x32-5.2.1.exe’ is downloaded, double click the file and below window will be shown:
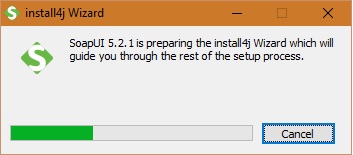
Step 2: Installer will extract the files and start preparing itself for installation. You will see the below window message and then Click next to proceed with installation.
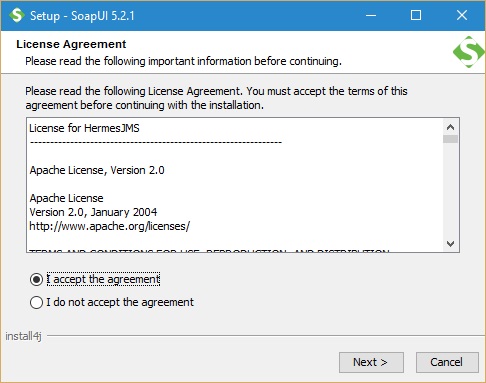
Step 3: After clicking next button, it will ask you to read and accept the agreement. Accept the agreement in order to proceed further for installation.

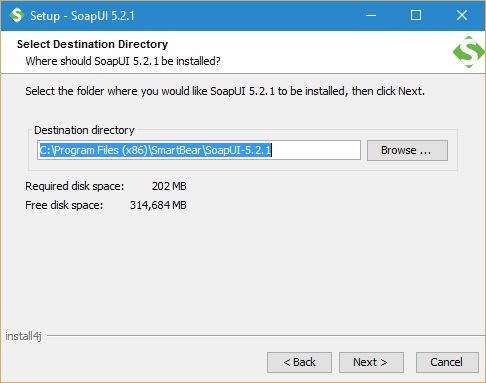
Step 4: After accepting the agreement, it will ask you to choose the installation path on your local machine. Please either choose a suitable installation path on your C drive as desired or choose the default path as indicated below for installation of SoapUI. After selection of the path, click on the next button to proceed further.
Step 5: Below screen will be visible to choose the components you want to install on your machine, click next to proceed further for installation.
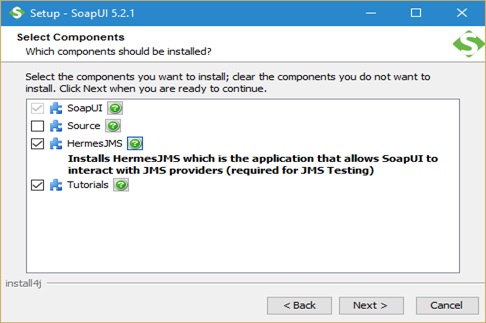
Step 6: In case, if you have checked Hermes JMS component, it will ask you to accept another agreement as shown below. Please accept this agreement and click next button to proceed further for installation all components selected before.
Step 7: Next it will ask for the installation path for SoapUI tutorials, choose either a suitable path or the default path indicated on your machine.

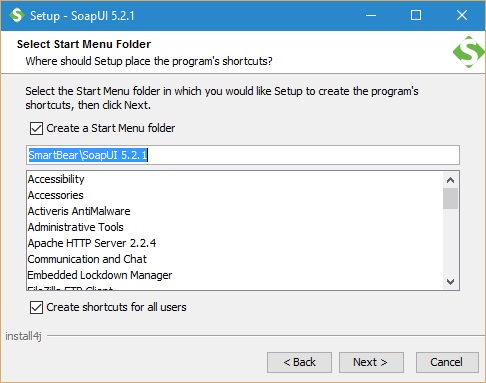
Step 8: Next it will ask you to select the start menu folder in which you like to create the program’s shortcuts. Choose the default path as indicated below and click on the next button.
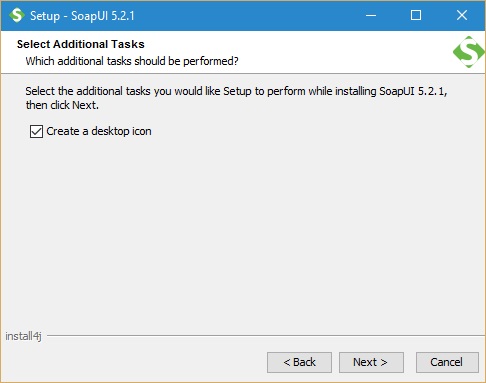
Step 9: Check the box below on the screen, if you want to create a desktop icon and click on the Next button.
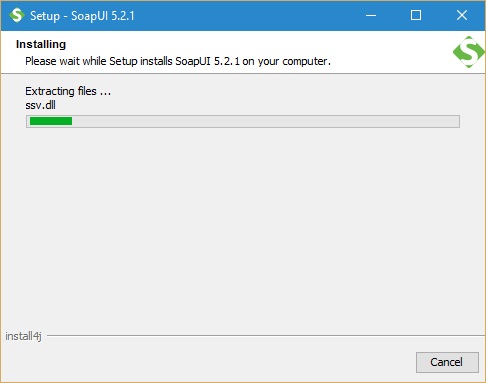
Step 10: Set up will start extracting all required file and starting installing SoapUI version 5.2.1 tool on your machine. This step will take a couple of minutes.
Step 11: After installation is complete below screen will be visible which confirms that Soap UI version 5.2.1 has been installed successfully on your local machine and you are ready to run your SoapUI tests.
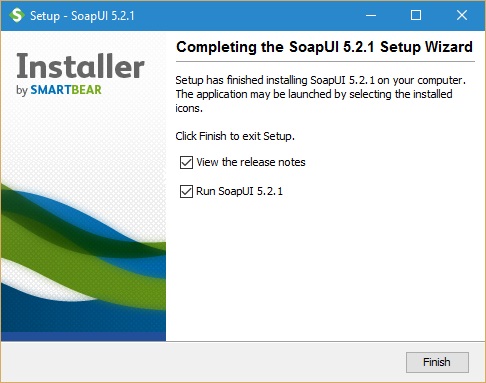
Step 12: Click the Finish button, SoapUI tool will get started and you can see the release notes has opened in the notepad.
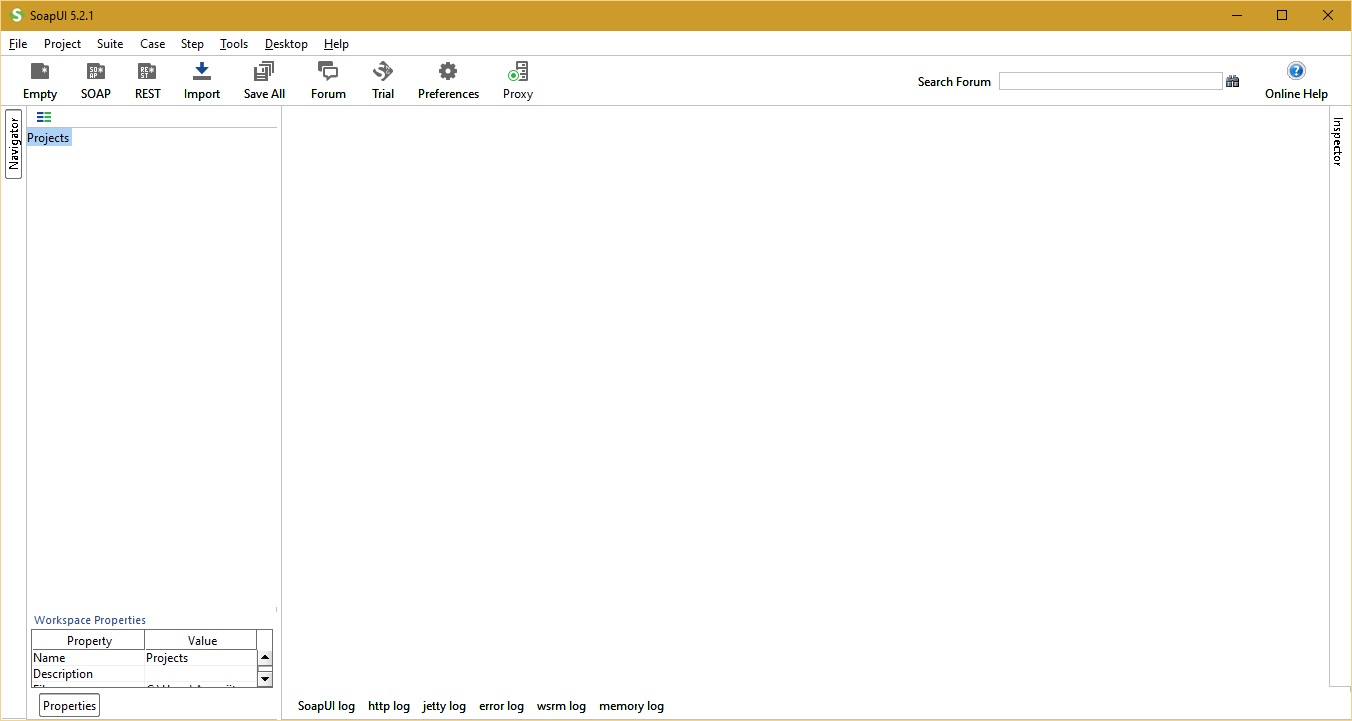
Step 13: SoapUI is ready to develop your SoapUI project.
Comparison between SoapUI and SoapUI Pro:
Let’s keep this in mind that SoapUI Pro is a superset of the SoapUI tool.
| Properties | SoapUI | SoapUI Pro |
| Supported Protocols | HTTP, HTTPS, JMS, JDBC, AMF, REST, SOAP/WSDL. | HTTP, HTTPS, JMS, JDBC, AMF, REST, SOAP/WSDL. |
| Testing Support | Functional, Load, Compliance, Security, and Regression testing. | Functional, Load, Compliance, Security, and Regression testing. |
| Mock Services | Yes. | Yes. |
| Code Generation | Supports drag and drop features for code generation. | Supports drag and drop features for code generation. |
| Integration with other automation tools | It can be integrated with Apache ANT, Maven, HUDSON, and Junit automation tools. | The Pro version also can be integrated with Apache ANT, Maven, HUDSON, and Junit automation tools. |
| Multiple Environment Support | It does not support the switch between multiple environments like SIT, UAT, TEST, etc. | It supports the switch between multiple environments. |
| Standalone Application | Yes. | Yes. |
| Groovy code templates | It does not provide templates for Groovy code. | It provides templates for Groovy code. |
| Floating Licenses | No. | Yes. |
| Support for basic functional testing features like Message Assertion, Running of Multiple Tests, Manual Test Step, etc. | Yes. | Yes. |
| Support for other functional testing features like WSDL coverage, request and response coverage, test refactoring, data source driven test, scripting libraries, unit reporting, etc. | Do not support it. | It supports all of these functional testing features. |
| Support for Security testing features | It supports all security testing features like the Pro version excepting Reporting. | It supports security testing features such as Boundary Scan, Invalid Type, SQL Injection, XPath Injection, XML Bomb, Fuzzing Scan, Cross-Site Scripting, Configurable Scans and Reporting. |
| Support for Load testing features | It supports all security testing features like the Pro version excepting Reporting. | It supports load testing features such as Rapid Load Tests from Functional Tests, Configurable Load Strategies, Load Test Assertions, Real-Time Statistics, Performance Monitoring, Statistics Exporting, Setup/Tear Down using Groovy Scripting, load UI Integration, and Reporting. |
| Test Case and Test Suite Coverage | No. | Yes. |
From the above comparison, it is clear that the SoapUI Pro version is recommended when the web service project testing demands below features.
- Reporting for Load testing and Security testing.
- The Pro version provides Groovy code templates which help in writing tests with ease.
- Better test coverage report to demonstrate the areas in application testing which lack proper testing through statistic report.
- Test debugging and breakpoint features are supported in the pro version only.
- Pro features enable switching between multiple environments like UAT, SIT, Prod, etc.to run tests.
- Since the pro version is paid, it has exclusive support apart from the online forums.
In the next series of this tutorial, we are going to learn about how to create Soap UI Project to test web service or web API.
If you enjoyed this, you might also enjoy these posts inspired by the STC team:
- Tutorial 1 – Introduction to SoapUI – Why SoapUI?
- Tutorial 2 – What is Web Service and How it is tested?
- Tutorial 3 – Web Service Sample Project and its Testing
- Tutorial 4 – Installation and configuration of SoapUI
- Tutorial 5 – Your First SoapUI Project
- Tutorial 6 – How to do Functional Testing in SoapUI?
- Tutorial 7 – Simple guide to create Load Testing using SoapUI
- Tutorial 8 – Mock Services Testing in SoapUI
- Tutorial 9 – How To Perform Security Testing In SoapUI?
- Tutorial 10 – REST Testing using SoapUI
- Tutorial 11 – REST Sample Project
- Tutorial 12 – Sample API Projects in SoapUI
- Tutorial 13 – Schema Inference
- Tutorial 14 – 10 Testing Tips for the SoapUI Beginners
Feel free to ask your queries on SoapUI Installation and configuration in the comments below.

⇓ Subscribe Us ⇓
If you are not regular reader of this website then highly recommends you to Sign up for our free email newsletter!! Sign up just providing your email address below:
Happy Testing!!!
