In previous article we have covered on Start Selenium WebDriver Test Script on your own – Selenium Tutorial. I have used “@Test” annotation in the script, one of our reader ask in comments about “what is use of annotaions & why we added @Test annotation”. So I have started writing this post to clear the concept of what is JUnit Annotations & what are different JUnit annotations with meaning of each. Also what is different testing framework used in Selenium WebDriver automation other than JUnit.
What is JUnit Annotations?
JUnit is a unit testing framework for the Java programming language. JUnit has been important in the development of test-driven development. To execute Selenium WebDriver testing using JUnit we have to add JUnit annotations in your test.
Different JUnit Annotations:
We are using following most commonly used five annotations in our Selenium WebDriver test scripts:
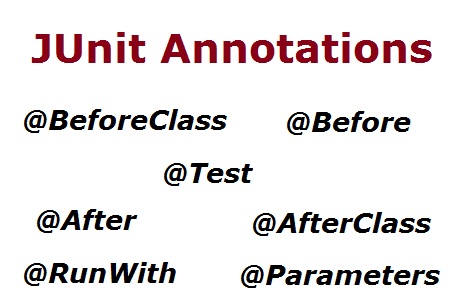
- @Test
- @Before
- @After
- @BeforeClass
- @AfterClass
Test methods must be annotated by the @Test annotation. If the situation requires it, it is also possible to define a method to execute before or after of the test methods with the @Before or @After and @BeforeClass or @AfterClass annotations.
Let’s elaborate on these JUnit annotations here:
@Test
The annotation @Test identifies that a method is a test method. When it is mentioned as @Test before a test method, it tells JUnit framework that the following is a Test Method.
@Before
The @Before annotation is used to identify the method which is executed before executing the Test Method. This method can be used to set up the test environment.
@After
The @After annotation is method which is executed after executing the Test Method. This method can be used to do teardown i.e. deleting temporary data or setting up default values or cleaning up test environment etc.
@BeforeClass
The @BeforeClass method is used only once before start all tests. Basically this is used to perform time intensive activities, like connect to a database.
@AfterClass
The @AfterClass method is used only once after finish executing all tests. Basically this is used to perform clean-up activities, like disconnect from a database.
In upcoming article the we will use above listed JUnit annotations and create the Selenium WebDriver automation tests.
Different Testing Frameworks:
TestNG is a one of the more popular testing Framework used as alternative to JUnit testing Framework. It supports multiple advantages, powerful and unique features in the TestNG framework. As JUnit is comes with Eclipse so we don’t want to install separately. For TestNG testing framework we have to install this explicitly in Eclipse.
Many people’s are using JUnit testing Framework as it is come with Eclipse by default. It is simple & easy to use that why we have started with JUnit testing framework to execute Selenium WebDriver tests. Once time comes we will see how to install TestNG testing framework & how to execute test using this powerful framework.
In next Selenium Tutorial article, we are using above explained JUnit annotations and will explain “How to run a Selenium WebDriver Test with different JUnit Annotations” in this post. If you like this article then make sure to share it with your friends & please leave your questions/tips/suggestions in the comment section below and I’ll try to answer as many as I can.
If you are not regular reader of this website then highly recommends you to sign up for our free email newsletter!! Sign up just providing your email address below:

2 thoughts on “Learn JUnit annotations used for your Selenium WebDriver automation”
these articles are good for beginners but try to provide some complex things in selenium like MAVEN<ANT frame work and how can a Android mobile tested using selenium etc….
Sir,
This is very helpful for us but i want to know how to run our scripts on different browsers with junit.