In this tutorial, we are going to discuss Selenium grid in detail. Selenium grid is a software that is associated with Selenium software that is capable of executing multiple tests in parallel across different web browsers, operating systems and hardware architectures. It is based on hub-node execution model where a hub is a single machine that runs the test, however, the execution of these tests can be done on the different machines known as nodes.
Selenium HUB and NODES Model:

The HUB
- It is a central point from where we load our tests.
- One grid always has one hub.
- Hub is just a single machine, for example, a PC with Windows 10 Operating System and Mozilla Firefox browser installed on it.
- Tests run on the Hub and the browser on the node machines executes the test.
The NODES
- Nodes can be defined as the Selenium instances where loaded tests by Hub are executed.
- Unlike Hub, nodes can be one or more than one.
- Nodes can be launched on the machines with different combinations of web browsers, operating systems and hardware architectures.
- It should be noted that the machines that are running the nodes are required to be the same platform as that of the Hub. Therefore, the above combination should be chosen wisely for testing and test environment setup.
Advantages of Selenium Grid
- Selenium Grid allows running multiple tests across different web browsers, operating systems, and machines. This ensures compatibility of the application under test across multiple combinations of web browsers, operating system, and hardware architecture.
- It speeds up the test suite completion time as it is capable of running multiple tests in parallel. For example, if we have 5 nodes and we need to execute a test suite of 50 tests then it is going to take 5 times lesser time than a single machine that runs this test suit without Selenium Grid.
Disadvantage of Selenium Grid
- Extra cost to project as it requires additional machines as Nodes.
Versions of Selenium Grids
Selenium Grid comes in two versions known as Grid 1 and Grid 2. Grid 2 version is the latest version which is gradually depreciating Grid version 1. Following is the comparison between Grid 1 and Grid 2.
| S No. | Selenium Grid Version 1 | Selenium Grid Version 2 |
| 1. | It has its own remote control. Do not confuse it with RC server, they are two different programs. | It is integrated with Selenium Server jar file. |
| 2. | We need to configure Apache Ant to use Grid version 1. | No configuration of Apache Ant is required for Grid version 2. |
| 3. | It supports only Selenium RC commands and scripts. | It supports both Selenium RC as well as WebDriver commands and scripts. |
| 4. | It can automate only one web browser per remote control. | It can automate up to 5 web browsers per remote control. |
| 5. | Depreciated version, its usage is rare these days. | It is an advanced version with many superior features over Grid version 1. |
Steps to install Selenium Grid 2
In this tutorial, we are going to discuss on Selenium Grid 2 only. Below are the steps to install Selenium Grid 2 from scratch.
Step 1: Open a browser and browse the following link.
http://docs.seleniumhq.org/download/
Step 2: It will open up the web page that has Selenium standalone server download link as shown below. Click on that link to download Selenium server.
Step 3: Download the jar file ‘selenium-server-standalone-2.53.0’ and place in the directory on C drive as given below.
C:\SeleniumServer
Step 4: Open a command prompt window and navigate to path ‘C:\SeleniumServer\’ where we downloaded the jar file and execute the below command as shown below.
java -jar selenium-server-standalone-2.30.0.jar -role hub
Let’s name this hub machines as the first machine whose IP address is ‘192.168.1.8’. This IP address can be procured after executing ‘ipconfig’ command on windows command prompt.
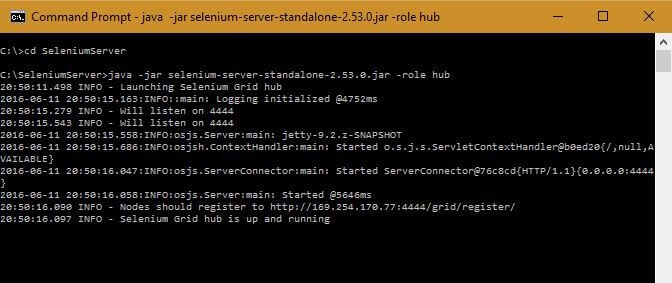
The command prompt window is displaying the message as ‘Selenium Grid hub is up and running’. By default, the selenium Grid interface uses port 4444 as a web interface.
Step 5: Open a browser session and browse below URL to verify if selenium grid hub is running or not. It will open up a console as shown below.
http://localhost:4444/grid/console or http://192.168.1.8:4444 (i.e. hub machine IP address).
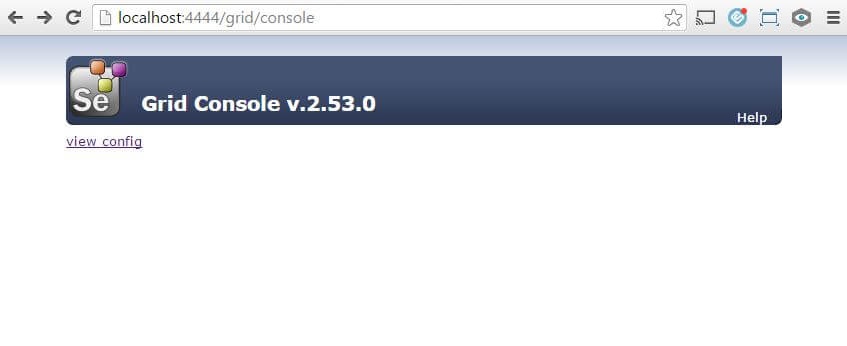
Above console indicates that Selenium Grid hub has been installed successfully that can be accessed by the nodes on other machines by following the below steps.
Step 6: On the Node machine, place the downloaded selenium jar at the same location and execute the following command on the windows command prompt as shown below. Let name this machine as the second machine.
C:\SeleniumServer>java -jar selenium-server-standalone-2.53.0.jar -role webdriver -hub http://192.168.1.8:4444/grid/register -port 5555
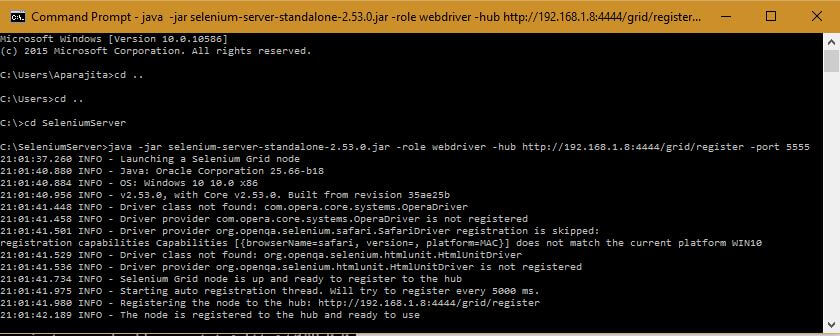
Above the window is the second machine that is running as a node at port 5555 and it has successfully displayed the message as ‘The node is registered to the hub and ready to use’.
After this registration of node to the hub, we can observe the similar message on the Hub side that ‘Registered a node http://169.254.170.77:5555’. This is shown below.
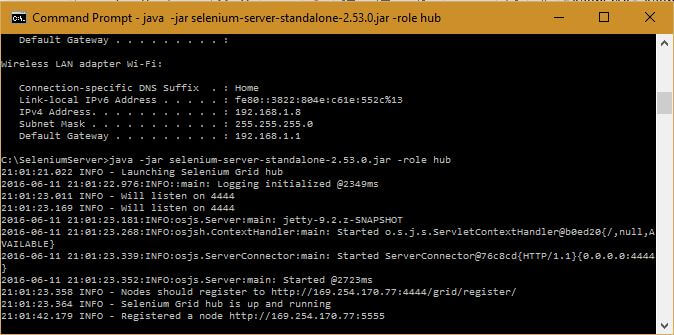
With the current Selenium grid setup, we have the first machine as a hub that runs the test and the second machine as a node that executes the test. Likewise, we can add up to 5 number of nodes to this grid by following the same procedure.
Step 7: We can refresh the Hub URL ‘http://localhost:4444/grid/console/#’ to verify if Node has been configured successfully to the Hub in the above steps. It will display the following information on the webpage about the name of the node, type of OS and the available web browsers as shown below. By default 5 you can work on Firefox, 5 Chrome, and 1 IE browser.

The Grid allows us to configure the number of a browser on a node and type of browser on a node and for this we need understand the concept of maxSession and maxInstance parameters in Grid.
Explanation of Supported Parameters in Grid:
| Parameter | Default Value | Comment |
| -port | 4444 | This is default port. You can change the port as per your need. |
| -host | – | Specify the name of hostname or IP address value where your HUB is running. |
| -timeout | 300 | This timeout value in seconds, if a node does not receive any request for more than specified period then hub automatically releases the node for another test. If you want to remove the timeout then you have to explicitly set the value of timeout as -timeout 0, so hub will never release the node.
Pls. note: This is not WebDriver timeout. |
| -maxSession | 5 | Number of browser runs parallel on a node. If set to “-maxSession 2” then you can have max 2 browsers running on a node. |
| -browser | 5 firefox, 5 chrome, and 1 internet | If browser option is not provided then it start with default browser value. You can specify a name of the browser as below:
“-browser browserName=firefox”
You can repeat this option with different browser Name’s. |
| maxInstance | The maximum number of browsers of this type. This value you need to provide along with browser option as below:
“-browser browserName=firefox,maxInstances=2” |
|
| -registerCycle | N | Allow to restart the hub without having to restart the nodes. How often in ms the node will try to register itself again. |
Running test on Hub-Node Model
Following is the automation code that could be created in Eclipse on the first machine. Once we run this test, it will be executed on the second machine (IP and port: http://169.254.170.77:5555/wd/hub/).
package seleniumpackage;

import java.net.MalformedURLException;
import java.net.URL;
import org.openqa.selenium.Capabilities;
import org.openqa.selenium.WebDriver;
import org.openqa.selenium.remote.DesiredCapabilities;
import org.openqa.selenium.remote.RemoteWebDriver;

public class HubNodeModel {
public static void main(String args []) {
String baseURL = "https://www.facebook.com/";
String nodeURL="http://169.254.170.77:5555/wd/hub/";
WebDriver driver;
Capabilities capabilities = DesiredCapabilities.firefox();
try {
driver = new RemoteWebDriver(new URL(nodeURL), capabilities);
driver.get(baseURL);
if ("Facebook - Log In or Sign Up".equals(driver.getTitle())){
System.out.println("Test Passed Successfully!");
}
else {
System.out.println("Test Not Passed!");
}
driver.quit();
}
catch (MalformedURLException exp){
exp.printStackTrace();
}
}
}
Explanation of the code
- In the above code, we are fetching the title of the Facebook login page which is “https://www.facebook.com/”. This is defined as our testing base URL.
- Here, we are going to execute this test on the remote machine (Node) that has node URL as ‘http://169.254.170.77:5555/wd/hub/)’. This is defined as node URL.
- As usual, we need to define a web driver instance. While working with Selenium Grid, we need to use RemoteWebDriver class which accepts two parameters. The first parameter is the URL of the node as described before and second is the web browser capabilities. Here, we are using DesiredCapabilities class to invoke Firefox web browser for testing.
- Once we get the instance of web driver. We are loading the Facebook website using the base URL and then fetching the title.
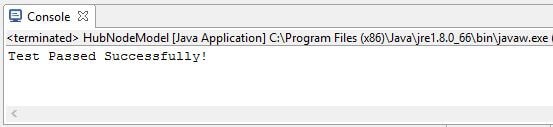
- Since the fetched title is equal to the expected title. Therefore, system display ‘Test Passed Successfully!’ in the console as shown below.
Output
Conclusion
In this chapter, we discussed Selenium Grid as Hub-Node model and steps to install it. Later, we will create a Hub and a Node machine to implement a test automation script in JAVA as a working example.

3 thoughts on “Selenium Tutorial: Introduction to Selenium Grid”
good tutorial, thanks for clearing difference between maxInstance and maxSession..
Thank you.
Thanks for the very helpful article!