This tutorial will talk about JUnit Framework and how to use in your selenium script. For comprehensive Selenium tutorials series check out here.
What is JUnit?
JUnit is a controlling entity in selenium. For example in selenium suppose we have 10 scripts running and based on the script run reports and logs get generated and along with that we have set of XL files from which data get to generate. If we want the first script to execute first then the third script next and the next script doesn’t want to execute and some script wants to execute on the end for this there should be a controlling entity in between which controls everything. Controlling entity will read the data from excel file and will call the corresponding script and pass on the data from excel file and also generate the reports and also logs, here controlling entity is JUnit.
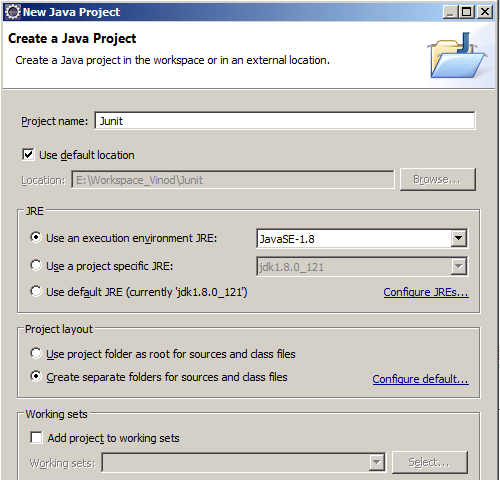
Step1: Create a New Project in Eclipse
Project Name: Junit and Click on Finish
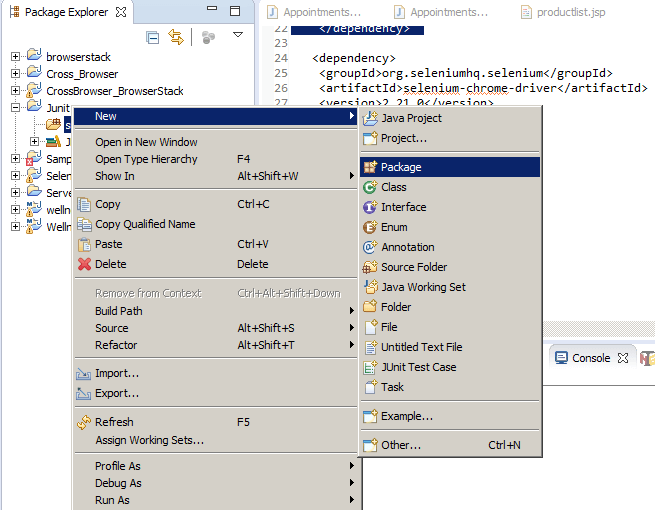
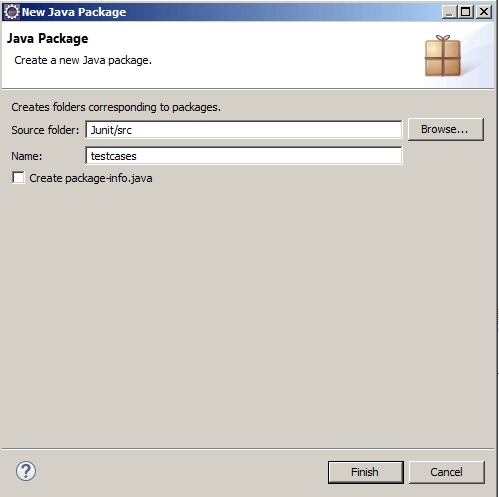
Step2: Right click on src folder and create a New Package
Package Name: testcases
Click on Finish
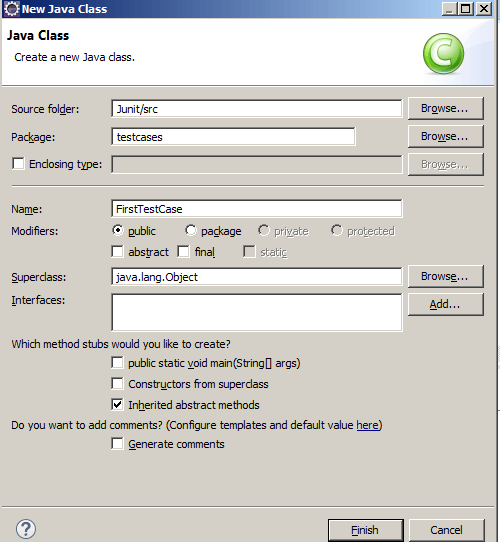
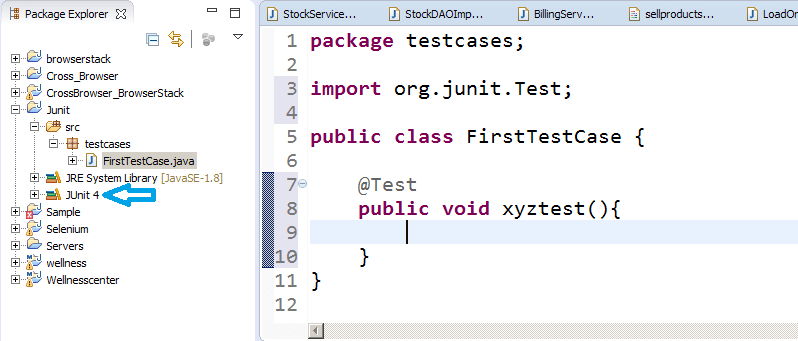
Step3: Create a Class under package
Class Name: FirstTestCase
Click on Finish
Note: If we want to make a JUnit class and inside it if we want to write a test case then we no need to write public static void main() , just we need to add the annotation @Test.
[You make like : How to use JUnit Annotations in Selenium WebDriver Automation Script]
First, we need to integrate JUnit into our project, just we need to add JUnit library to the project. Mouse hover to @Test and click on ‘Add JUnit library to the build path’ and Junit library is added to the build path.
package testcases;

import org.junit.Test;

public class FirstTestCase {

@Test
// Test Case
public void loginTest(){
//selenium code

System.out.println("logging in user");
}
@Test
// Test Case
public void registerTest(){
//selenium code

System.out.println("Registering a user");

}
@Test
// Test Case
public void dataBaseTest(){
//selenium code

System.out.println("Testing the database");

}

}
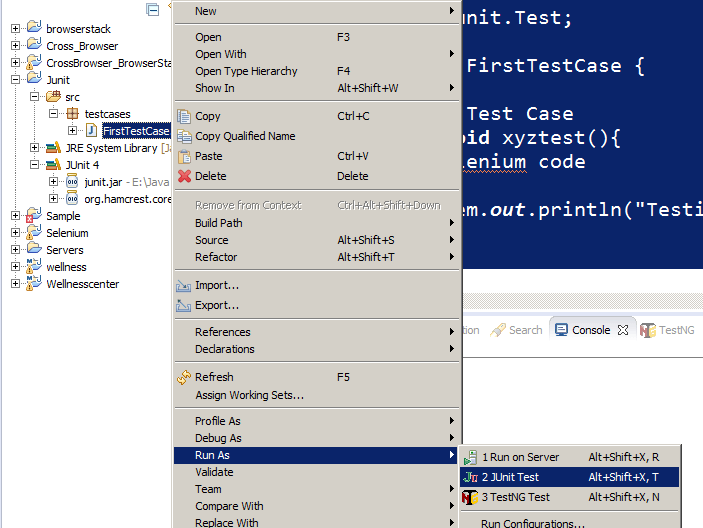
Run the above program
Right click on Class->Select Run As->Select the option JUnit Test
Output:
logging in user
Registering a user
Testing the database
Ignore the Test:
@Ignore annotation is used to Ignore the test
Example:
package testcases;

import org.junit.Ignore;

import org.junit.Test;

public class FirstTestCase {

@Test // Test Case

public void loginTest(){

//selenium code

System.out.println("logging in user");

}

@Ignore

@Test // Test Case

public void registerTest(){

//selenium code

System.out.println("Registering a  user");

}

@Test // Test Case

public void dataBaseTest(){

//selenium code

System.out.println("Testing the database");

}

}
Run the above program
Right click on Class->Select Run As->Select the option JUnit Test
Output:
logging in user
Testing the database
Running TestCases in a Batch
Example1:
package testcases;

import org.junit.Test;

public class SecondTestCase {

@Test

public void sendEmailTest() {

System.out.println("Testing Sending Email");

}
}
Example2:
package testcases;

import org.junit.Ignore;

import org.junit.Test;

public class FirstTestCase {

@Test
// Test Case

public void loginTest(){

//selenium code

System.out.println("logging in user");

}

@Ignore

@Test
// Test Case

public void registerTest(){

//selenium code

System.out.println("Registering a  user");

}

@Test
// Test Case

public void dataBaseTest(){

//selenium code

System.out.println("Testing the database");

}
Create Third Test case and run above Two tests in one class
package testcases;

import org.junit.runner.RunWith;

import org.junit.runners.Suite;

import org.junit.runners.Suite.SuiteClasses;

@RunWith(Suite.class)

@SuiteClasses({FirstTestCase.class,SecondTestCase.class})

public class MyTestSuiteRunner {

}
Right Click on MyTestSuiteRunner and Run As Junit Test
@Before and @After Annotations
package testcases;

import org.junit.Before;

import org.junit.After;

import org.junit.Test;

public class SecondTestCase {

//browser open

@Before

public void openBrowser() {

//open browser

System.out.println(“opening the browser”);

}

@Test

public void sendEmailTest() {

System.out.println("Testing Sending Email");

}

@Test

public void sendMessageTest() {

System.out.println("Testing Sending Message");

}

@After

public void closeBrowser() {

//close the browser

System.out.println(“closing the browser”);

}
}
Run the above program
Right Click on SecondTestCase and Run As JUnit Test
@BeforeClass and @AfterClass Annotation
@BeforeClass and @AfterClass methods will be executed before and after executing all the test cases.
package testcases;

import org.junit.Before;

import org.junit.After;

import org.junit.Test;

public class SecondTestCase {

//browser open

@BeforeClass // have to be static

public static void beginning() {

System.out.println(“******beginning****”);

}

@AfterClass // have to be static
public static void ending() {

System.out.println(“******ending*******”);

}

@Before
public void openBrowser() {

//open browser

System.out.println(“opening the browser”);

}

@Test
public void sendEmailTest() {

System.out.println("Testing Sending Email");

}

@Test
public void sendMessageTest() {

System.out.println("Testing Sending Message");

}

@After
public void closeBrowser() {

//close the browser

System.out.println(“closing the browser”);

}
}
Run the above program
Right Click on SecondTestCase and Run As JUnit Test
Output: Beginning and Ending gets printed before and after executing all the test cases
Assertions in JUnit
Create a New Class
Class Name: Assertions
package testcases;

import org.junit.Test;

public class Assertions {

@Test

public void testFriendlistFacebook() {

int actual_total_friends=100;

int expected_total_friends=101;

Assert.assertEquals( expected_total_friends, actual_total_friends);
}
}
Run the above program
Right Click on Assertions and Run As JUnit Test
Parameterize the Test
Create a New Class
Class Name: ParameterizedTestCase
package testcases;

import org.junit.Test;

import org.junit.runner.RunWith;

import org.junit.runners.Parameterized;

import org.junit.runners.Parameterized.Parameters;

@RunWith(Parameterized.class)

public class ParameterizedTestCase {

public String username;

public String password;

public int pin;

public ParameterizedTestCase(String username , String password, int pin) {

this.username = username;

this.password = password;

this.pin = pin;

}

@Parameters

public static Collection<Object[]>  getdata() {

//rows – number of times you want to repeat the test

//cols- number of parameters you want to pass

Object[] [] data = new Object[2] [3];

//1st row

data[0][0]=”testuser1”;

data[0][1]=”pass1”;

data[0][2]=”89989”;

//2nd row

data[1][0]=”testuser2”;

data[1][1]=”pass2”;

data[1][2]=”77666”;

return Arrays.asList(data);

}

@Test

public void testRegister() {

System.ou.println(“testing registration--” + username + “_ _ “ + password + “ _ _” + pin);

}

}
Run the above program
Right Click on ParameterizedTestCase and Run As JUnit Test.
If you are not a regular reader of this website then highly recommends you to Sign up for our free email newsletter!! Sign up just providing your email address below:
Happy Testing!!!
