In this chapter, we are going to learn about locators in Selenium IDE and their use in Selenium IDE scripts. Any dynamic website has various GUI elements such as Text Boxes, Radio Buttons, Text areas, Buttons, Check Boxes, etc. Selenium IDE has locators that are used to locate GUI elements on a website under test. It is important to identify the correct GUI element for the automation script to test in the right direction. Sometimes while testing with other tools, we often end up working with incorrect GUI elements or no element at all. But in Selenium IDE with the use of locators, we can precisely locate the correct element for the test.
Selenium provides the following different types of Locators:
- ID
- Name
- Link Text
- CSS Selector
- Tag and ID
- Tag and class
- Tag and attribute
- Tag, class, and attribute
- Inner text
- DOM (Document Object Model)
- getElementById
- getElementsByName
- dom: name
- dom: index
- XPath
Which type of locator should be used for web testing depends on the type of web application under test. Let’s understand each of the Locators in Selenium.
1. Locating By ID:
It is one of the most common ways of locating GUI elements as ID’s for such elements are supposed to be unique on a web page.
As shown below, the target format: id=id of the element. Here, we will be using LinkedIn as our test application. The following are the steps.
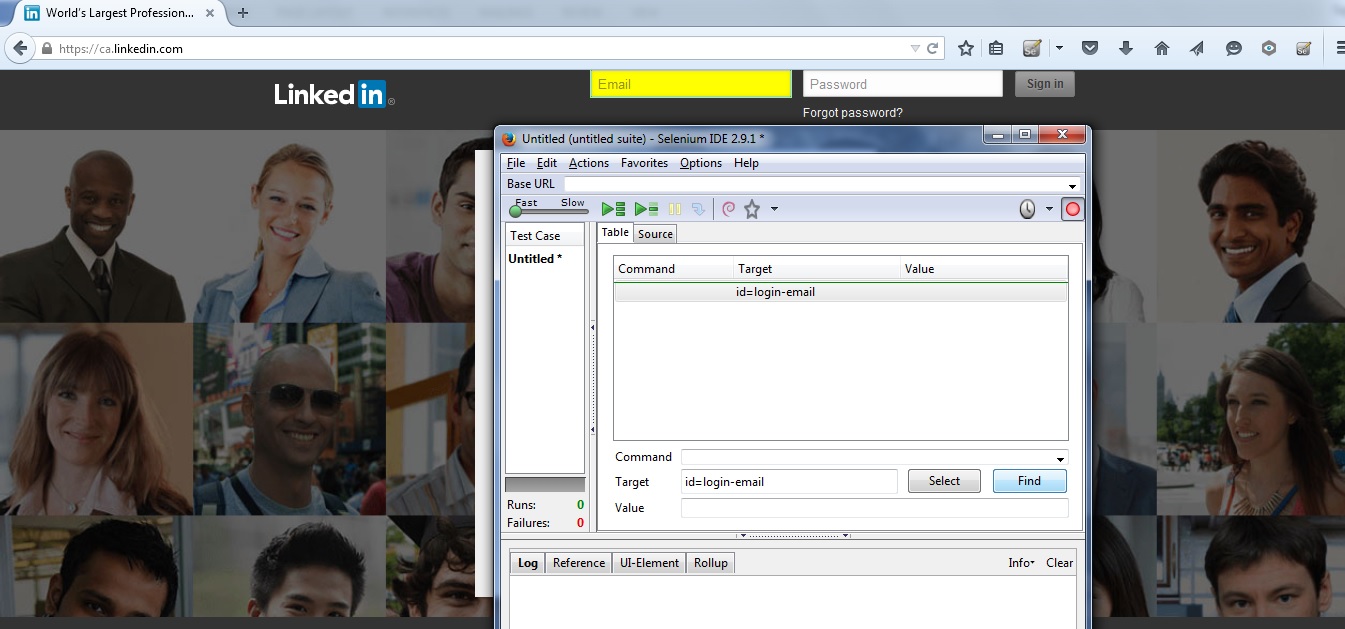
Step 1: Navigate to the linkhttps://ca.linkedin.com/. Inspect the element “Email” text box using the Firefox browser and take note of its ID. In this case, the ID is “login-email”. Both are highlighted below in yellow color.

Step 2: Next, launch your Selenium IDE in the browser and enter “id=login-email” in the Target box as shown below. After this, click on the Find button and notice that the “Email” text box becomes highlighted with a yellow color that will be bordered with the green color that means, Selenium IDE has located the required text box element correctly as shown below.
2. Locating by Name:
Locating by Names another way of locating GUI elements as NAME’s for such elements are supposed to be different from other elements on the same web page.
As shown below, the target format: name=name of the element. Here again, we will be using LinkedIn as our test application. Following are the steps.
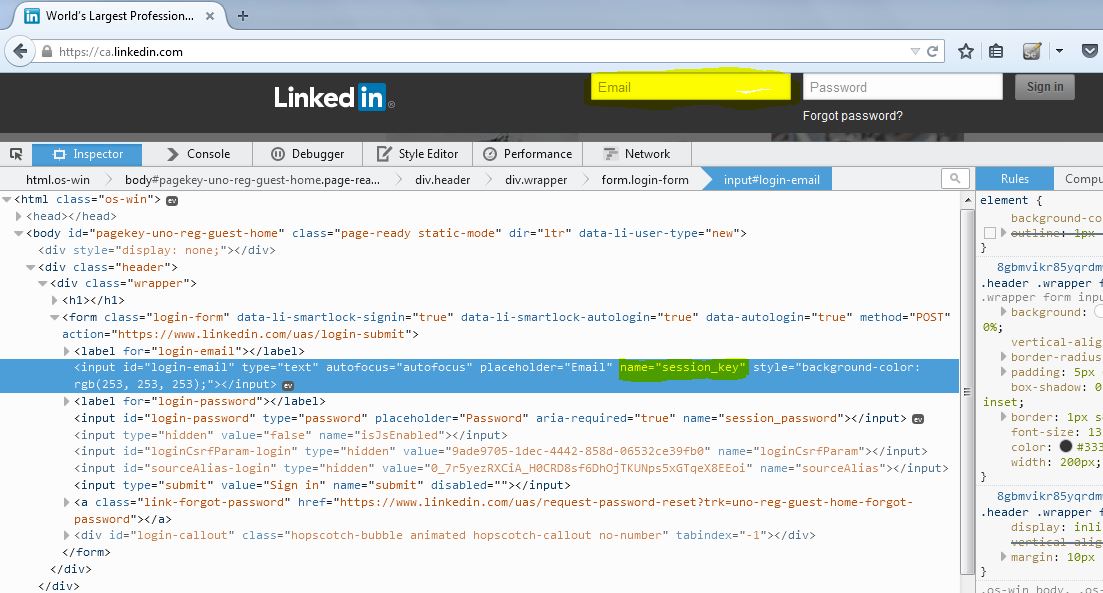
Step 1: Navigate to the link https://ca.linkedin.com/. Inspect the element “Email” text box using Firefox browser and take the note of its NAME. In this case, the NAME is “session_key”. Both are highlighted below in yellow color.
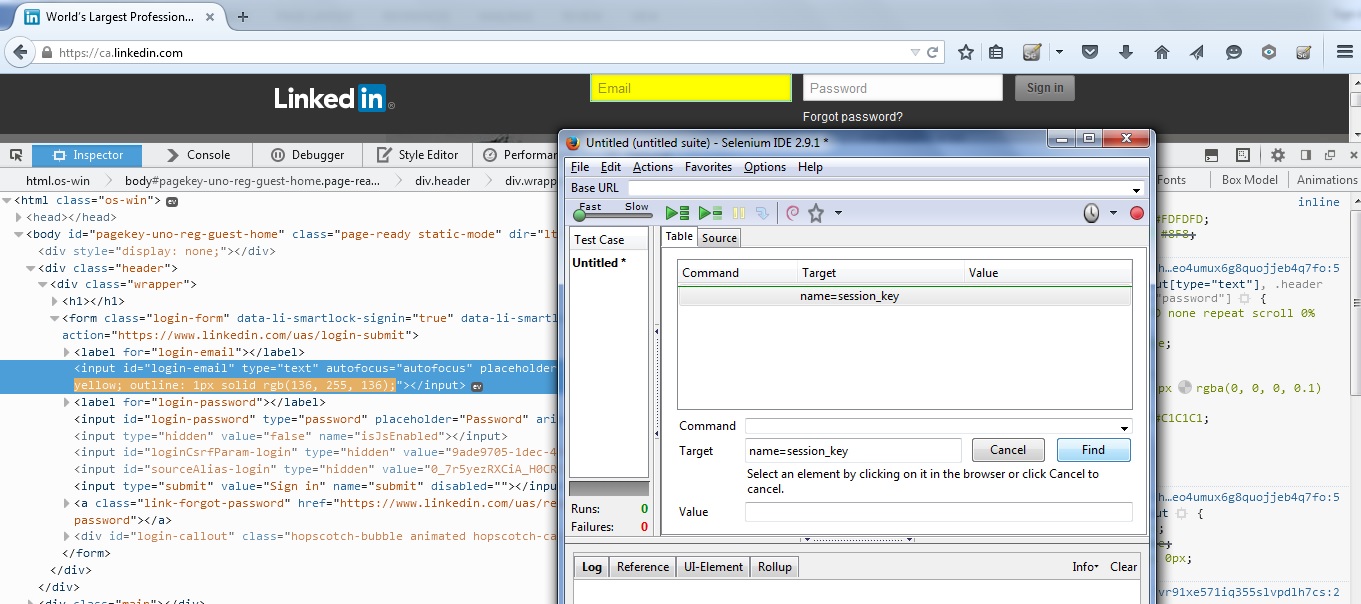
Step 2: Next, launch your Selenium IDE in browser and enter “name=session_key” in the Target box as shown below. After this, click on the find button and notice that the “Email” text box becomes highlighted with yellow color that will be bordered with green color that means, Selenium IDE has located the required text box element correctly. This is shown below.
3. Locating by Link Text:
Locators in Selenium to locate by Link Text are the way of locating only hyperlink texts as GUI element. As shown below, the target format: link=link_textof the element. Here, we will be using Selenium Website(http://www.seleniumhq.org/) as our test application. The following are the steps.
In this example, we will be accessing the “Download” link found on the Selenium Website. Following are the steps.
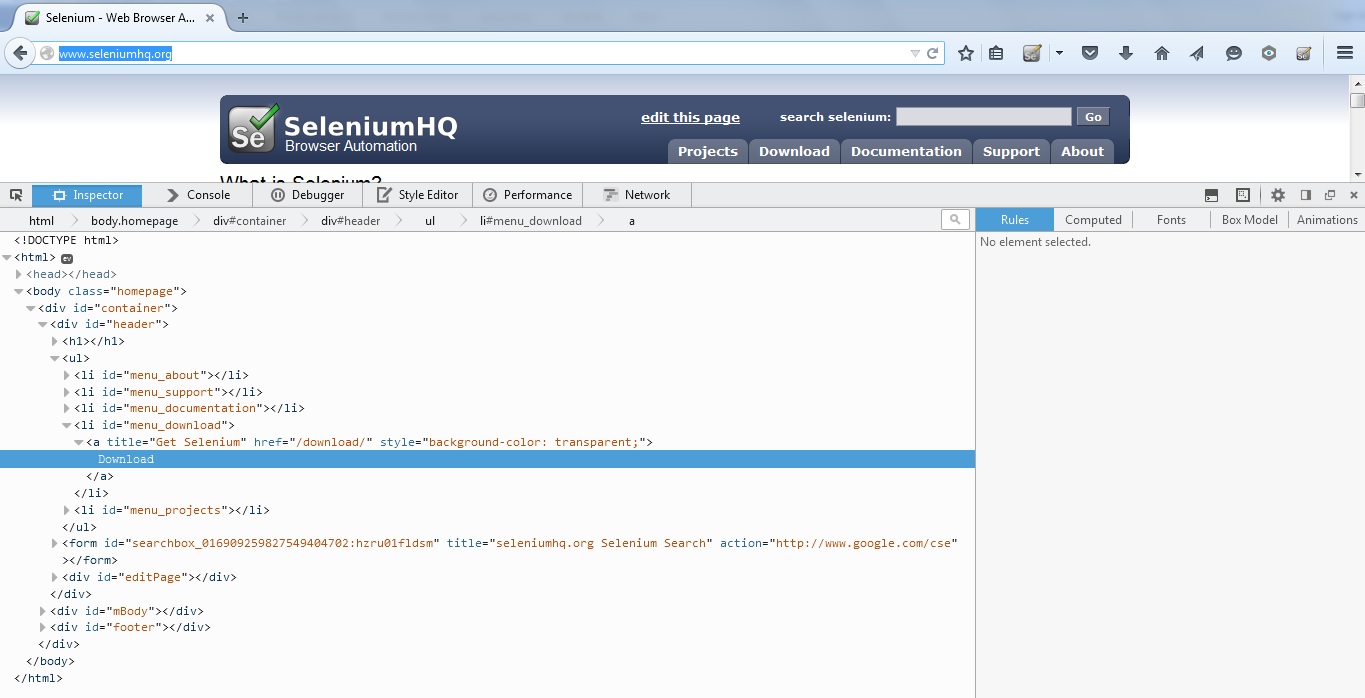
Step 1: Enter the URL as (http://www.seleniumhq.org/) on the Firefox browser. It will take you to the Selenium homepage.
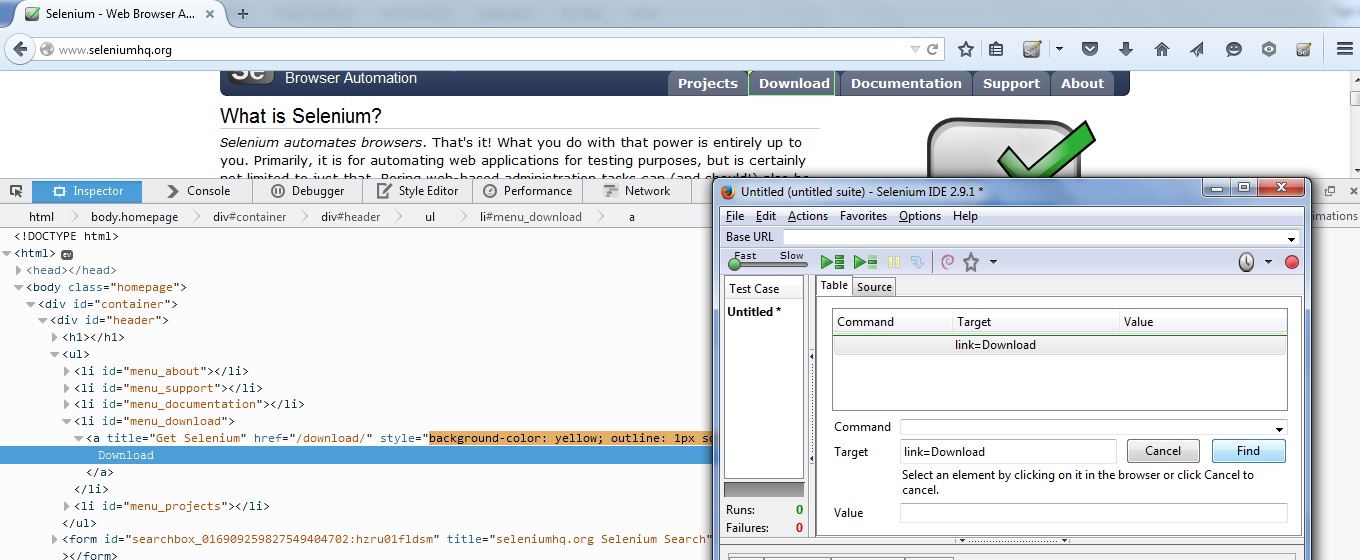
Step 2: Inspect the GUI element for the link “Download” on the current web page. This link text is found between the tags<a></a> as shown below.
Step 3: Next, launch your Selenium IDE in the browser and enter “link=Download” in the Target box as shown below. After this, click on the Find button and notice that the “Download” link becomes highlighted with a yellow color that will be bordered with the green color that means, Selenium IDE has located the required link element correctly. This is shown below.
4. Locating by CSS Selector:
In this approach of identifying GUI elements, we use inner texts. Inner texts can be defined as the actual string patterns that the HTML label shows on the page. Below is the CSS selector Locators in Selenium syntax.
| SYNTAX | DESCRIPTION |
| css=tag: contains(“inner text”) | Here tag is the HTML tag of the element this is being accessed and the inner text is the inner text of the element. |
In the below example, we will be accessing the “Email or Phone Number” text box found on the Facebook Website. Following are the steps.
Step 1: Enter the URL as (https://www.facebook.com/login/) on the Firefox browser. It will take you to the Facebook login page.
Step 2: Inspect the GUI element for the text box on the current web page.
Step 3: Next, launch your Selenium IDE in browser and enter “css=input.inputtext[tabindex=”1″]” in the Target box as shown below. After this, click on the Find button and notice that the “Email or Phone Number” text box becomes highlighted with a yellow color that will be bordered with the green color that means, Selenium IDE has located the required text box element correctly. This is shown below.

5. Locating by DOM (Document Object Model):
In DOM (Document Object Model), we identify each GUI element in the form of the DOM Model. In the model, we can identify an element with its unique id using the method “getElementById”. This method can access only one element at a time. Another method is known as “getElementsByName” which collects an array of elements that have the name which we have specified on the web page. Using this method we can access the individual elements using an index which starts at 0 indexes.
| SYNTAX | DESCRIPTION |
| document.getElementById (“id”) | Here, id is the id of the GUI element that is defined by its ‘id’ attribute. |
| document.getElementsByNames (“name”)[index] | Here, the name is the name of the GUI element that is defined by its ‘name’ attribute. And, the index is an integer that indicates which element within getElementsByNames array will be used. |
Using the method getElementsByName, we are going to access the element “Email” text box of the LinkedIn website as we did earlier. The following are the steps.
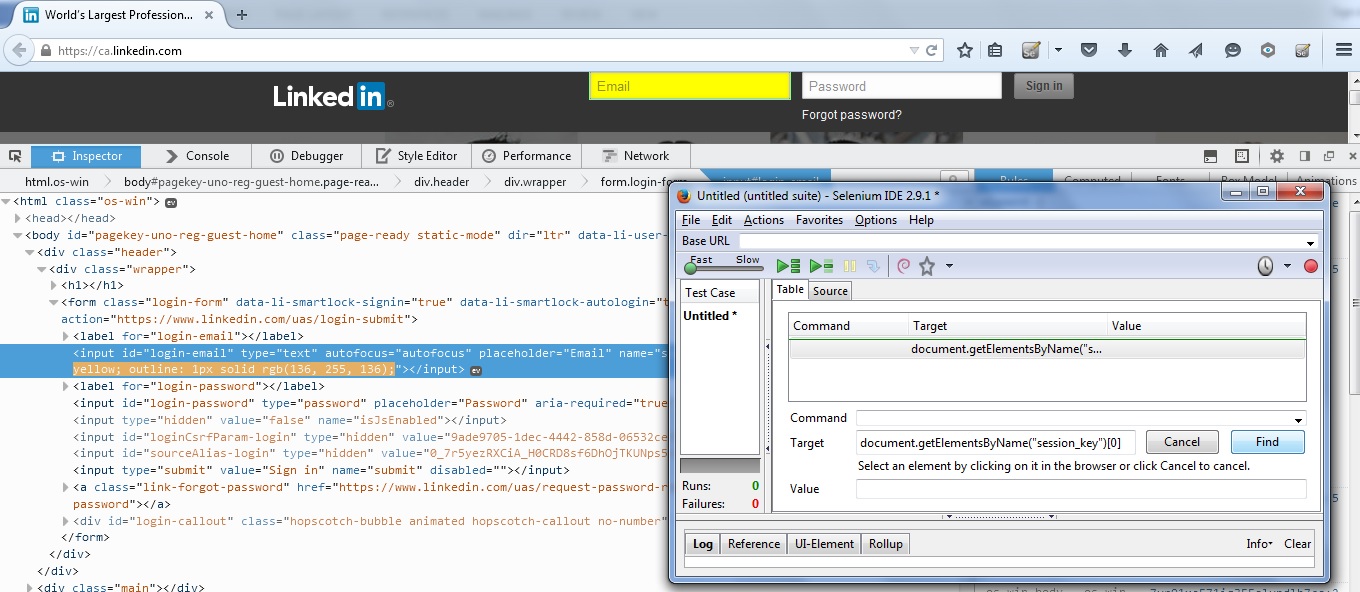
Step 1: Navigate to the link https://ca.linkedin.com/. Inspect the element “Email” text box using the Firefox browser and take note of its NAME. In this case, the NAME is “session_key“. Both are highlighted below in yellow color.
Step 2: Next, launch your Selenium IDE in the browser and enter “document.getElementsByName(“session_key”)[0]” in the Target box as shown below. After this, click on the Find button and notice that the “Email” text box becomes highlighted with a yellow color that will be bordered with the green color that means, Selenium IDE has located the required text box element correctly. This is shown below.
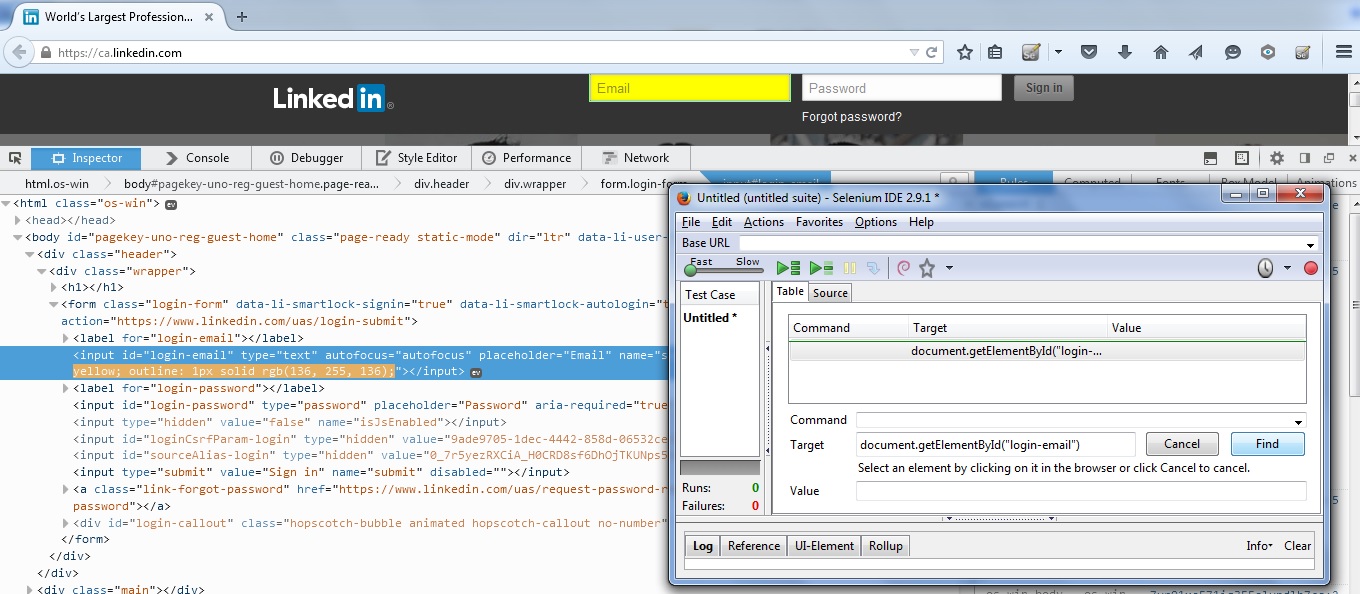
Step 3: Launch your Selenium IDE in the browser and enter “document.getElementById (“login-email”)” in the Target box as shown below. After this, click on the Find button and notice that the “Email” text box becomes highlighted with a yellow color that will be bordered with the green color that means, Selenium IDE has located the required text box element correctly. This is shown below.
Locating by DOM – dom: name & dom: id:
Below are the syntax’s and their description.
| SYNTAX | DESCRIPTION |
| document.forms[“index”].elements[“id”]
| Here, id is the id of the GUI element that is defined by its ‘id’ attribute. |
| document.forms[“index”].elements[“name”]
| Here, the name is the name of the GUI element that is defined by its ‘name’ attribute. And, the index is an integer that indicates which forming the array will be used. |
Using the above methods, we are going to access the element “Email” text box of the LinkedIn website as we did earlier. The following are the steps.
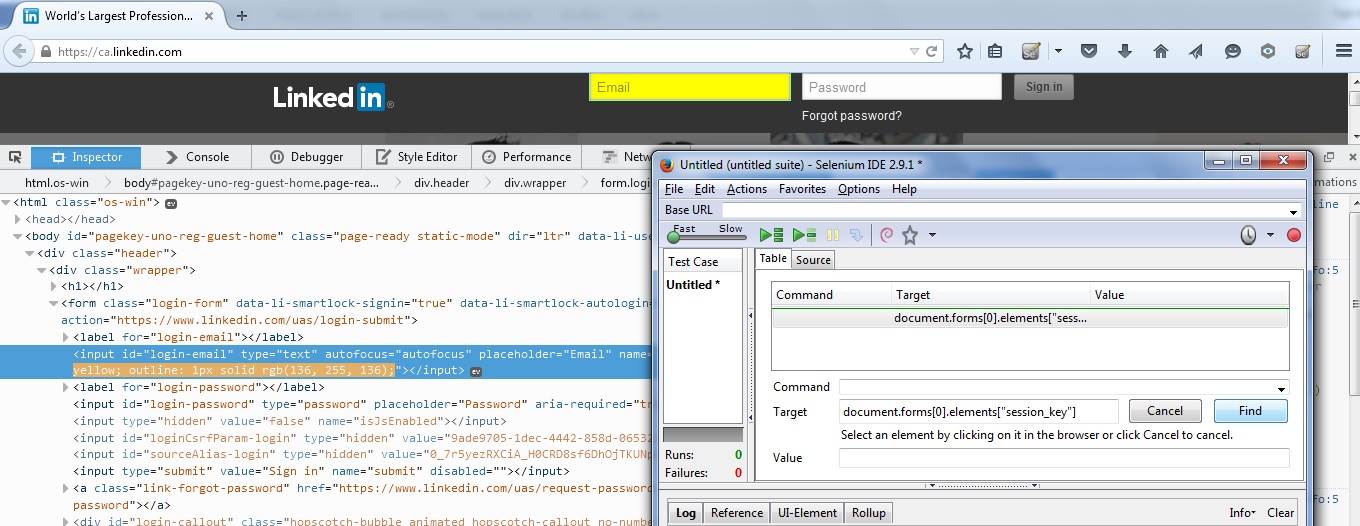
Step 1: Navigate to the linkhttps://ca.linkedin.com/. Inspect the element “Email” text box using the Firefox browser and take note of its NAME. In this case, the NAME is “session_key“. Both are highlighted below in yellow color.
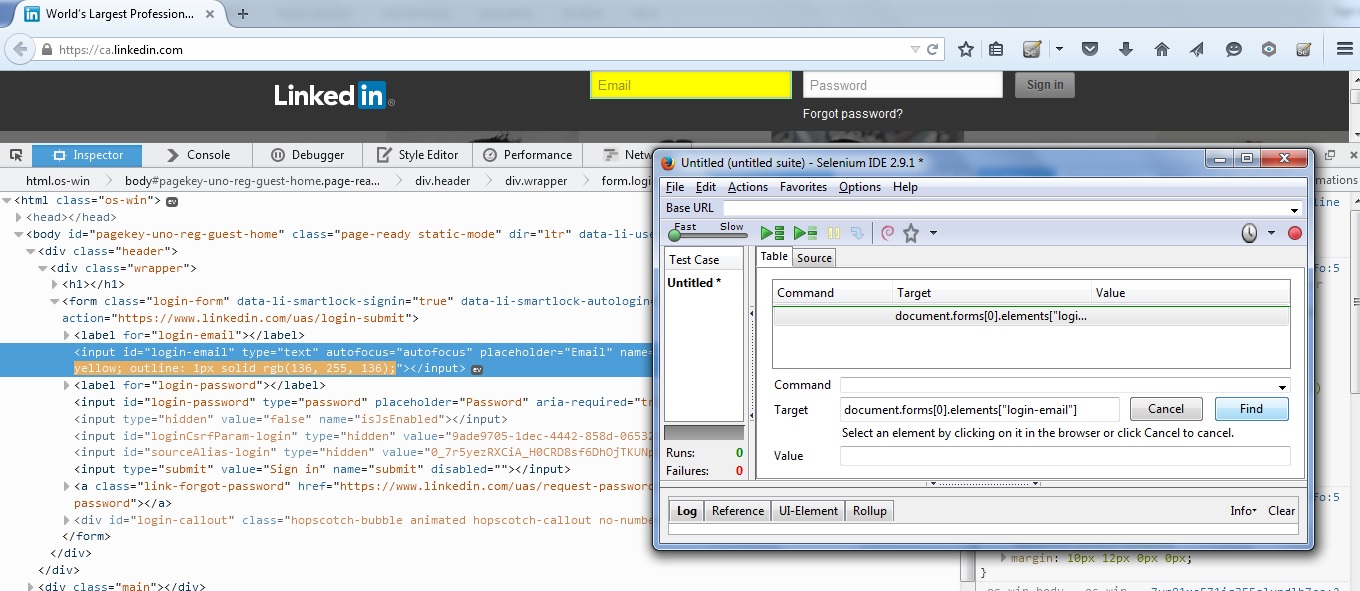
Step 2: Launch your Selenium IDE in browser and enter “document.forms[0].elements[“session_key”]“)” in the Target box as shown below. After this, click on the Find button and notice that the “Email” text box becomes highlighted with a yellow color that will be bordered with the green color that means, Selenium IDE has located the required text box element correctly. This is shown below.
Step 3: Launch your Selenium IDE in browser and enter “document.forms[0].elements[“login-email”]”)” in the Target box as shown below. After this, click on the find button and notice that the “Email” text box becomes highlighted with a yellow color that will be bordered with the green color that means, Selenium IDE has located the required text box element correctly. This is shown below.
6. Locating by XPath:
We search nodes in XML (Extensible Markup Language) with the use of XPath as a language. Thinking that HTML is an implementation of XML, we can use XPath in locating HTML elements. It has an advantage that it can access almost any GUI element on a web page, even those elements which are without class, name, id, or other attributes. On the other hand, it has a disadvantage that it is not a straightforward approach of locating elements as it involves too many different complicated rules that are required to be taken into consideration.
In the example below, we will be accessing the “Selenium” image present on the right-hand side of the selenium website using XPath. The following are the steps.
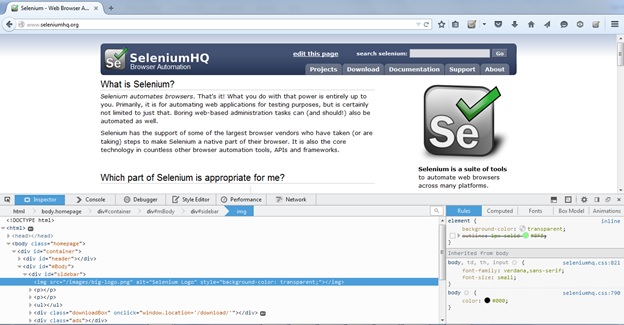
Step 1: Enter the URL as (http://www.seleniumhq.org/) on the Firefox browser. It will take you to the Selenium homepage.
Step 2: Inspect the GUI element for the link “Selenium” image present on the right-hand side of the current web page. This link text is found between the tags<img></img> as shown below.
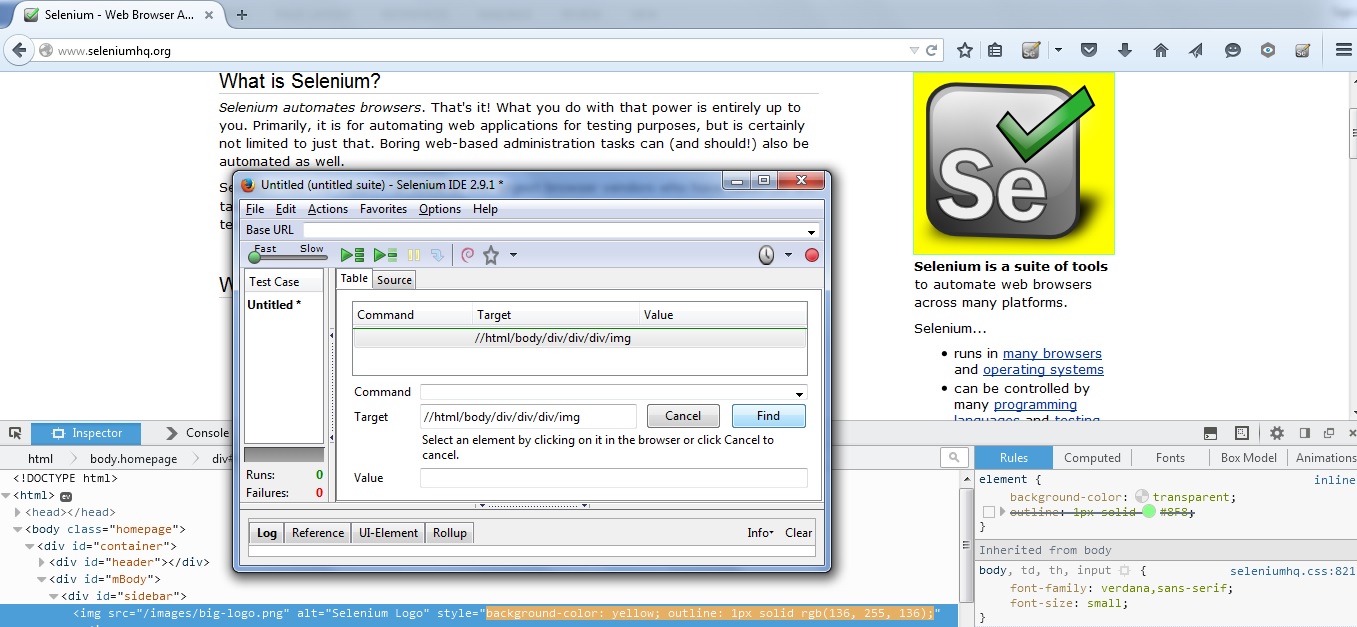
Step 3: Next, launch your Selenium IDE in browser and enter XPath “//html/body/div/div/div/img” in the Target box as shown below. After this, click on the find button and notice that the “Selenium” image becomes highlighted with a yellow color that will be bordered with the green color that means, Selenium IDE has located the required image element correctly.
⇓ Subscribe Us ⇓
If you are not regular reader of this website then highly recommends you to Sign up for our free email newsletter!! Sign up just providing your email address below:
Happy Testing!!!
