In previous article we have cover Introduction of JMeter & its supported features. Along with that we also covered “How to do download & install JMeter on windows” in earlier posts. Now most of the performance testers are thinking of what next after installation of JMeter, how we should start creating our first step?
In today’s article we will see how to record your first JMeter Test Plan using JMeter HTTP Proxy Server, How to do Firefox browser settings for recording JMeter first test plan, How to do JMeter load testing tool settings for recording your first test plan.
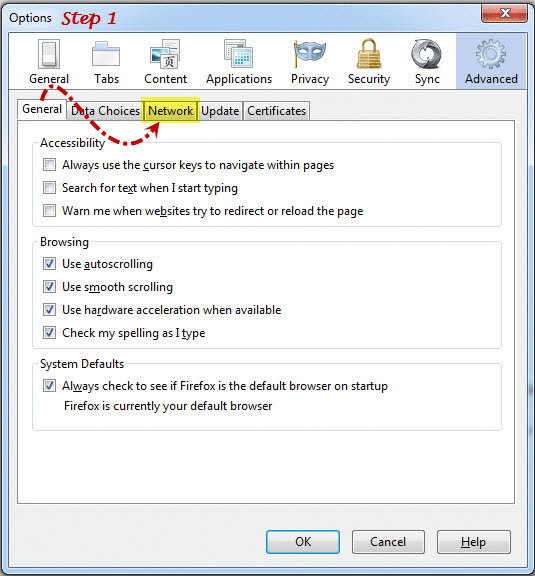
First we have to setup proxy server in Firefox browser to checkout the First Test plan recording steps. Follow simple steps:
- Open Firefox Browser
- Click on Tools > Options > Advanced tab > Network Tab > Setting button.
- Choose “Manual proxy configuration” radio button.
- Enter HTTP Proxy: localhost
- Enter Port: 8080
(In case of port 8080 is being used by any other instance we can enter any other port number like: 90, 4445, 4545 etc.)
You can check following image to get exact steps for how to setup proxy server.
Once the above setting is done open the JMeter tool to set up a recording for your first Test Plan.
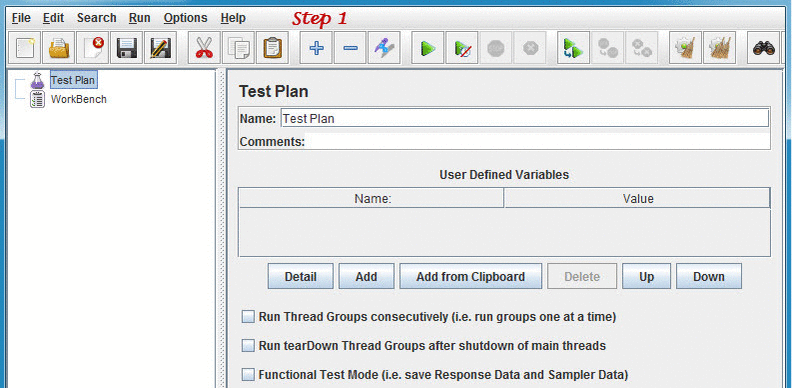
1) To learn how to start JMeter you can check this post “JMeter Installation Guide”. Now open the JMeter by clicking on JMeter.bat file.
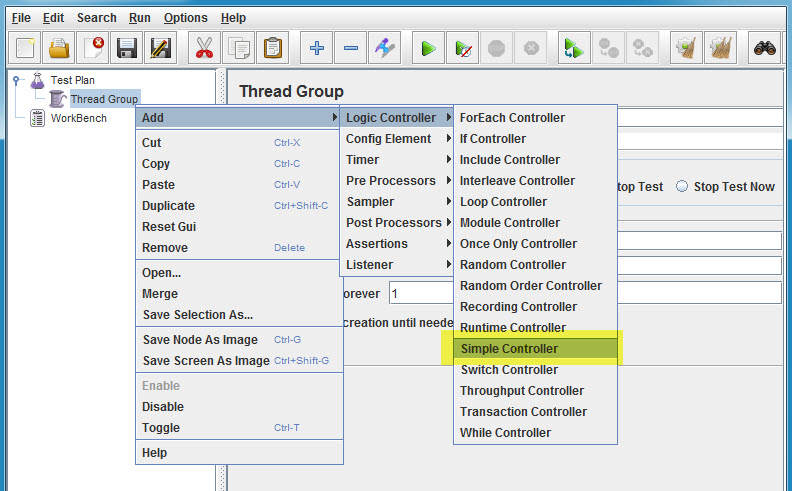
2) Right click on Test Plan and choose Add > Threads (Users) > Thread Group.
- The new Thread Group option will get added under Test Plan element.
3) Right click on Thread Group and choose Logic Controller > Simple Controller. The new Simple Controller option will get added under Thread Group element.
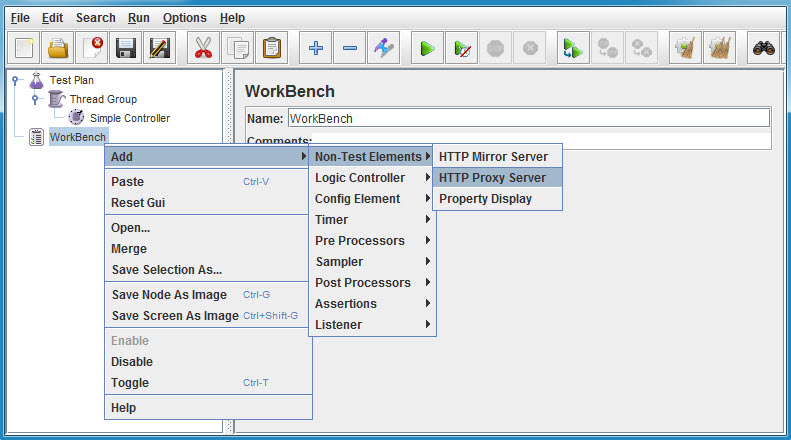
4) Right click on Workbench and choose Add > Non-Test Elements > HTTP Proxy Server.
The new HTTP Proxy Server option will get added under Workbench element. This option will add JMeter proxy server in your JMeter test plan.
5) Before start recording we have to do simple configuration setting in the HTTP Proxy Server option
- Click on HTTP Proxy Server option
- Under Global Setting section – Set Port: 8080 (Same port value which is configured in the above steps while configuring setting FireFox browser)
- Under Test Plan Content section – Choose Target Controller: Thread Group > Simple Controller.
Once you complete your settings then JMeter HTTP Proxy Server will look like as below:
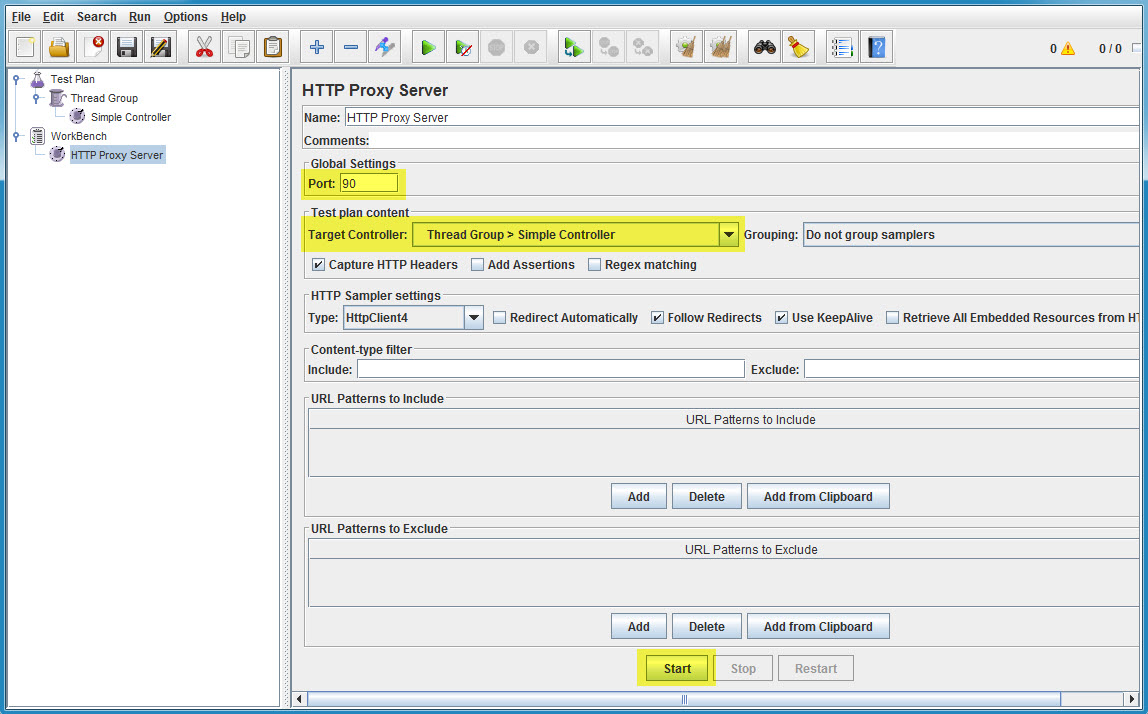
Now you are ready to start Recording using HTTP Proxy Server in JMeter & record your first JMeter test plan script in Apache JMeter. Click on “Start” button & open the URL in FireFox browser for which you want to run your performance testing script. Perform required navigation in FireFox browser & all steps will be recorded in Apache JMeter. (Note: Don’t do unnecessary navigation while recording, if you did that then please remove recorded script & start again from scratch.)
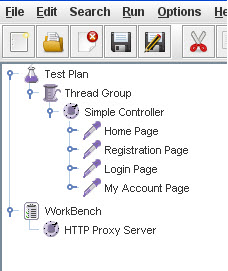
The recorded script will be displayed under Thread group > Simple Controller option same as displayed in below image. You should also explore the recorded script for your understanding how JMeter recording works using proxy server.
Conclusion on Recording using HTTP Proxy Server in JMeter:
Till we have learn about “Recording using HTTP Proxy Server in JMeter”. If you enjoy reading this article please make sure to share it with your friends. Please leave your questions/tips/suggestions in the comment section below and I’ll try to answer as many as I can.
Don’t Miss Another Article On JMeter
Join over 10,000 people who get FREE and fresh content from this Blog.
We Respect Privacy, You’re Safe! No Spam!
FULL LIST OF JMETER TUTORIAL SERIES
Happy Testing!!!
