In this chapter, we are going to discuss TestNG framework and how this framework could be used to create multiple test sessions to execute tests in parallel using Selenium WebDriver.
TestNG Framework
TestNG framework is the “Next Generation” framework that overcomes the limitations of the existing test framework known as JUnit. It has many inbuilt features and other advantages that make the test easier and very robust. Before we can look into this area, let’s first learn to install TestNG framework in eclipse IDE. Following are the steps.
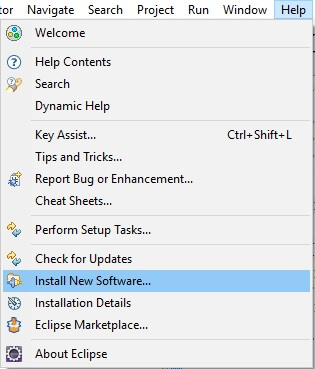
STEP 1: Open the eclipse and navigate as Help -> Install New Software… as shown below.
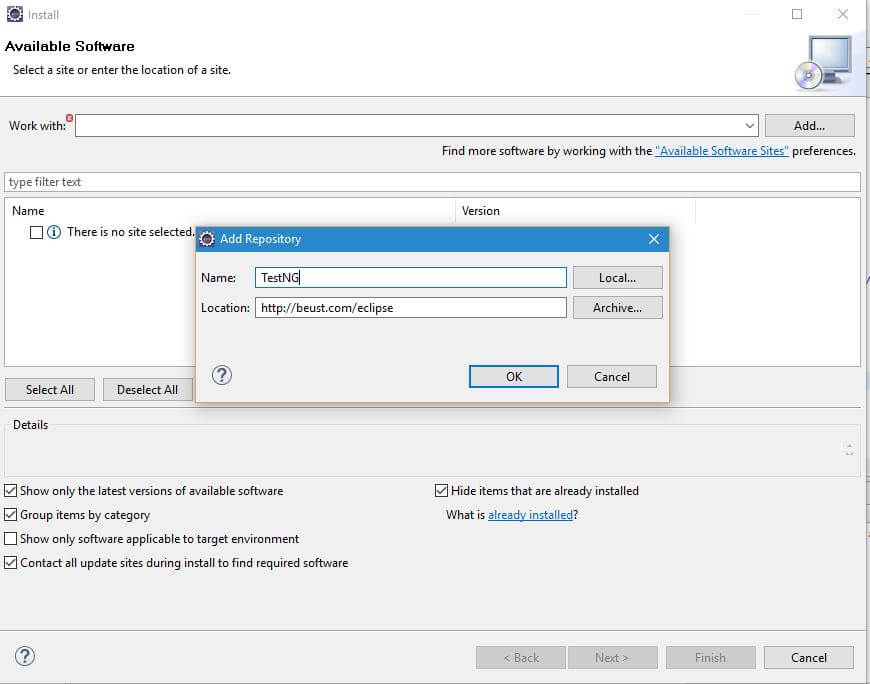
STEP 2: Above step will open up ‘Install’ dialogue box as shown below. Click on the ‘Add’ button present on the right side of the box. This will open up another dialogue box, in this dialogue box enter ‘Name’ as ‘TestNG’ and ‘Location’ as ‘http://beust.com/eclipse’. Click on the OK button.
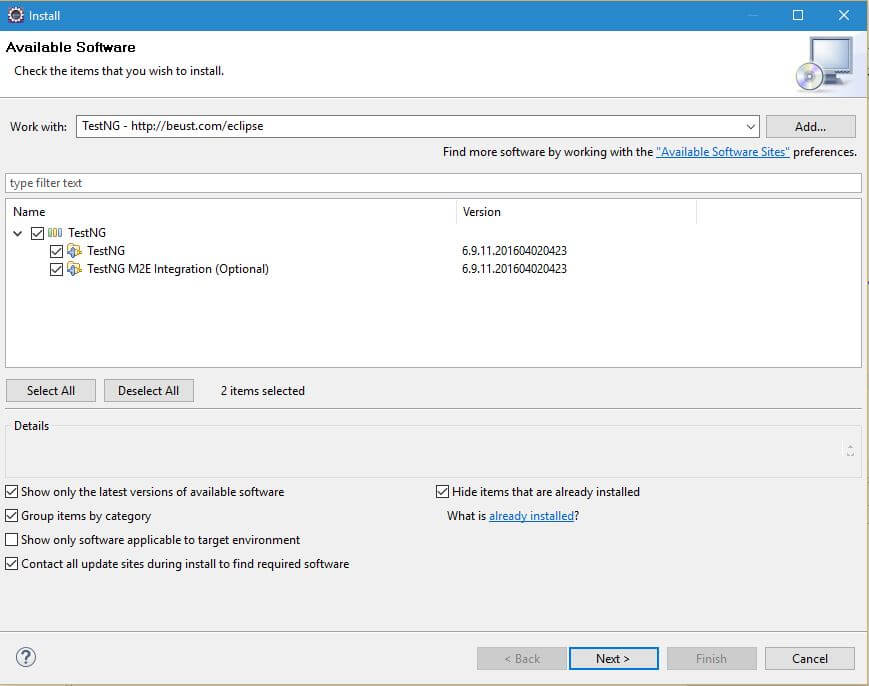
STEP 3: It will open up the available software for TestNG framework. Checked the checkboxes as shown below and click on the Next button.
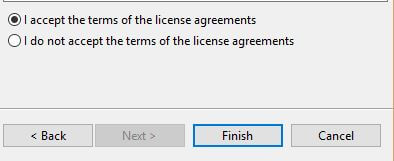
STEP 4: Next, it will ask to accept the terms of the license agreements and after accepting it click on the Finish button.
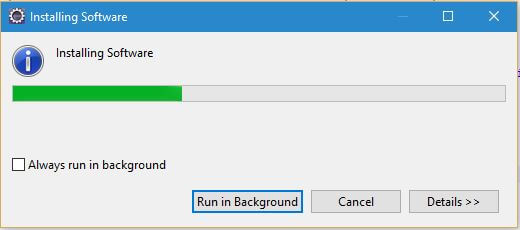
STEP 5: Above step will start installing the software in eclipse as shown below. This step will take few minutes to complete TestNG framework.
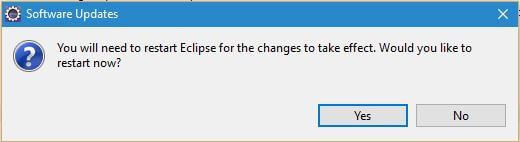
STEP 6: Once installation of software is completed, the system will ask to restart the eclipse. Click on the ‘Yes’ button to restart the eclipse.
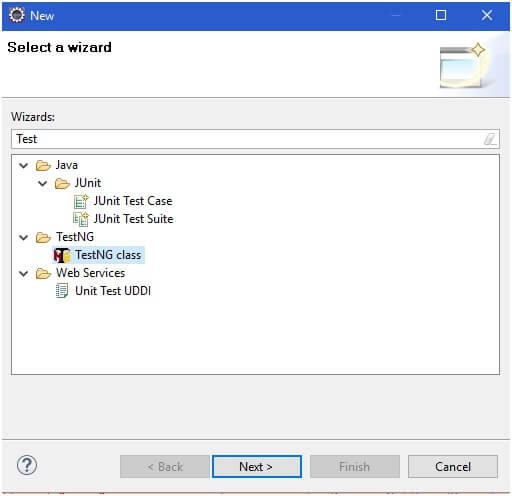
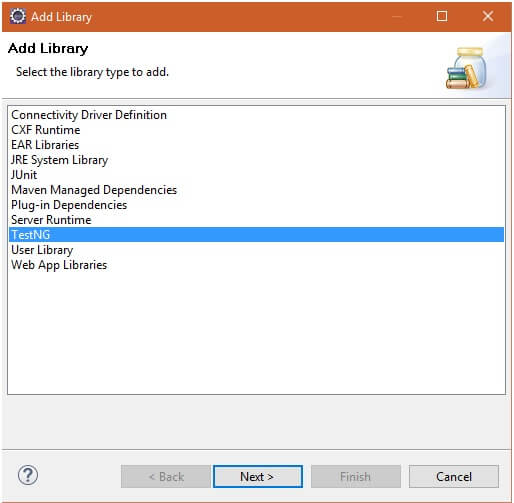
STEP 7: Once eclipse is restarted. Navigate as File -> New -> Others… It will open up a wizard as shown below. Type the text as ‘Test’ which will filter out other options and display ‘TestNG class’ option.Choose this option and click on the Next button.
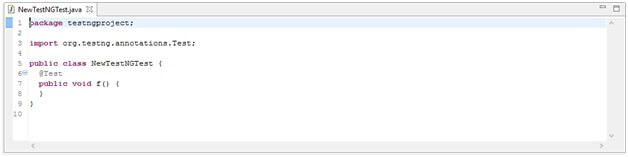
STEP 8: It will ask to give a package name as ‘testngproject’ and the class name as ‘NewTestNGTest’. Give these name and click on the OK button to see the Class template as shown below.
STEP 9: You need to choose the TestNG library at the project path as shown below. For this you have to navigate as Right click on the project -> Build Path -> Add Libraries…
STEP 10: You need to add all selenium jars on the build path as we did in the earlier chapters of this tutorials. After build path for the TestNG project is completed, we will be able to see the following libraries in eclipse.
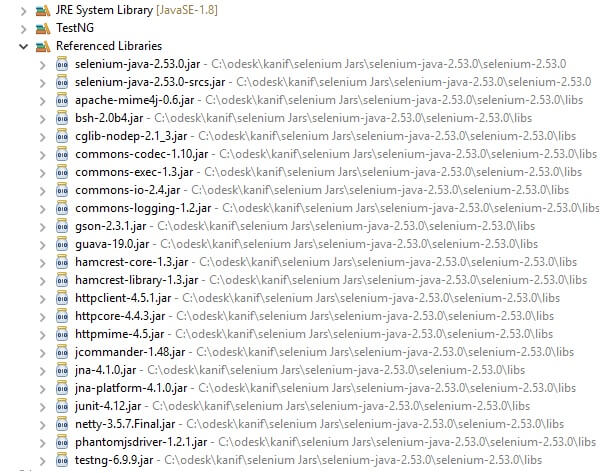
This completes the installation and configuration of the TestNG framework in eclipse, now let’s use this framework to create multiple sessions and run these sessions in parallel.
Plus point for TestNG over Junit
- In TestNG, we use annotations which are easy to understand.
- In TestNG, we can group tests very easily.
- In TestNG, it is possible to achieve parallel testing environment.
Sessions, Parallel run and Dependency in Selenium using TestNG framework
Selenium WebDriver has an inbuilt functionality to create a session whenever we instantiate a new WebDriver object for any browser. After the instance is created, it generates a new ‘sessionID’ which is attached to the corresponding Web browsers such as Firefox if we have instantiated the Firefox WebDriver object.
Therefore, there is no need to explicitly generate a driver session as it is Selenium WebDriver in-built property.
Following is the example code to run multiple session of the Firefox WebDriver using TestNG framework.
package testngproject;

import org.junit.Assert;
import org.openqa.selenium.WebDriver;
import org.openqa.selenium.firefox.FirefoxDriver;
import org.testng.annotations.Test;

public class NewTestNG {
@Test
public void test1() {
WebDriver driverFF = new FirefoxDriver();
String baseWebUrl = "https://www.facebook.com/";
driverFF.get(baseWebUrl);
Assert.assertEquals("Facebook - Log In or Sign Up", driverFF.getTitle());
driverFF.getTitle();
driverFF.close();
}
@Test
public void test2() {
WebDriver driverFF = new FirefoxDriver();
String baseWebUrl = "https://www.facebook.com/";
driverFF.get(baseWebUrl);
Assert.assertEquals("Facebook - Log In or Sign Up", driverFF.getTitle());
driverFF.getTitle();
driverFF.close();
}
}
Explanation of code
- Here, we are using TestNG framework where all tests are written under annotation as ‘@Test’.
- Each of these test1 and test2 methods is invoking two Firefox driver sessions and fetching the heading from Facebook page.
- When we run this complete test that has two test methods using TestNG framework. We can see the successful report as shown below.

Running Scripts in Parallel
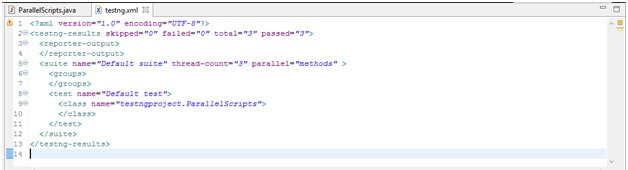
When we want to run the test scripts in parallel using WebDriver and TestNG framework, then we need to use ‘parallel’ attribute in ‘testng.xml’ file as shown below.
This parallel attribute of the suite tag can accept the following 4 values.
| S. No. | Attribute value | Description |
| 1. | tests | When the parallel attribute has value as tests, then all the test cases present inside the test tag will run in parallel. |
| 2. | classes | When the parallel attribute has value as classes, then all the test cases present inside a JAVA class will run in parallel. |
| 3. | methods | When the parallel attribute has value as methods, then all the methods with ‘@Test’ annotation will execute in parallel. |
| 4. | instances | When the parallel attribute has value as instances, then all the test cases present in the same instance will execute in parallel. |
The thread-count attribute of the suite tag accepts a numeric value that specifies how many threads could be allocated for the current execution.
Using the above configuration of ‘testng.xml’ file, we can use the following JAVA code to execute three test methods annotated as ‘@Test’ to run in parallel.
package testngproject;

import org.junit.Assert;
import org.openqa.selenium.WebDriver;
import org.openqa.selenium.firefox.FirefoxDriver;
import org.testng.annotations.Test;

public class ParallelScripts {
@Test
public void parallelTest1() {
WebDriver driverFF = new FirefoxDriver();
String baseWebUrl = "https://www.facebook.com/";
driverFF.get(baseWebUrl);
Assert.assertEquals("Facebook - Log In or Sign Up", driverFF.getTitle());
driverFF.getTitle();
driverFF.close();
}
@Test
public void parallelTest2() {
WebDriver driverFF = new FirefoxDriver();
String baseWebUrl = "https://www.facebook.com/";
driverFF.get(baseWebUrl);
Assert.assertEquals("Facebook - Log In or Sign Up", driverFF.getTitle());
driverFF.getTitle();
driverFF.close();
}
@Test
public void parallelTest3() {
WebDriver driverFF = new FirefoxDriver();
String baseWebUrl = "https://www.facebook.com/";
driverFF.get(baseWebUrl);
Assert.assertEquals("Facebook - Log In or Sign Up", driverFF.getTitle());
driverFF.getTitle();
driverFF.close();
}
}
Explanation of Code
- Here, we are using TestNG framework and the class script has three methods which are annotated as ‘@Test’.
- All 3 methods invoke separate session of the Firefox driver to get the title of the Facebook login page.
- We are asserting the title of the web page against the expected title value which is eventually to get passed successfully.
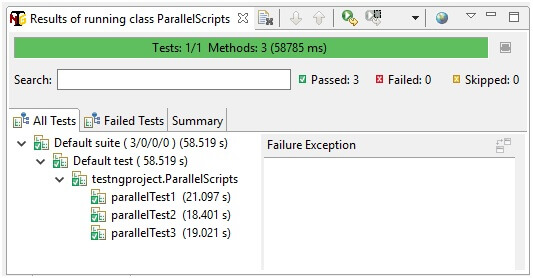
- Since the suite tag present in ‘testng.xml’ a file has parallel attribute value as ‘methods’ and thread-count attribute as 3. Therefore, all of these three methods will be executed as a single thread in parallel at a time.
Output
Following is the output when we run the above test scripts as TestNG class in eclipse.
Test Case order and Dependency
Using TestNG framework and testng.xml configuration file, we may set up the test case order as well as their dependencies.
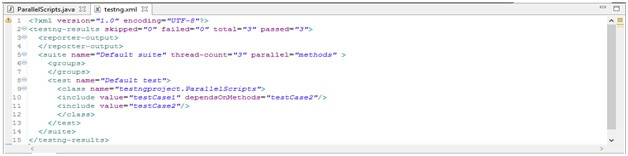
Suppose, we have two test cases known as ‘testCase1’ and ‘testCase2’ and we want to execute ‘testCase1’ after ‘testCase2’. All we have do is that we need to set the dependency and the order of execution using the ‘dependsOnMethods’ attribute of the include tag that is used inside the class tag as shown below.
Download Selenium Sample Code here
Conclusion
In this chapter, we have discussed the installation and configuration of the TestNG framework and then learned how to configure testng.xml file to run the multiple sessions of WebDriver in parallel and the execution order of the test case and their dependencies.
⇓ Subscibe Us ⇓
If you are not a regular reader of this website then highly recommends you to Sign up for our free email newsletter!! Sign up just providing your email address below:
Happy Testing!!!
