In this article, we are going to discuss recording, running and resolving errors associated with various tests executed on TestComplete. The TestComplete tool is a very robust tool where the team can easily record and play tests in order to create test scripts without programming knowledge. Therefore, the TestComplete tool enables the testing teams irrespective of any skill level to create and run automated test scripts for various UI tests for desktop, mobile (Android or iOS), and web applications. So lets see how to start Recording in TestComplete.
Test Recording in TestComplete:
We can easily record the test automation script in TestComplete tool. The following are the approaches in the TestComplete tool which help in recording, editing, and manipulation automated test scripts.
How to Start, Pause and Stop Recording?
We can start recording test using TestComplete with the help of following steps.
- Open a project in TestComplete.
- Click on the Record Keyword Test or Record Script on the Test Engine toolbar.
- From the main menu of TestComplete, select Test | Record | Record Keyword Test or Test | Record | Record Script.
- Next, press on the Record New Test on the toolbar of the Keyword Test editor.
- Next, press SHIFT+F1. At this point TestComplete with a show the recording Toolbar where the recording process can be controlled.
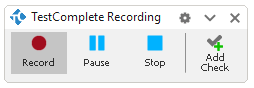
- Anytime, you can pause the recording by click on Pause on the Recording toolbar or press SHIFT+F10.
- Anytime, you can resume the recording by click on Recordon the Recording toolbar or press SHIFT+F1.
- Anytime, you can stop the recording by click on Stop on the Recording toolbar or press SHIFT+F2.
How to append Recordings to the Current Keyword Test?
If a keyword is used in the tests, then the recorded operations can be appended to the existing tests and there is no need to record it as new tests. The following are the steps.
- On the TestComplete, open the test in the Keyword Test editor.
- Next, click on the Append to Test on the editor’s toolbar as shown below.
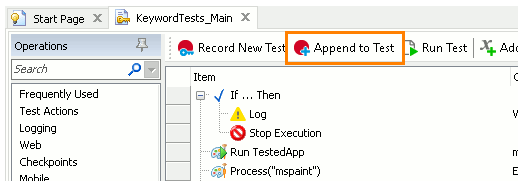 When a message appears that asks where to append the recorded operations, then select To End.
 - You can append the recorded operations after a specific operation by enabling the Specify test option in Tools | Options | General | Show Again Flags | Keyword Testing. Next, open the test in the Keyword Test editor and select the operation where you want to add the recorded operations. Next, click on the Append to Test on the editor’s toolbar. When the system asks where to append the recorded operations, there you can select “To Current Position“.
What to do after Recording Has Started?
After you have started recording a particular test. The TestComplete performs the following automation activities.
- It gets switched to the Recording mode and the Recording toolbar is displayed.
- The TestComplete main window is minimized.
- The changes made to the current project are saved.
- A new script routine or keyword test are created where the test actions are saved.
- When a test is started the TestComplete turns off the CAPS LOCK key to ensure the correct simulation keystrokes.
- The tested applications are started which have the Autorun application available on the recording option enabled.
- The Mobile Screen window is displayed. It is used during the testing mobile applications testing.
Things to do during test Recording? Using the TestComplete tool, you can do the following during recording of tests.
- You can create checkpoints during recording tests for desktop and web applications by using create checkpoints wizard.
- It is capable to record multiple multi-touch gestures on Android devices.
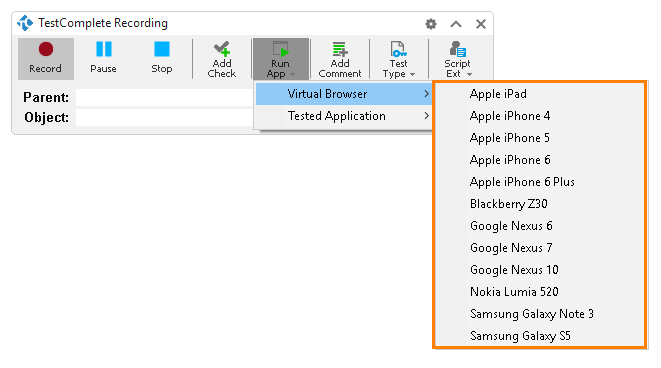
- It can launch applications from the Tested Application collections as shown below.

- It can launch a mobile browser emulator as shown below.
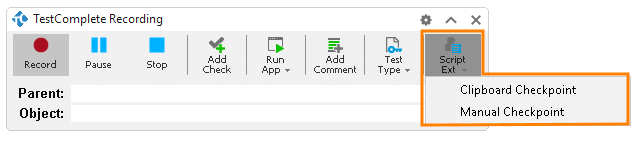
- It can switch between low-level recording and script and keyword test.
- You can use Add Comments button to add comments into the recorded tests.
How to Record the Application Startup?
The start of applications is traced by the TestComplete tool during the recording and it may add test actions after the recording is over which will automatically start these applications depending on their types as desktop, web and mobile application.
How to Change the Type of the Recorded Test?
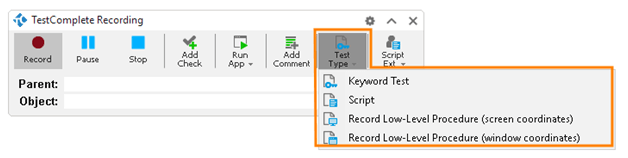
TestComplete tool is capable to record tests as –
Keyword tests, Scripts and Low-level procedures which are only applicable to desktop and web applications. You can start recording either a script or keyword test but switching to another test type can be done during recording. We have to use the following buttons on the recording toolbar as shown below.
At the time of switching it simply inserts a call to the new test where the test was recorded previously in a particular sequence.
What can be the default Names of Recorded Tests?
The TestComplete tool can names new keyword tests and scripting routines automatically which will look like TestN. Here, N is a number. E.g. Test1, Test2, etc. Test names cannot be duplicated or coincide with the names which already exists for keyword tests in the scripting unit.These default names can be changed anytime in TestComplete by using Project Explorer.
How to Record Different Types of Tests?
TestComplete provides options to record test for Mobile (both Android and iOS), web application as well as desktop applications.
How to Record Options and Specifics?
TestComplete has various options that can affect the recording process.
- At the time of designing, you can select Tools | Options from the main menu of the TestComplete tool and then select the Engines | Recording
- Click on the Recording toolbar when you recording the test.
- When you open Recording Options Dialog then you can see a full list of the options.
- Recording Specifics enables testing of the different type of testing elements using TestComplete.
Test Running:
We can run the recorded test scripts for test automation in the following ways.
- Test Scripts can be executed directly from the TestComplete IDE,
- Test Scripts can be executed from the command line,
- Test scripts can be executed as a scheduled task,
- Test Scripts can be executed through COM from external scripts and applications,
- Test Scripts can be executed as a part of Visual Studio tests or MSBuild projects,
- Test Scripts can be executed from connected and Self-Testing applications.
- You can also run the entire project or project suite, test item, group of tests, etc. from TestComplete.
Resolving errors:
After test execution is testing logs are generated in the TestComplete tool. These testing logs can be analyzed against the Test failures and can be fixed at the test data or script level after taking the appropriate actions.
Over to you:
In this article, we discussed the powerful record and play feature of the TestComplete tool for the creation and execution of automated scripts for various UI tests for desktop, mobile (Android or iOS), and web applications. We have also discussed the test result analysis as well as resolving errors in the TestComplete tool.
