First look of QTP/UFT 12.0 after installation: In previous article we have seen “Overview of HP Unified Functional Testing 12.0“. In today’s article taking first look of UFT tool after installation.
1) After Installation, start the application either; from desktop shortcut or from Start Menu.
QTP 12.0 automatically creates desktop shortcut after installation process done, use the desktop shortcut to launch the QTP 12.0.

Also, you can start the QTP from Start > All Programs > HP Software > HP Unified Functional Testing, as shown in the figure below.
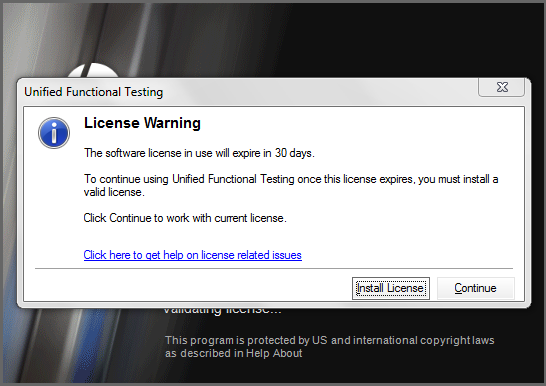
2) Once you open UFT 12.0, the first window will be the License window. If you have already chosen the Seat (Trial) license at the time of installation then click on “Continue” button else click on “Install License” button.
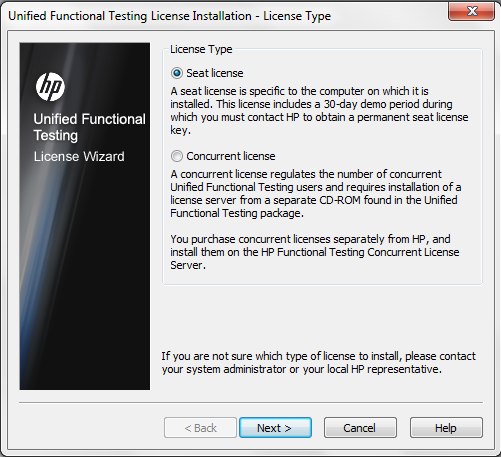
3) The next window will be the license type window, choose any one of the license type shown in the figure below, to install the license type.
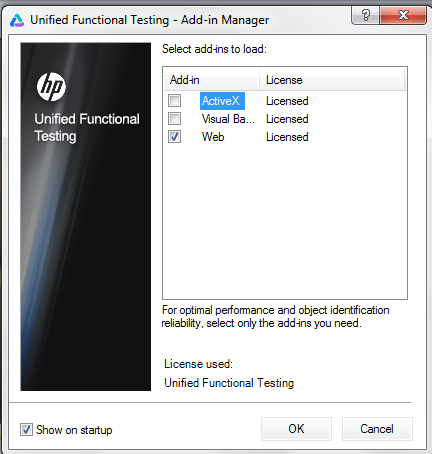
4) When you click on “Continue” in the license warning window, the next window will be the Add-in Manager window, select the required add-ins from the list that should be suitable to your application which you are going to test using UFT 12.0 then click on “OK”.
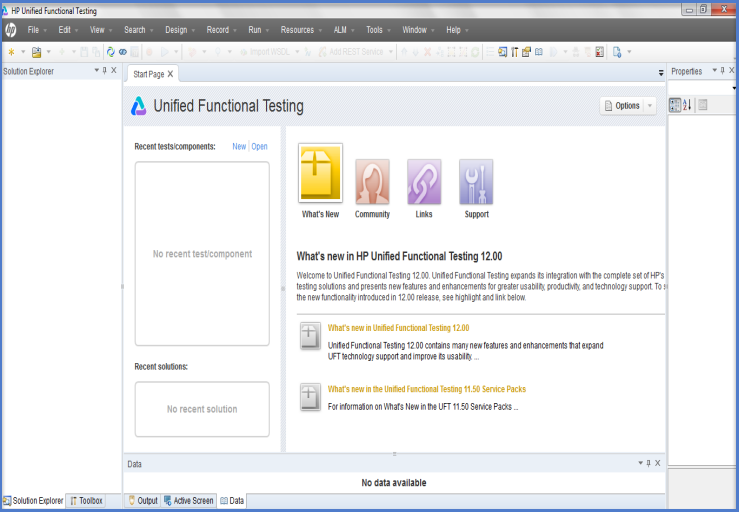
5) After loading the required add-ins, the UFT 12.0 application window opens, which will display as shown in the figure below.
Let’s start the working process of UFT 12.0
The first and simple test formation technique in UFT is record and playback.During the functional testing of the application, Record function records the user actions of the application to automatically generate the scripts that can be played back later. Using record function, users can automation build scripts without knowledge of any scripting language.
Recording modes in UFT 12.0
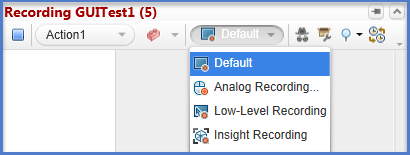
There are different modes of Recording in UFT 12.0,
1) Normal Recording: It is a default recording mode that records the objects functions and operations implemented on the application under test.
2) Analog Recording: At the time of recording an application functional operation under test, the exact mouse and keyboard operations can also be recorder relative to the that particular application. In this recording mode, each and every movement of the mouse as you drag the mouse around a screen or window can be recorded. This mode is valuable for recording operations that cannot be recorded at the level of an object, for example, recording a signature produced by dragging the mouse.
3) Low-Level Recording: Permits user to record any object of the application. Recording happens at the object level and records all run-time objects as Window or WinObject test objects. Use low-level recording technique, useful to record exact coordinates of the object under test.
4) Insight Recording: In this case, record operation happens based on its appearance, not on its native properties.
Operation of Record and Playback function
Working process of Record and Playback function in Normal recording mode is as follows,
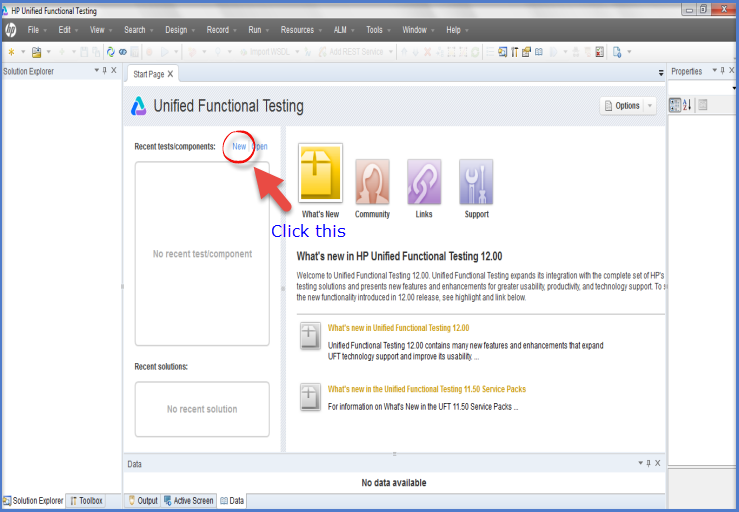

1) In the start page of UFT, click on”New” as shown below in the figure.
2) After Clicking on “New” option, the new test window opens with various test types, here GUI test type has been automatically selected, by default. But, user can also select the test type from the list as per their requirement. So, select the test type (GUI Test) from the list, change the Name and Location if you want then click on “Create” to save the test in a particular location with particular name.
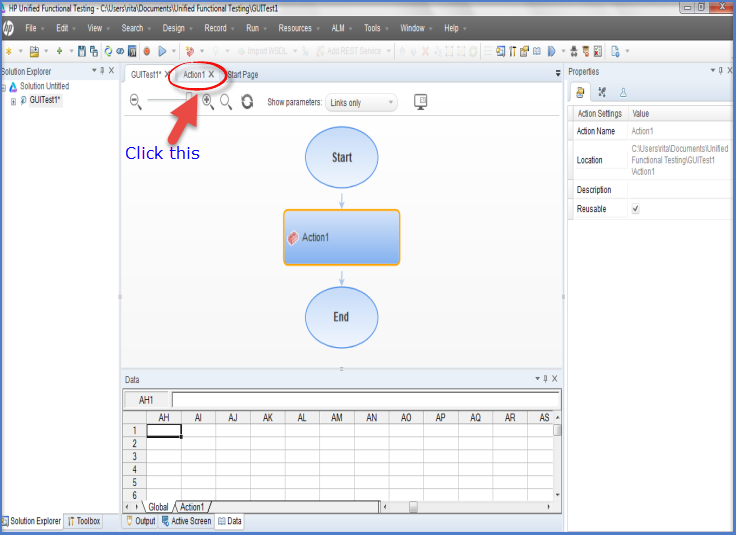
3) Next,a new test window screen opens as shown below. Here, click on “Action1” Tab for further process.
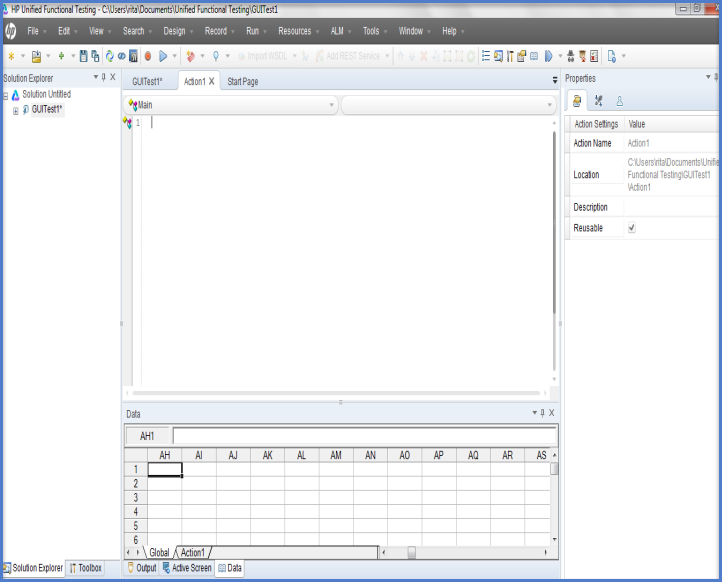
4) The Action1 window will look like the figure as shown below with1 action, by default.
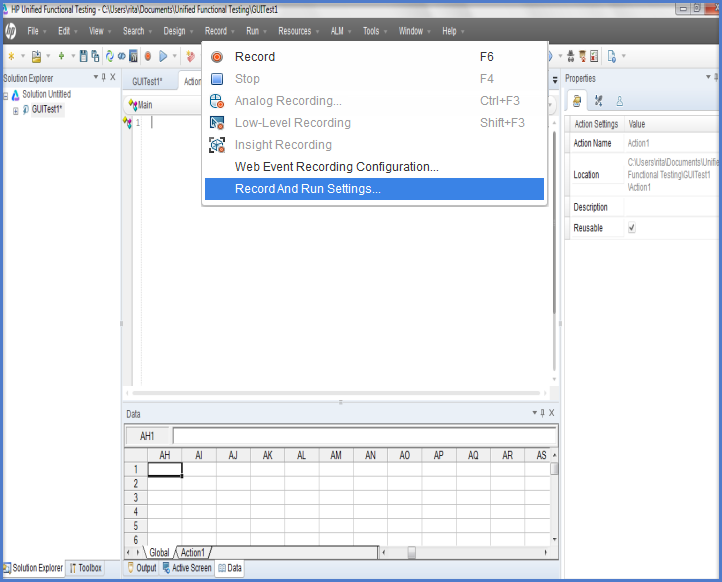
5) In the Action1 window, from “Record” Menu select “Record and Run Settings” as shown below.
6) In the Record and Run Settings Dialog window, user can go to any tab (Web orWindows Applications) depends on the type of application on which you are working. For example; here you will get the recording process of a Web Based Application: “http://easycalculation.com/” on Mozilla Firefox.
User can also choose the Web browser on which the web application will open, the default selection is Microsoft Internet Explorer. UFT 12.0 supports all browsers shown in the figure below.
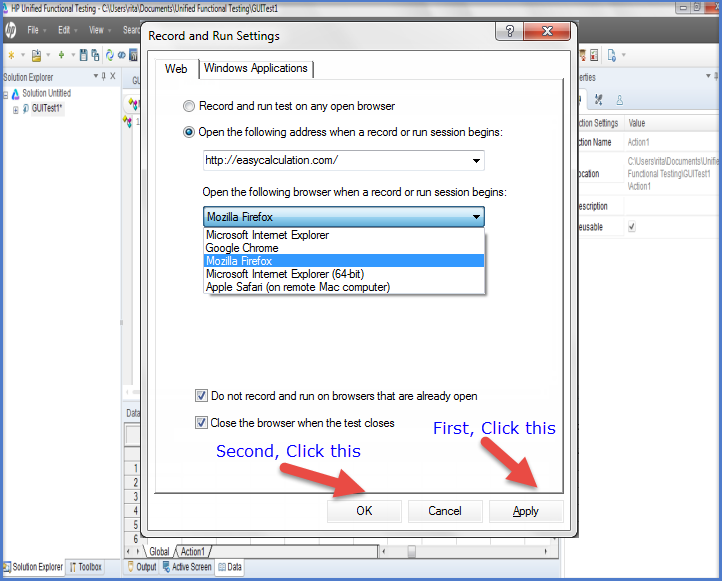
After doing required on the Record and Run Settings Dialog window, first click on Apply then OK.
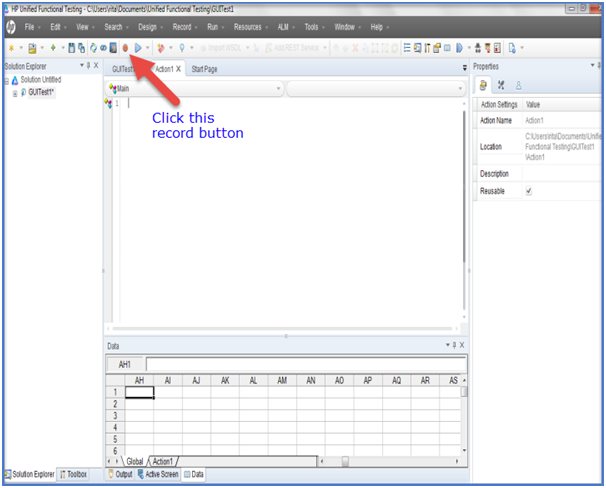
7) Next, click the Record Button.
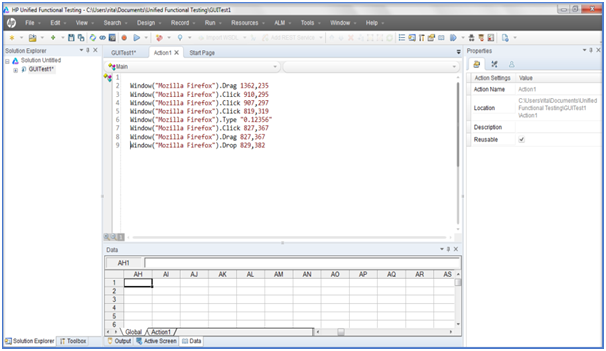
8) Once user click on Record button, Mozilla Firefox automatically opens URL: http://easycalculation.com/ as per the settings. In this particular Web address, whatever action you will do, scripts will generate for that particular action. After recording process done, click on stop button and go back to the UFT user interface, generated scripts will be shown in Action1 Pane as shown in the figure below.
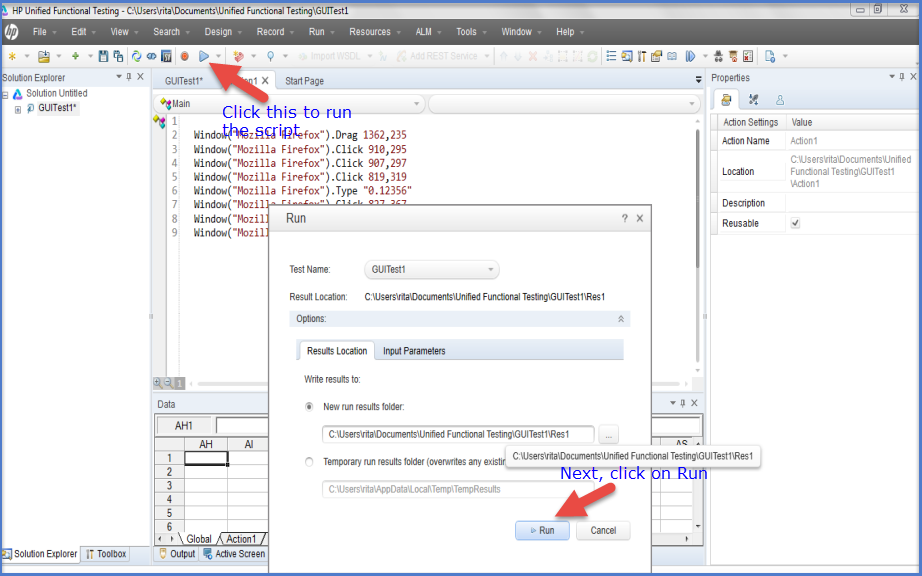
9) Now playback the script by clicking on the playback (Run)button to display desired result.
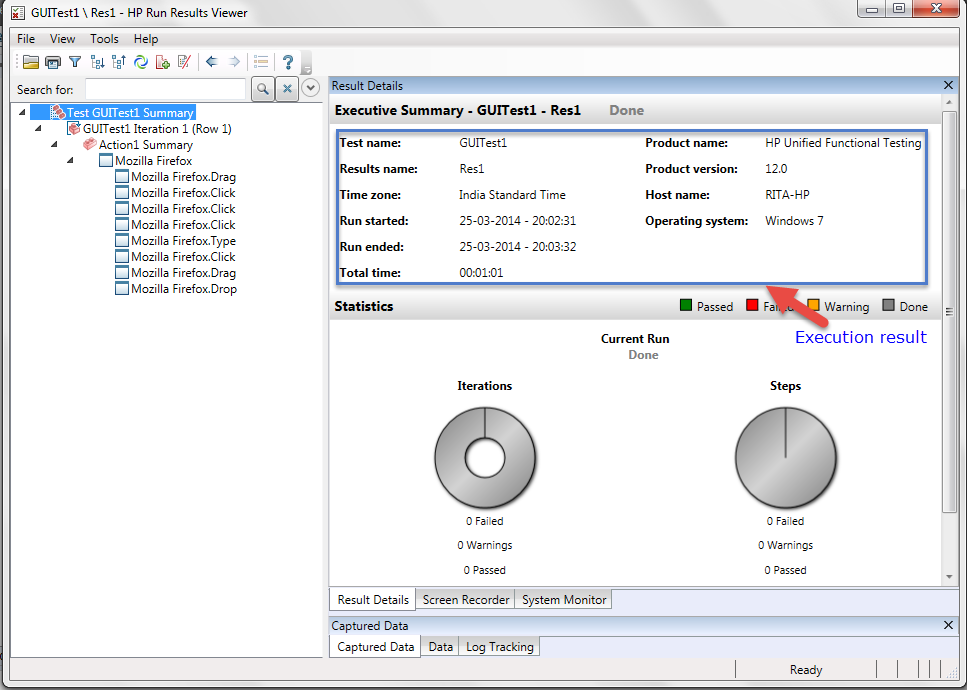
10) At last, the result window will display as shown in the figure below.
How scripts generate in all recording modes:
After clicking on Recording button, one toolbar appears that facilitates user to choose the recording mode from the recording pane that appears on the screen once recording starts.
Let do this with the example of the URL: http://easycalculation.com/
Go to, Tax Calculator > Chine Income > Taxable Income > Calculate

Recording in Normal Mode: Script generated using above example.
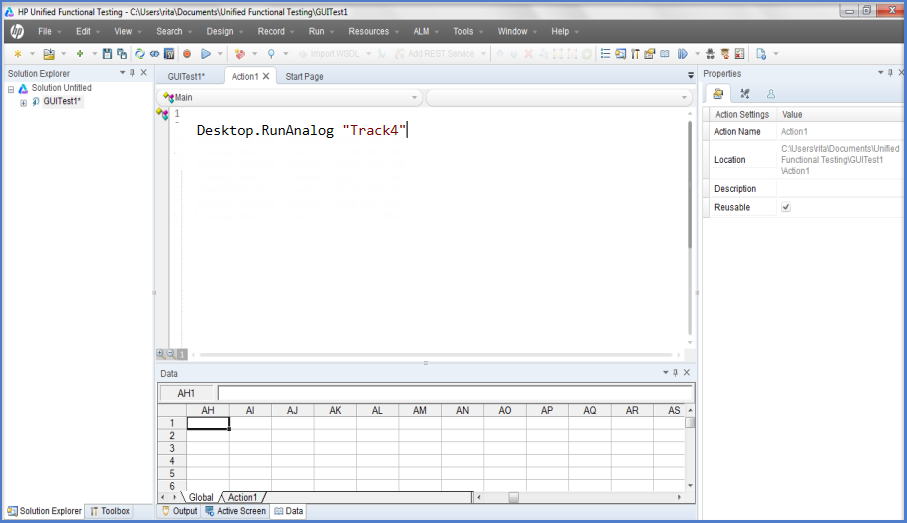
Recording in Analog Mode: Script generated using above example.
Recording in Low-Level Mode: No script generated.
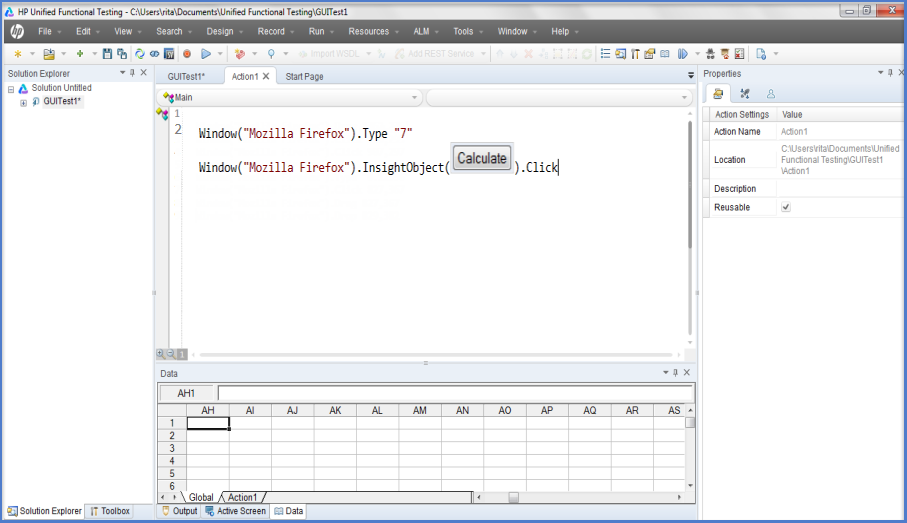
Recording in insight Mode: Script generated using above example.
That is all for today! In next UFT/QTP Training Tutorial 5, we will covering “Overview of UFT panes” in detailed. Please feel free to post your questions.
Note – If you have missed any tutorial in this series please check this
UFT/QTP training tutorial series page where we have listed all UFT/QTP tutorials.
⇓ Subscribe Us ⇓
If you are not regular reader of this website then highly recommends you to Sign up for our free email newsletter!! Sign up just providing your email address below:
Happy Testing!!!