Introduction
Apache Flume is a tool which is used for moving the bulk streaming data into HDFS echo system. It has the following features.
- Flume is a tool which is used for the bulk data streaming into HDFS.
- Flume is based on an agent-based architecture where the code is written (known as ‘agent’) that takes care of fetching of data.
- Flume enables the Data flows into HDFS system via zero or more channels.
- Flume data load can be a data driven event.
- Flume can be used to load streaming data such as tweets generated at Twitter, log files generated by a web server, etc.
- Flume agents are designed by keeping in mind about the need to fetch the streaming data.
Flume extends support to the multiple sources such as
- ‘tail’ that pipes data from a local file and write into HDFS via Flume. It works similar to Unix ‘tail’ command.
- System logs generated by application server, web server, etc.
- Apache log4j that enable Java applications to write events to files in HDFS via Flume.
Flume Architecture

A Flume agent is a JVM process. It has 3 components as follows.
- Flume Source.
- Flume Channel, and
- Flume Sink.
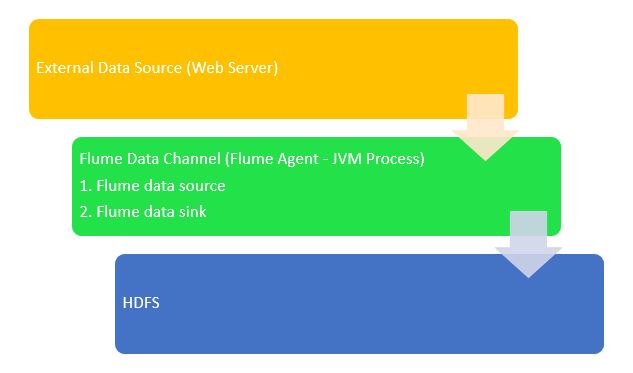
Flume tool with the help of these three components propagate the events after it has been initiated at an external source such as Web Server, Twitter application, etc.
In the below architecture diagram, the events are generated by external data source i.e. here Web Server which are consumed by Flume Data Source. The external data source uses the recognized data format of the target data source to send events to the Flume source.
Next, the Flume Source receives an event which gets stored into one or more Flume channels. The channel here acts as a store that keeps the event until it is ingested by the flume sink. The channel may store these events by using a local file system.
Further, the events are removed from a channel through the Flume sink and get stored into an external repository such as HDFS or Hadoop Ecosystem. The architecture is flexible enough to support multiple flume agents in order to sink forward the event to the flume source of next flume agent deployed in the actual flow.
Flume operations
The Flume tool has a very flexible design which is based on the streaming of data flows. It is a robust and fault tolerant system which is capable to support multiple fail-overs and recovery mechanisms. It has different levels of reliability in order to offer an ‘end-to-end delivery’ and the ‘best-effort delivery’. In the case of the Best-effort delivery, it does not tolerate any Flume node failure whereas in the case of an ‘end-to-end delivery’ mode, it guarantees the data delivery even in the event of multiple node failures simultaneously.
Flume uses one or more channels to carry data between sources and sinks. The data gathering can either be scheduled or event-driven. Flume has its own well defined query processing engine that makes it easy to convert each new batch of data while moving it to the intended sink.
Possible Flume sinks comprise HBase and HDFS. Flume is widely used to transport event data including network traffic data, live streaming data, data generated by social media websites, email messages, logs from web server, etc.
Steps to download and install Apache Flume
The following steps need to be followed to download and install Apache Flume
Step1: Login to the PC with the privileged credentials in order to install Apache flume software on your system.
su hduser Password
Privileged Access
Step 2: Create a new directory with any name say ‘ApacheFlumeProject’
sudo mkdir ApacheFlumeProject
Create directory
Step 3: Copy the required Java source code files (say MyTwitterSourceCode.java) into this directory and assign these files the read, write and execute permissions.
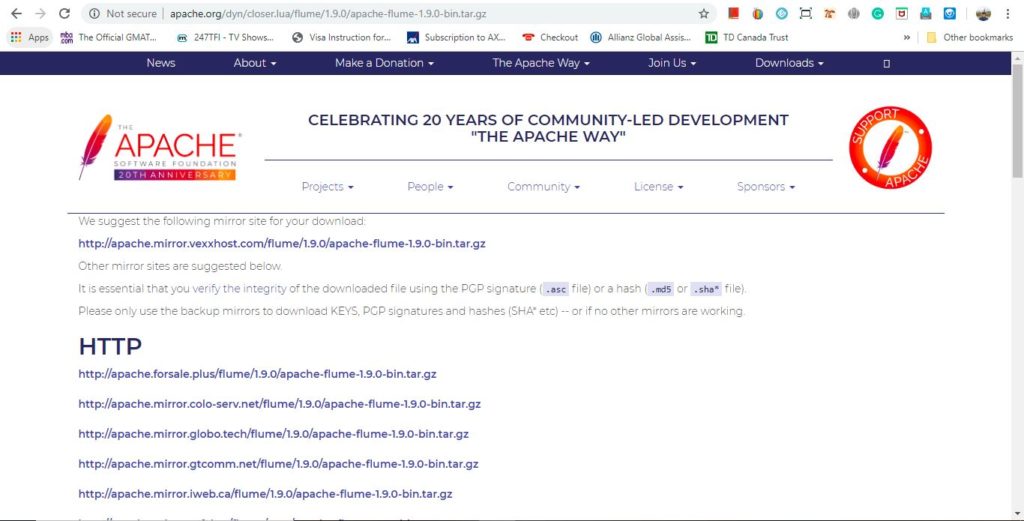
Step 4: Download and install ‘Apache Flume’ software from the below given link.
https://flume.apache.org/download.html
Download and Install Apache Flume

Use the latest version ‘apache-flume-1.9.0-bin.tar.gz’ and shown in the screenshot above. Click on this link which will take you to another web page with the link to download ‘Apache Flume’ software on your system.
Step 5: Next, copy the downloaded tar file into any directory of your choice and extract contents by using the following command in order to untar the file.
sudo tar -xvf apache-flume-1.9.0-bin.tar.gz
UNTAR the tar file for Apache Flume
The above command will create a new directory with the name as ‘apache-flume-1.9.0-bin’ and it will serve as an installation directory.
Step 6: Flume requires some libraries to be setup which will be required at the runtime depending on the type of streaming our project is used for. For example, if we are working for Twitter streaming application then we need to copy the following libraries under the following directories.
twitter4j-core-4.0.1.jar flume-ng-configuration-1.4.0.jar flume-ng-core-1.4.0.jar flume-ng-sdk-1.4.0.jar to Copy these libraries into <Installation Directory of Flume>/lib/
Supporting libraries
Note: All these JAR files should be given the execute permission in order them to work with Apache Flume. In order to give the execute and read permissions, the following command can be used.
sudo chmod -x twitter4j-core-4.0.1.jar sudo chmod +rrr /usr/local/apache-flume-1.9.0-bin/lib/twitter4j-core-4.0.1.jar
Command to assign execute and read permissions
Step 7: Set the CLASSPATH with the help of the following command.
export CLASSPATH=”/usr/local/apache-flume-1.9.0-bin/lib/*:~/ApacheFlumeProject/flume/mytwittersource/*”
Setting the CLASSPATH
Step 8: Source code compilation using the command given below. After compilation has completed, create a deployable jar file say MyTwitterSourceCodeForFlume.jar. In the Manifest.txt file add the line ‘Main-Class: flume.mytwittersource.MyTwitterSourceCodeForFlume’.
javac -d . MyTwitterSourceCodeForFlume.java MyTwitterSourceCode.java jar cfm MyTwitterSourceCodeForFlume.jar Manifest.txt flume/mytwittersource/*.class
Source code compilation & JAR file creation
Step 9: Next, copy MyTwitterSourceCodeForFlume.jar to <Flume Installation Directory>/lib/ folder and assign the execute permission.
sudo cp MyTwitterSourceCodeForFlume.jar <Flume Installation Directory>/lib/
Copy JAR to LIB
Step 10: Next, navigate to the configuration directory of Flume, <Flume Installation Directory>/conf and if the file flume.conf does not exist, then copy flume-conf.properties.template and rename it to flume.conf into this folder by using the command given below.
sudo cp flume-conf.properties.template flume.conf
Flume.conf file creation
Step 11: Similarly, if flume-env.sh does not exist, then copy ‘flume-env.sh.template’ and rename the file to ‘flume-env.sh’ by using the command given below.
sudo cp flume-env.sh.template flume-env.sh
Flume.conf file creation
At this step, the installation of Apache Flume has completed. Next, if you like to stream Twitter data then create an application at Twitter website and connect it to the Flume as data and sink via channel in order to bring it to the Hadoop ecosystem.
Conclusion
In this chapter, we discussed about Apache Flume architecture and the basic steps to download, install, and set up Apache Flume software on our system.
>>> Checkout Big Data Tutorial List <<<
⇓ Subscribe Us ⇓
If you are not regular reader of this website then highly recommends you to Sign up for our free email newsletter!! Sign up just providing your email address below:
Happy Testing!!!
