In this tutorial, we are going to learn about how to install MySQL Database and workbench Installation.
Install MySQL Database Steps:
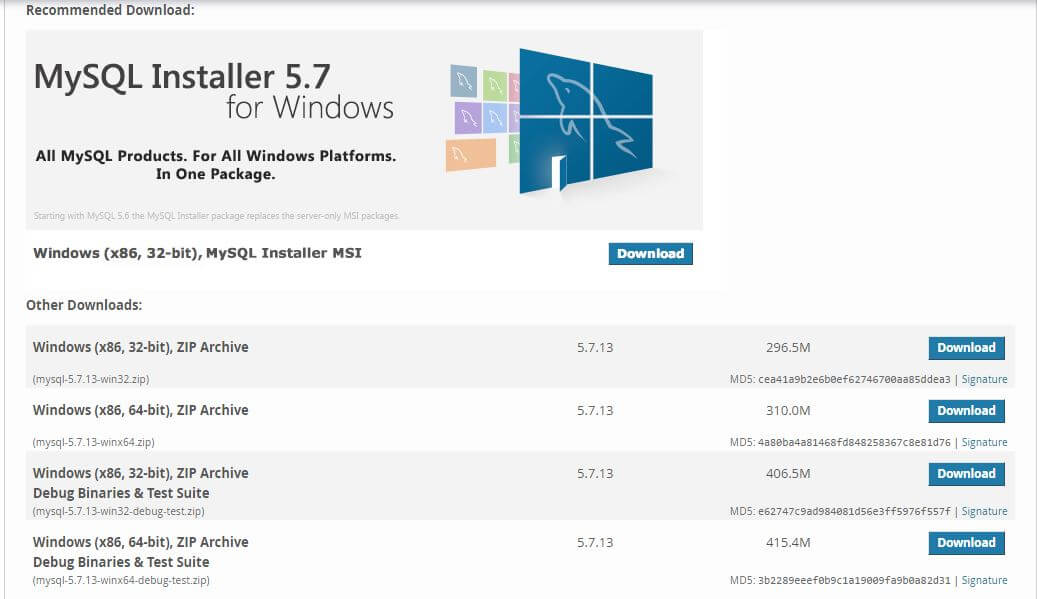
STEP 1: Download MySQL installer from below link and install it into your system.
http://dev.mysql.com/downloads/mysql/
After loading the above URL, you will see a web page as shown below. From this page click on the download link button to download MySQL installer.
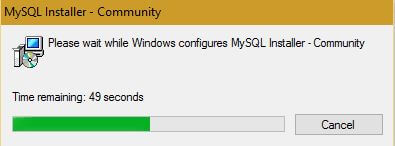
STEP 2: Once download gets completed, you will observe a file with the below file name. It will be of around 320 MB. Double click on this file to initiate the installation of MySQL package. The package here means that the installer will install MySQL database server, MySQL Workbench, connectors and other software that we will see in later steps.
mysql-installer-community-5.7.13.0.msi
STEP 3: MySQL installer will start configuring the file to prepare the setup for installation of the MySQL package as shown below.
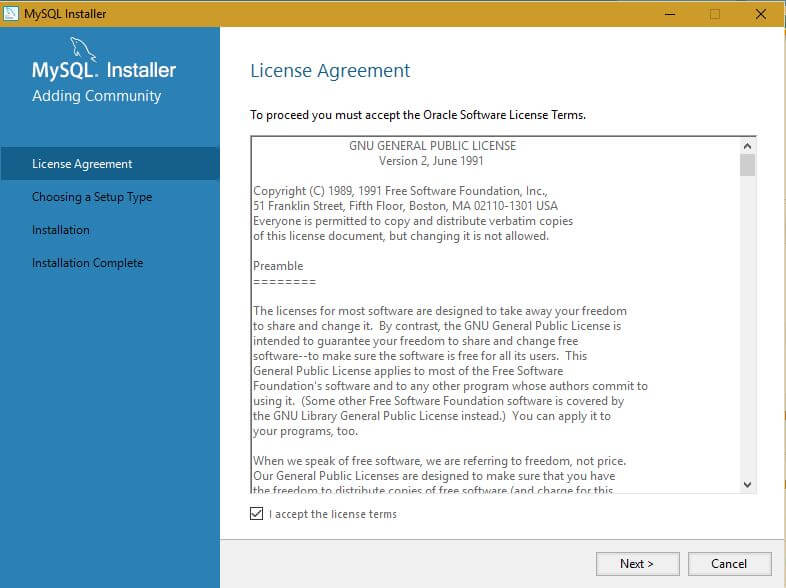
STEP 4: Next, it will open up a dialogue box to accept the license. Check the checkbox and click on the ‘Next’ button as shown below.
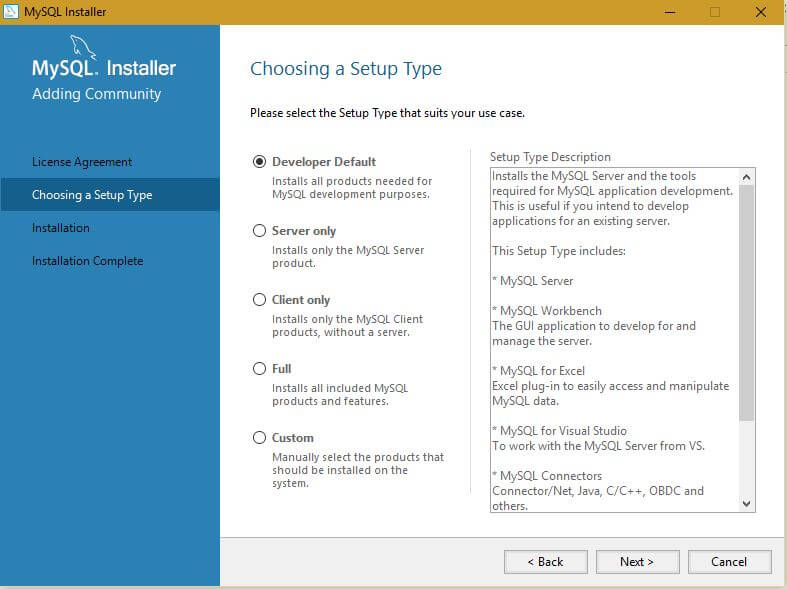
STEP 5: Choose a setup as ‘Developer Default’ and click on the ‘Next’ button as shown below.
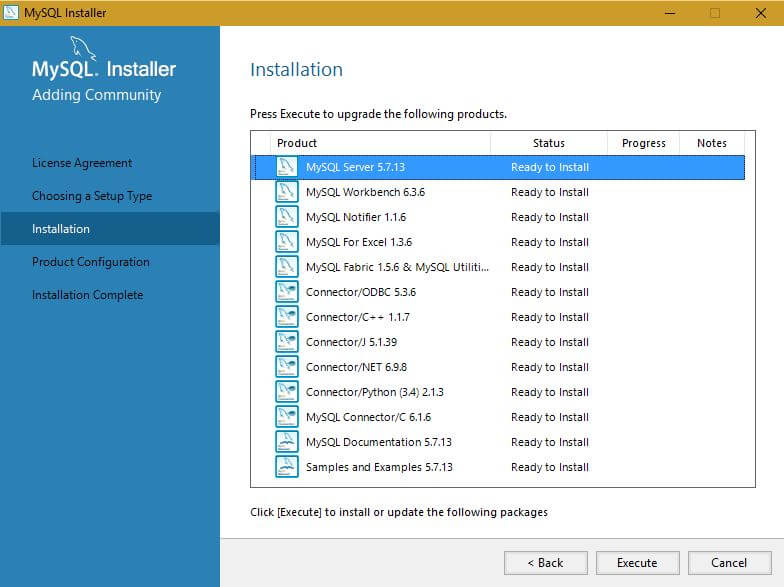
STEP 6: Click on the ‘Execute’ button present at the bottom of the dialogue box as shown below. This will kick-start the installation of the software items present in the MySQL package.
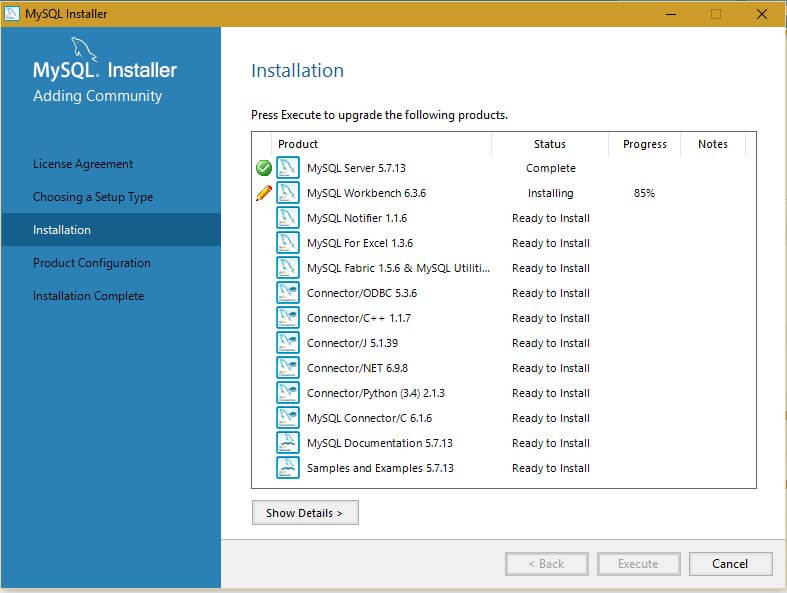
STEP 7: Below screenshot shows the sequence of products that are getting installed. Here, at this point MySQL server has completed the installation and MySQL workbench is in progress. This step will take few minutes to get complete.
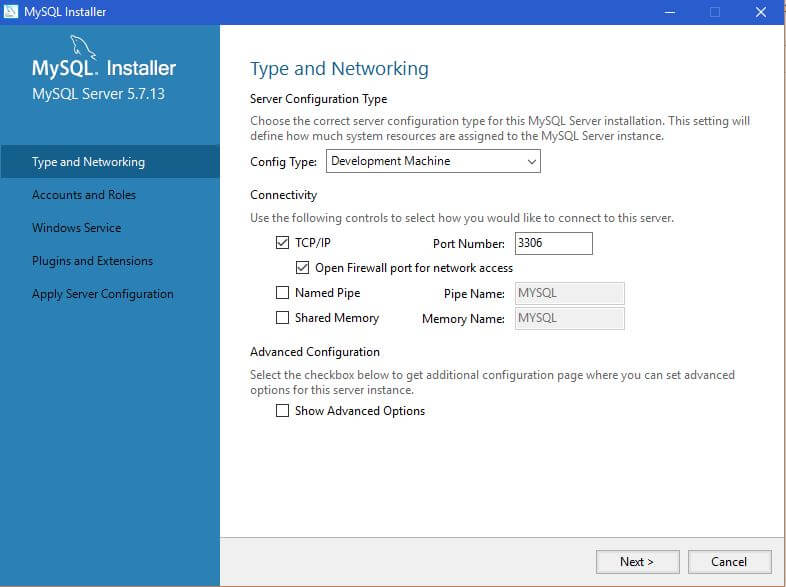
STEP 8: After installation of the product, the system will ask to choose the Config type and other connectivity directives. Here, we have selected Config type as ‘Development Machine’, Connectivity as TCP/IP and Port number is 3306 as shown below.
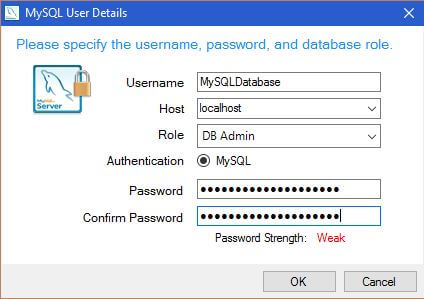
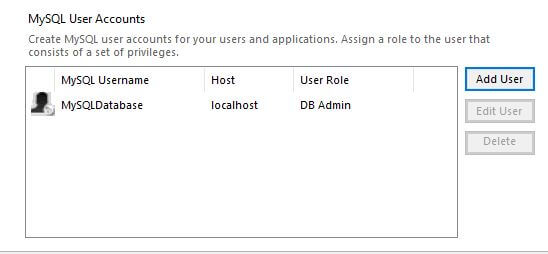
STEP 9: Next step it will ask to choose the account, username and password as shown below. Here, we are entering username as ‘MySQLDatabase’, host as ‘localhost’, Role as ‘DB Admin’ and password as ‘softwaretestingclass’. As shown below. After entering these details click on the OK button.
STEP 10: Once the account is created successfully, we can see the detail in current dialogue box as shown below.
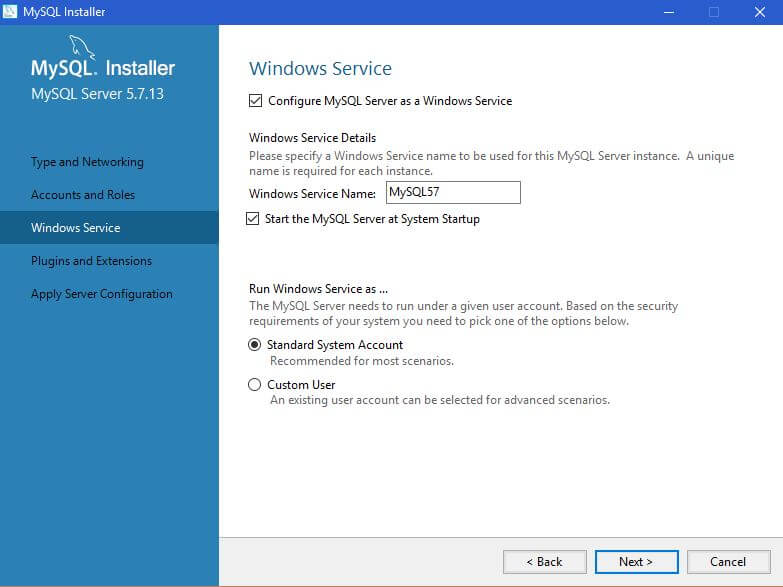
STEP 11: Next, the system will ask to configure Windows Service. Just keep the default setup and click on the ‘Next’ button as shown below.
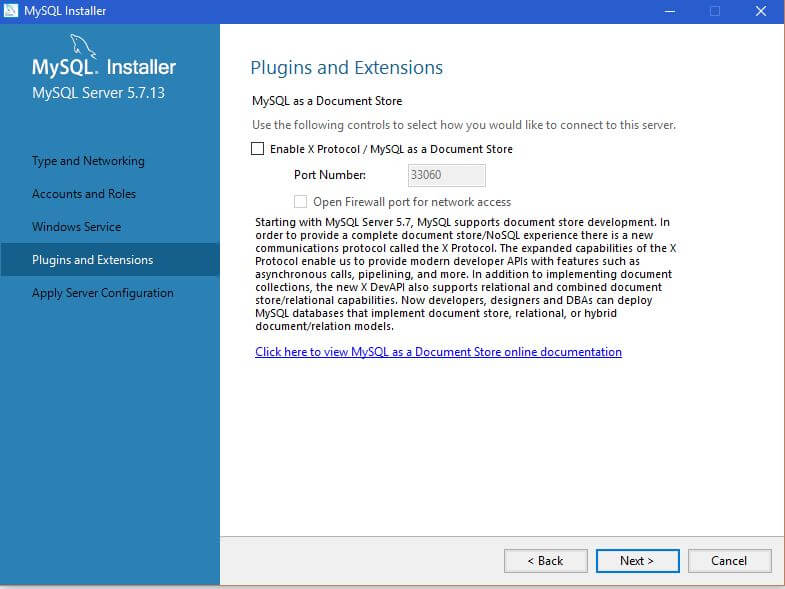
STEP 12: Next, the system will ask to configure Plugins and Extensions. Just keep the default setup and click on the ‘Next’ button as shown below.
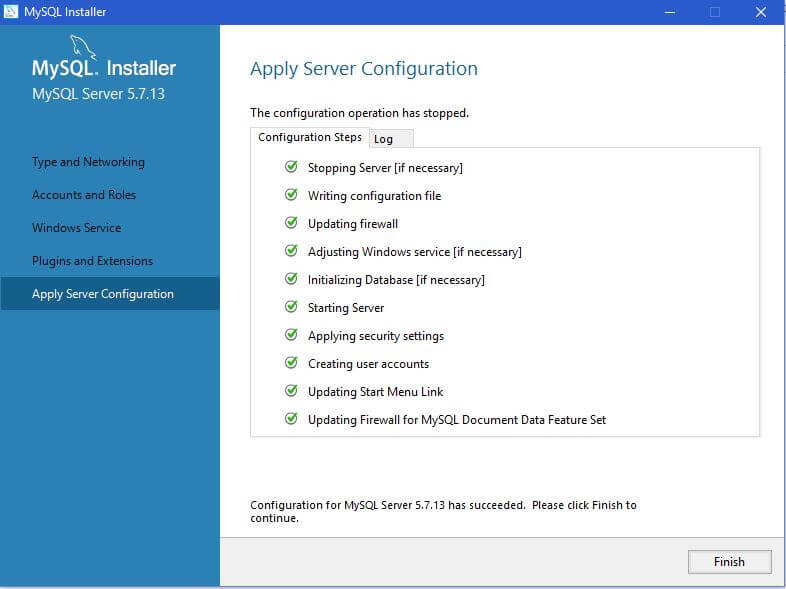
STEP 13: Next, the system will ask to apply server configuration. Just click on the ‘Execute’ button, you will the below screen once the configuration has completed. Click on the ‘Finish’ button to complete the MySQL package installation.
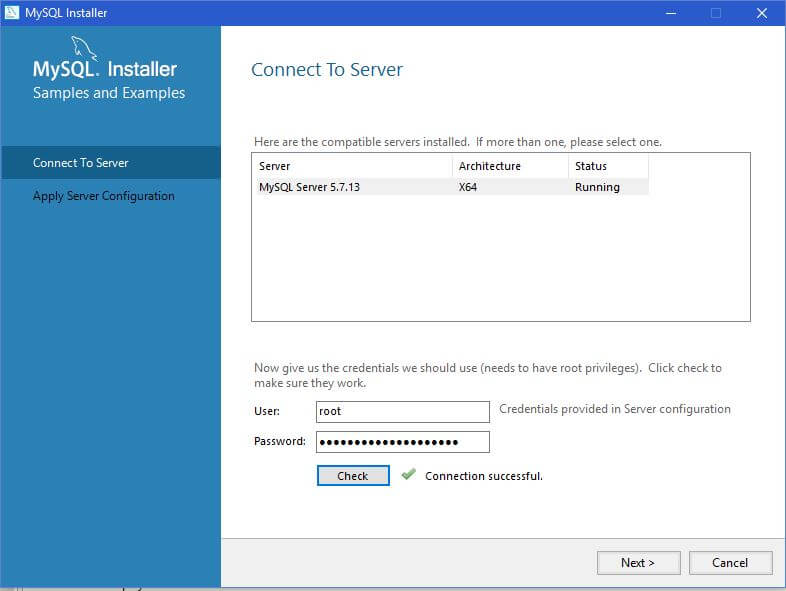
STEP 14: Next, the system will prompt to check the connectivity of the database. Just click on the ‘Check’ button to test the connectivity with the username as ‘root’ and password as ‘softwaretestingclass’. It will display ‘connection successful’ as shown below.
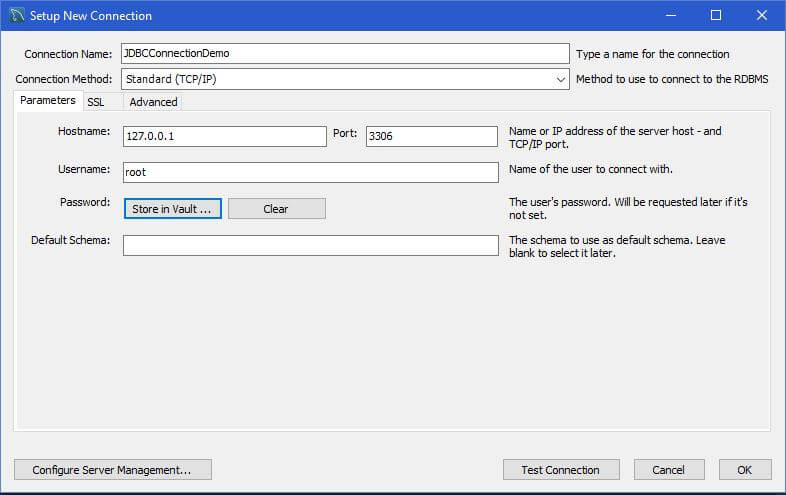
STEP 15: Open the MySQL Workbench and create a connection as shown below. Once entering below details, feel free to click on the TestConnection button to test the database connectivity.
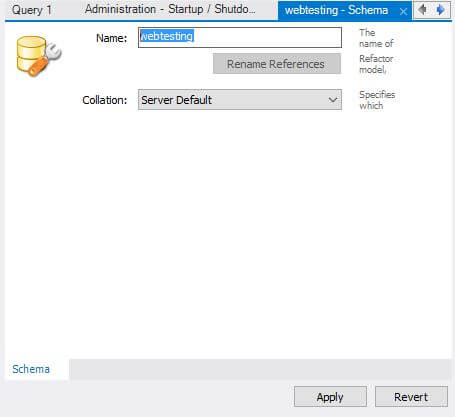
STEP 16: Create a new scheme ‘webtesting’ from the MySQL workbench as shown below. The schema is the database region where all tables are located. After entering the schema name and choosing the ‘Server Default’, click on the Apply button to complete the creation of schema.
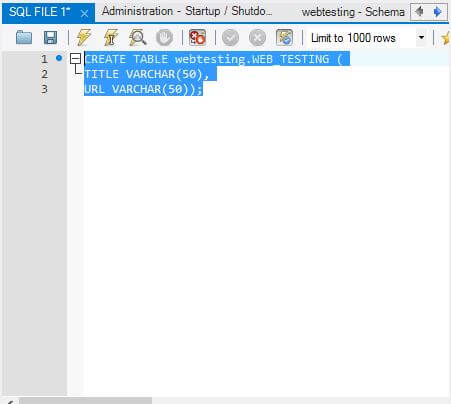
STEP 17: Now create a table WEB_TESTING in the webtesting schema by executing the below script from MySQL workbench. This table has two columns, the first column stores the website URL and the second column stores the home page title.
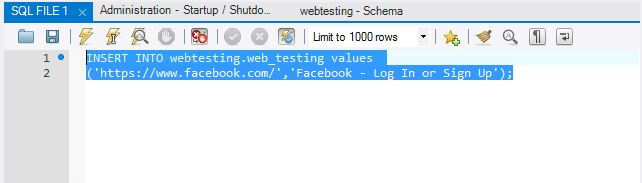
STEP 18: Insert the records into the table after executing the below DB script.
Here we learn how to Install MySQL Database into the machine and then the creation of scheme, table and inserting records into it.
