
In the last tutorial, we learned about Download and Installation of the JIRA tool from the Atlassian cloud. In JIRA, we create a project and a number of issues within the project. The issue in JIRA is something that needs to be worked on. We can assign this issue to the project participants following the workflow and as the work progresses the status of the issue gets changed until it is done or completed.
Below in this tutorial, we are going to learn about creating, editing, estimating, flagging, ranking, transitioning, and viewing an Issue in JIRA.
1) Creating an Issue in JIRA
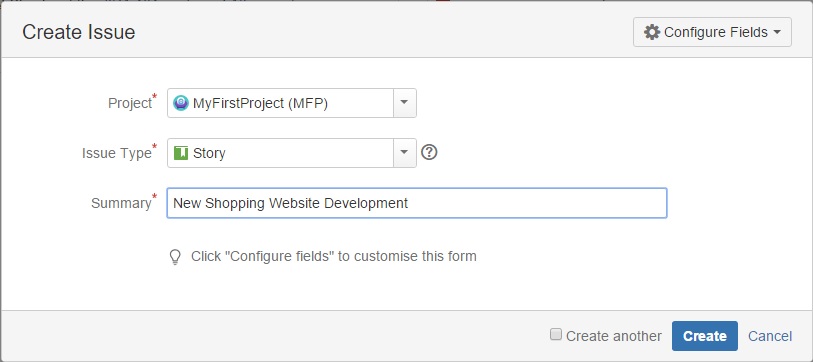
Every task is a user story and to describe a task as an issue in JIRA either click on “Create Issue” or press the c key on the keyboard. It will open up a dialogue box as shown below. From the two dropdown menu, select the project and issue type as Story respectively. The issue type is the story as we are working on a new shopping website development and will create sub-tasks under this main issue story. Also, choose a summary title for this story JIRA. Below are the issue types and descriptions available in JIRA.


Issue Type:
- Task: It is the work that needs to be done.
- Bug: It is the defect that is logged as an issue in JIRA. It may be encountered during UAT testing or post-production defects. A defect is something that impairs or deviates the expected functions of the product.
- Epic: It is used when there is a big project and needs to be split into a number of modules and each module is linked to the main epic JIRA.
- Story: It is the small but complete project description with a number of sub-tasks created and linked to it.
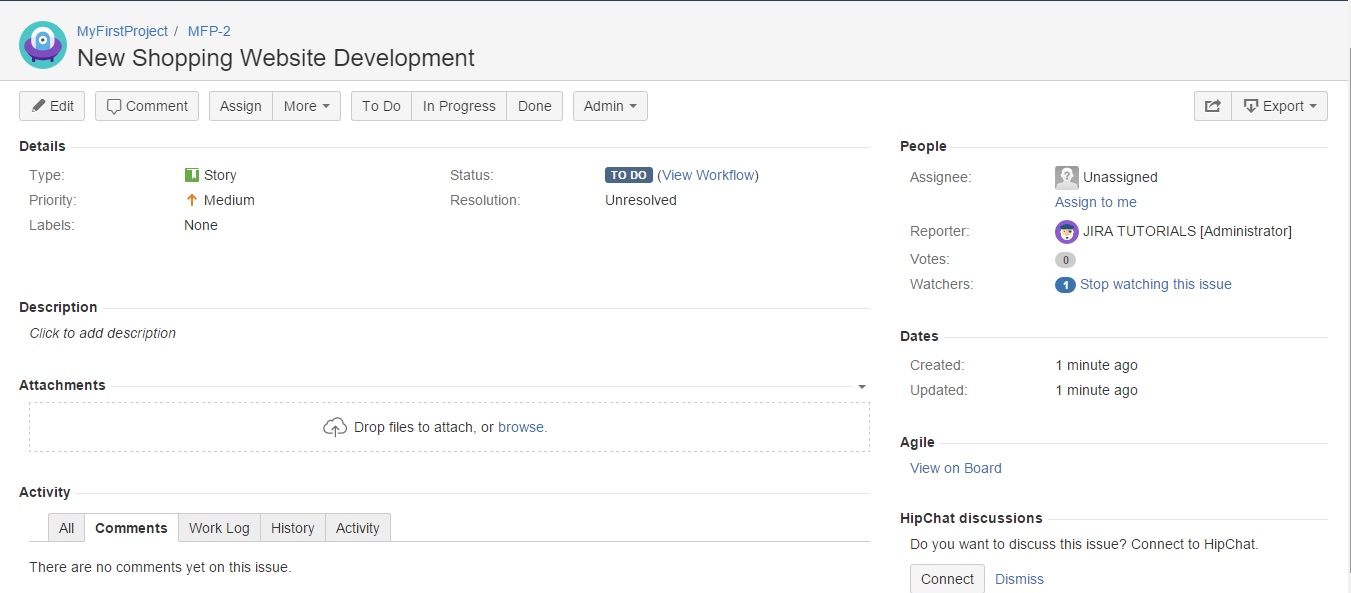
After clicking on the Create button an issue will be created and a unique reference number will be associated with it. This unique reference is the project key and the issue number (here it is MFP-2). The below screenshot demonstrates the created issue skeleton. The next step is to add the available information, attach files, etc. to the original issue.
2) Editing an Issue in JIRA
We can either quickly edit or edit all the fields for an issue.
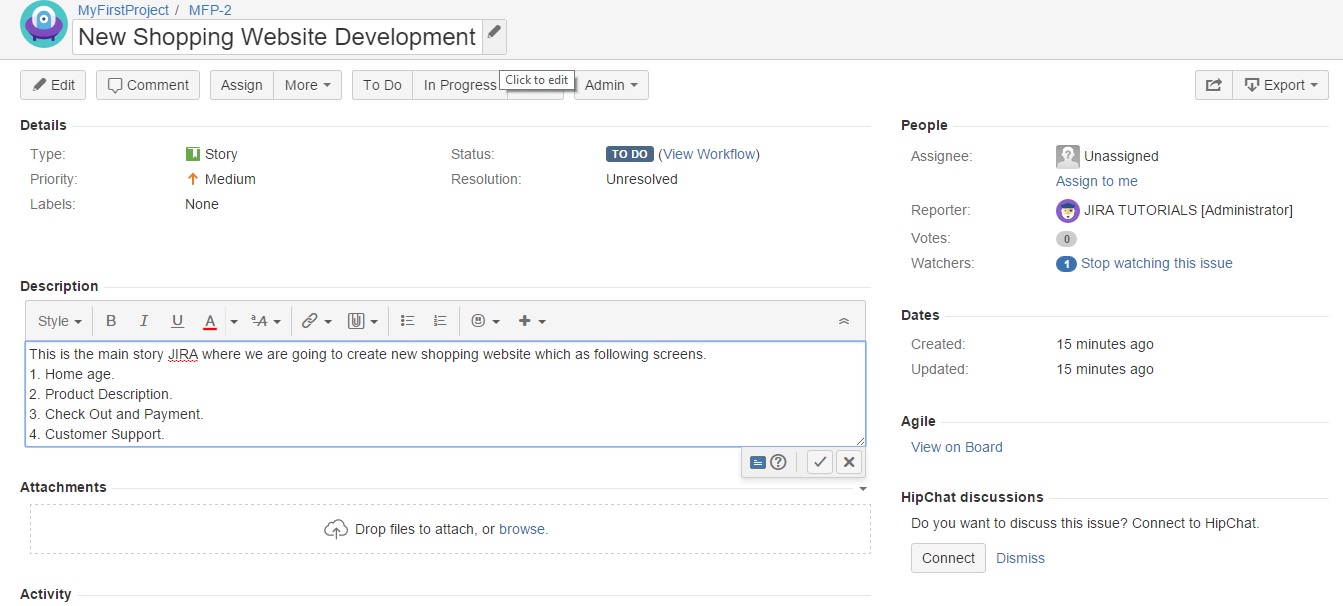
- Quick Edit: We can quickly edit the Summary, Description, other Story Points, and Remaining Estimate fields as shown below. Simply edit these fields and click on the check button to commit changes. Information will be updated immediately without reloading of the screen. Also, we can edit assignee, drag, and drop to upload the files or screenshots, etc.
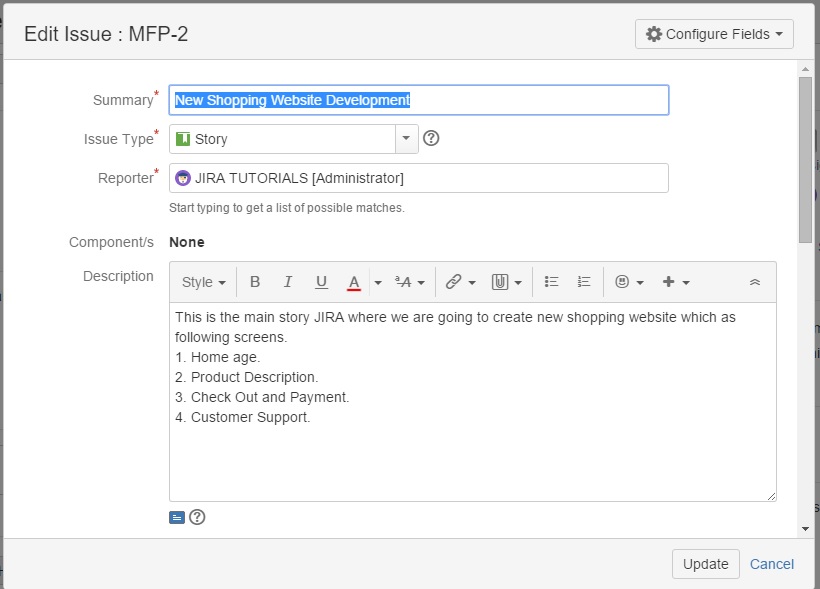
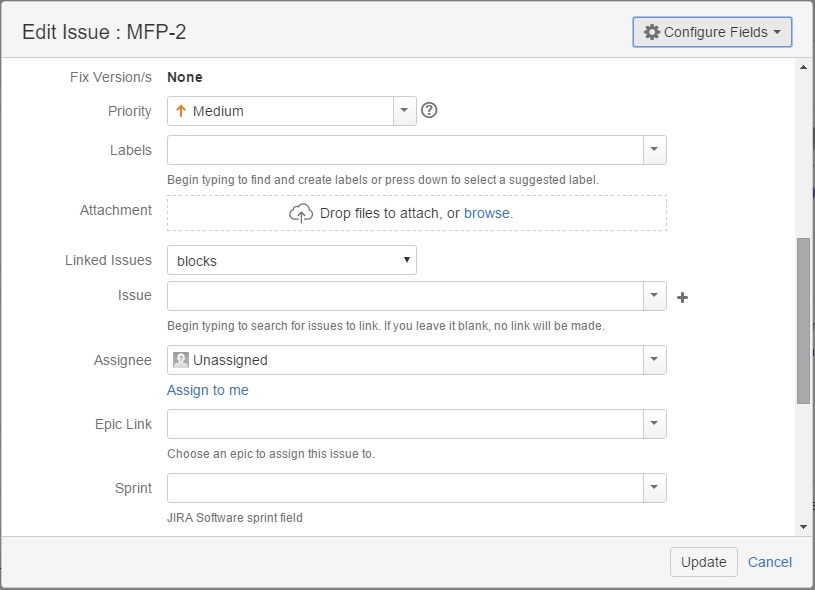
- Edit all the fields: Another way an issue can be edited is by adding details to all fields as shown below on the screen. This can be achieved by clicking on the edit button present on the top left corner. After its click, it will open a screen as shown below. We can edit here all the fields associated with issues such as summary, issue type, reporter, description, priority, labels, attachments, assignee, sprints, comments, etc.
When we scroll down the above screen, more fields will be visible as shown below.
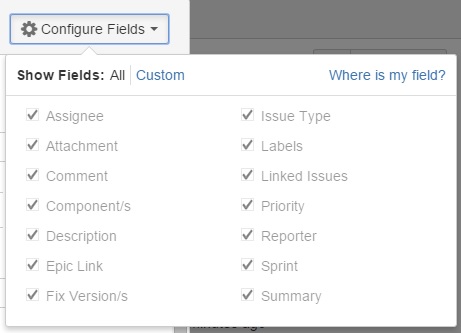
Also, we can limit the number of fields required to describe the issue according to the project need. Click on the configure fields button present on the right top corner as check the fields which are needed as shown below.
3) Estimating an Issue in JIRA
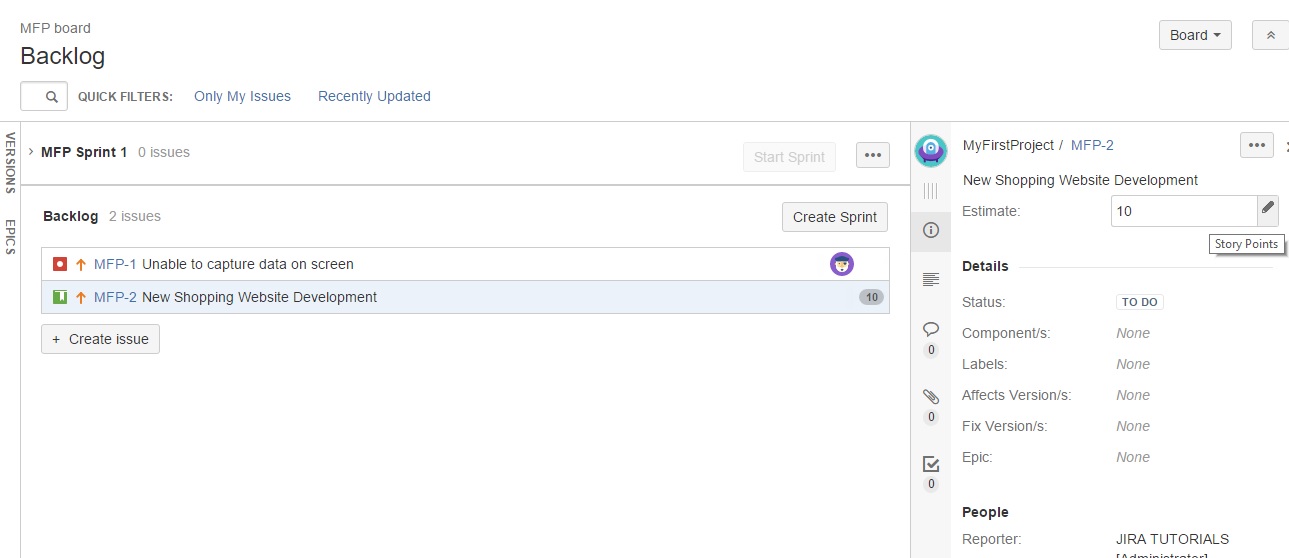
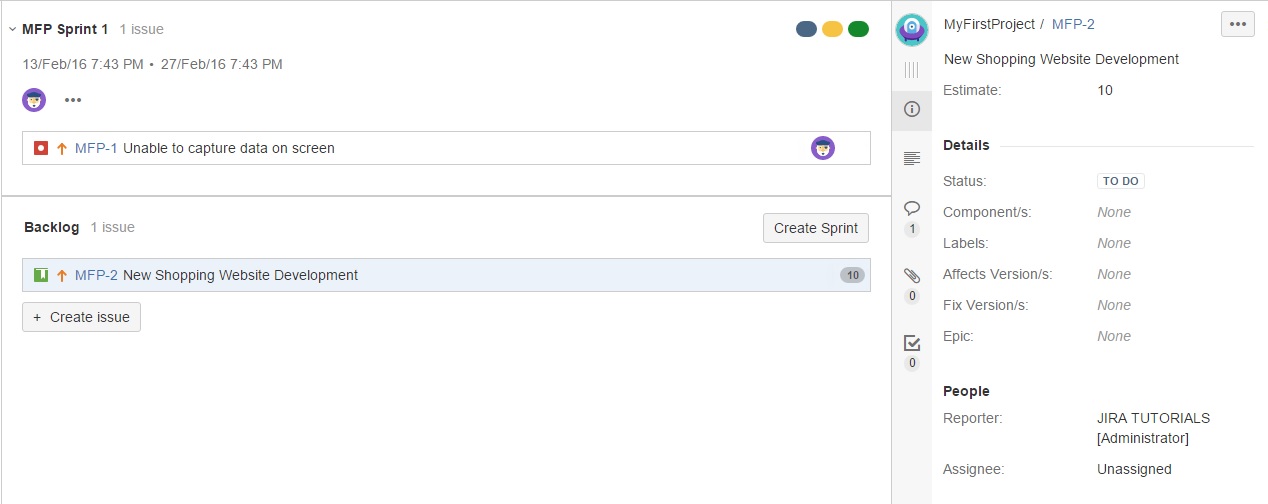
We can view the issue estimation after clicking on the Agile option “View on Board”. It will open a screen as shown below.Here we can see the backlog of all the issues. Click on the issue which will display the estimate and the other details on the right-hand side. Here we can give the estimated time in hours which JIRA will track automatically and start displaying the remaining time left (backlog) to complete the issue.
4) Flagging an Issue in JIRA
Any issue within a project can be flagged to gain the attention of the project participants. It can be added by the following steps.
- Click on the Agile “View on Board”, it will list down all the issues associated with the project.
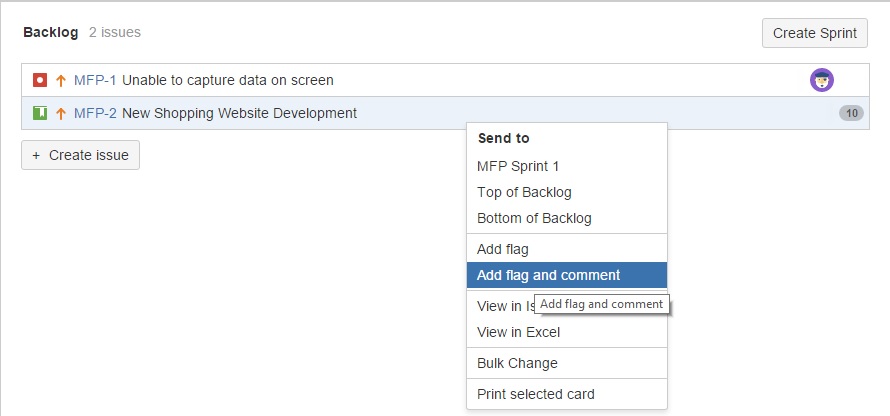
- Right-click on the issue which is required to be flagged.
- Choose the option either just “Add flag” or “Add flag and comment”. If the add flag with the comment is chosen it will open a dialogue window where we can enter the required comment and flag the issue.
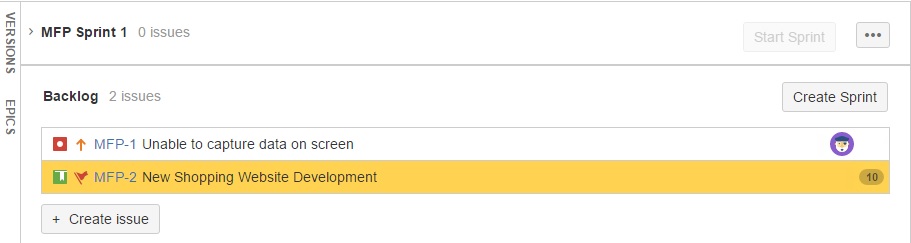
- The flagged issues will be visible as yellow color as shown on the below screenshots.
The below screen shows the flagged issue with yellow color.
If we want to remove the flag from the issue, below are the steps.
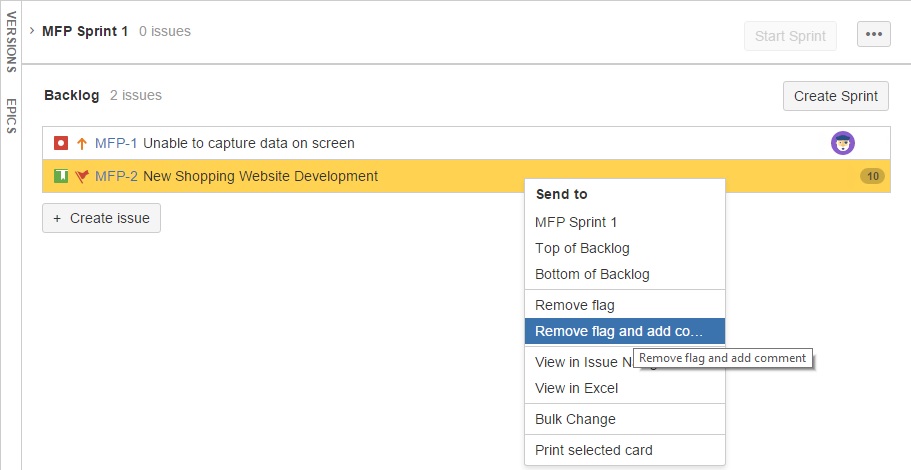
- Right-click on the flagged issue.
- It will show the option as “Remove flag” or “Remove flag and add comment” in the dropdown menu as shown in the below screenshot.
- Choose any of the above options the flag on the issue goes away. The only difference is that the former option does not require any comment to be added however later option will open up a dialogue window where comment could be added.
5) Ranking an Issues in JIRA
Issues can be ranked up or down in the list, below are the steps.
- Click on the Agile “View on Board”, it will list down all the issues associated with the project.
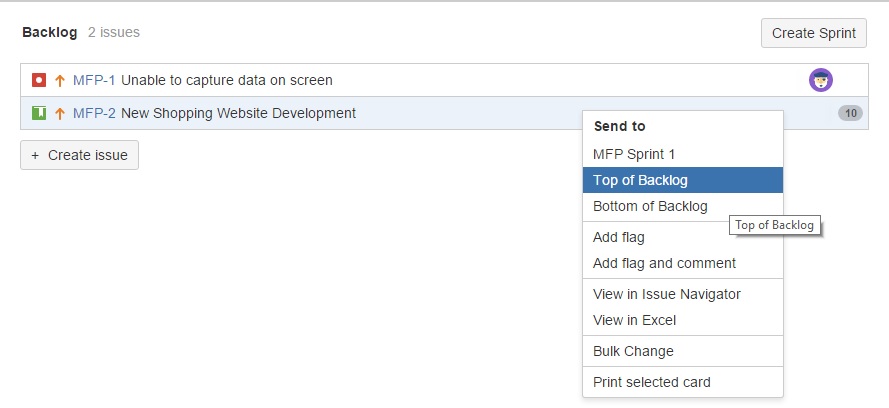
- Right-click on the issue which is required to move up in the list.
- The Dropdown menu will display options as “Top of Backlog” and “Bottom of Backlog”.
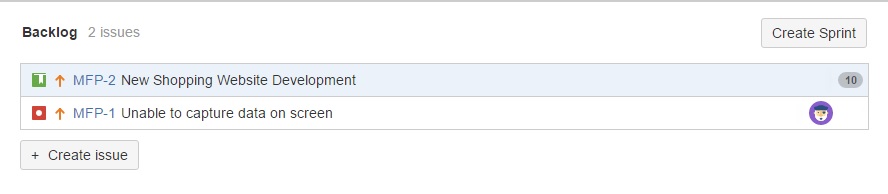
- Select Top of Backlog, it will move up the issue MFP-2 on top of issue MFP-1 as shown in the below screenshot.
The below screenshot shows the issue MFP-2 is raked up before issue MFP-1.
6) Transitioning an Issues in JIRA
Transitioning of the issue is done by drag and drop of the issue. It can be achieved by the below steps.
- Click on the Agile “View on Board”, it will list down all the issues associated with the project.
- Create an active sprint on the issue or Kanban board and as the issue progress status can be altered by drag and drop.
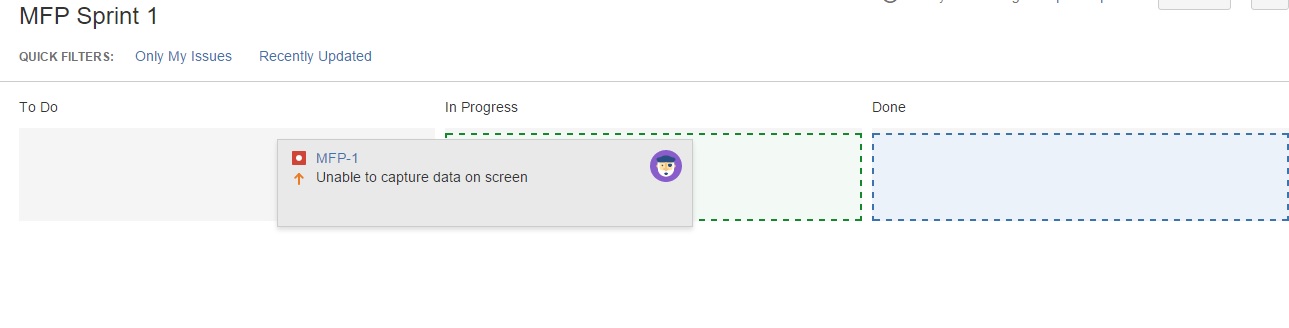
- The below diagram shows that MFP Sprint 1 created to track issue MFP-1 has changed its status from TODO to IN PROGRESS.
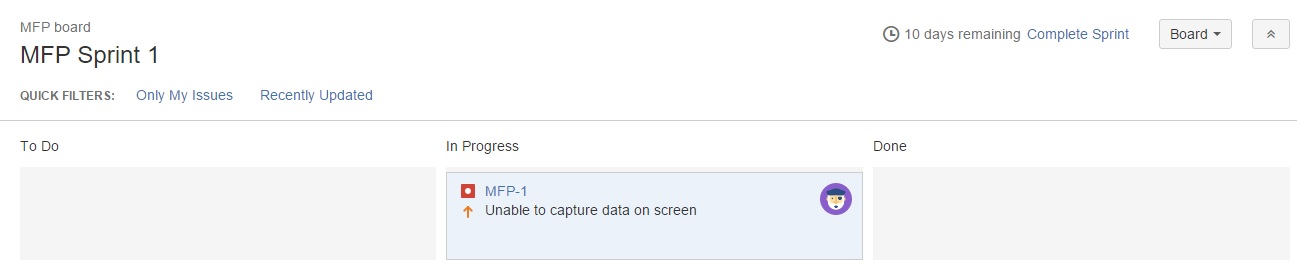
The below screenshot shows the status after the issue is drag and dropped to In Progress status. Similarly, when the issue is done, it can be drag and dropped to the done column which will transition the status as done. This makes the interface of JIRA very simple.
7) Viewing an Issues in JIRA
Viewing the issue is very simple. It can be explained by the below steps.
- Click on the Agile “View on Board”.
- On the new page, it will display the list of all the issues under the heading backlog.
- Click on the issue which will display the description of the issue on the right-hand side of the screen.
- It can be scrolled down and up to view the details of the issue.
Conclusion:
JIRA Tutorial 3 – Working with Issues in Jira. Today we have learned about creating, editing, estimating, flagging, ranking, transitioning, and viewing an Issue in JIRA.
In the next Atlassian JIRA tutorial, we will learn about Issue Management, workflow, and Reporting feature. Do let us know your comments, questions, and suggestions below and stay tuned for the next update.