In the last tutorial, we discussed about the FitNesse tool as the fully integrated standalone wiki and acceptance testing framework. Now in this tutorial of the series, we are going to learn about how to download, install FitNesse and kick start work on the FitNesse server.
Downloading the FitNesse server:
This tool developed in Java programming language. This tool bundled and shipped as a single executable jar file. Easy to download from the website http://www.fitnesse.org/ or directly from the below link.
Download link:
As indicated on the above website, it comes in 2 flavors:
- jar which is for use in Maven or Ivy.
- For the users who just want to run FitNesse by itself. They should download fitnesse-standalone.jar which comes with all dependencies (support libraries) included.
In this tutorial, we are going to download fitnesse-standalone.jar for official release 20151230 which is 4.6 MB in size.
Installing the FitNesse server on machine:
Pre-requsite to install or put standalone jar into work, it requires Java runtime environment (JRE) installed on the machine (laptop or PC). Use below steps to start the server once you successfully download.
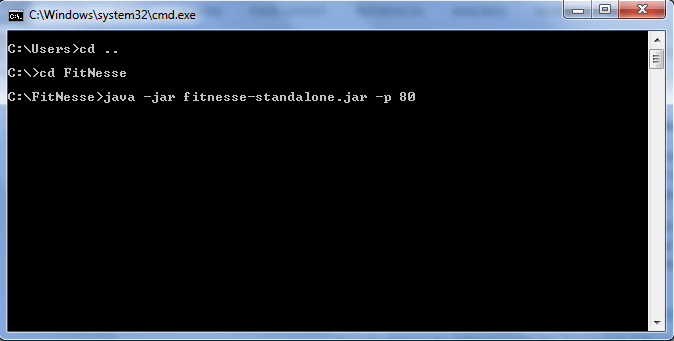
Step 1: Open the windows command prompt and change the directory where the downloaded standalone jar is copied. Next in order to run this jar file execute the following command, refer below screenshot:
java –jar fitnesse-standalone.jar –p 80
This command will attempt to execute the jar file and the web server welcome page will be available at the localhost URL at the port 80. If port 80 is already in use for a machine then it could be changed by giving the appropriate available port number (e.g. –p 8080, etc.)
Step 2: After entering the above java jar executable command, press enter. Jar file will get executed which will start the embedded web server at the URL http://localhost:80/. As discussed earlier the embedded web server is lightweight and simple to use.
It will take quite a while to start the embedded web server as shown in the below screenshot.
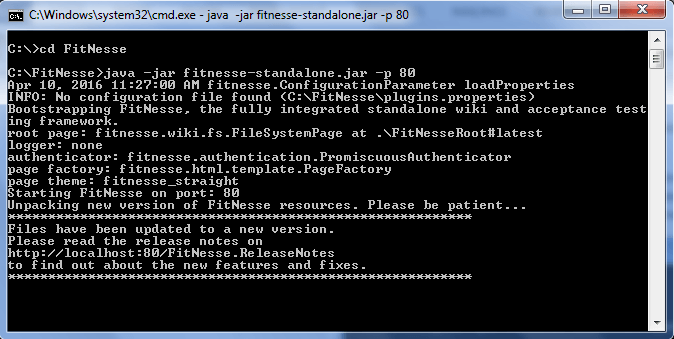
From the logs it is very clear that, it will first try to load the properties from the properties file. If this configuration file is not found then it will skip this step. Next the bootstrap module for FitNesse will get triggered which will create a directory known as FitNesse Root directory. Within this root directory, the system will install all the files from the jar bundle along with the directories on the local machine as shown in the below screenshot.
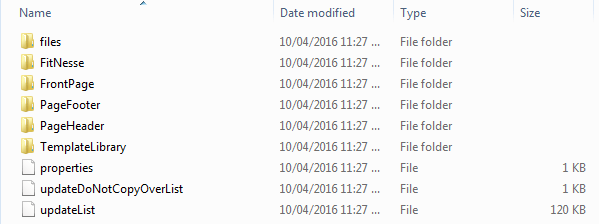
The key directories within FitNesse Root directory include the following.
- FitNesse directory: This directory contains documents related to user guide, release notes and example acceptance tests for FIT and SLIM testing engines. These can be navigated with their unique URLs as described below.
http://localhost/FitNesse.ReleaseNotes for release notes,
http://localhost/FitNesse.UserGuide for user guide, http://localhost/FitNesse.SuiteAcceptanceTests for suite acceptance tests, http://localhost/FitNesse.UserGuide.OneMinuteDescription for a one minute description and http://localhost/FitNesse.UserGuide.TwoMinuteExample for a two minute example.
- FrontPage directory: This directory has the start-up welcome page which is first visible when the embedded web server is started at the localhost of the machine at the desired port.
- Page Footer directory: This directory has the file which display the common contents on the footer section of all the Finesse’s test pages. Therefore if change in contents, the changed contents will be visible at the footer section of all the web pages.
- Page Header directory: This directory has the file which display the common contents on the header section of all the Finesse’s test pages. Therefore if change in contents, the changed contents will be visible at the header section of all the web pages.
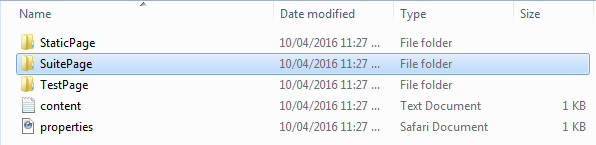
- Template Library directory: This directory further has its own display files along with 3 more directories which has display contents for Static Page, Test Page and Suite Page as shown in the below screenshot.
Finally, it started at the desired port (here port 80). At this point, all documents such as release notes, example acceptance tests, user guides, a one minute description, a two minutes example, etc. are available at the Front page.
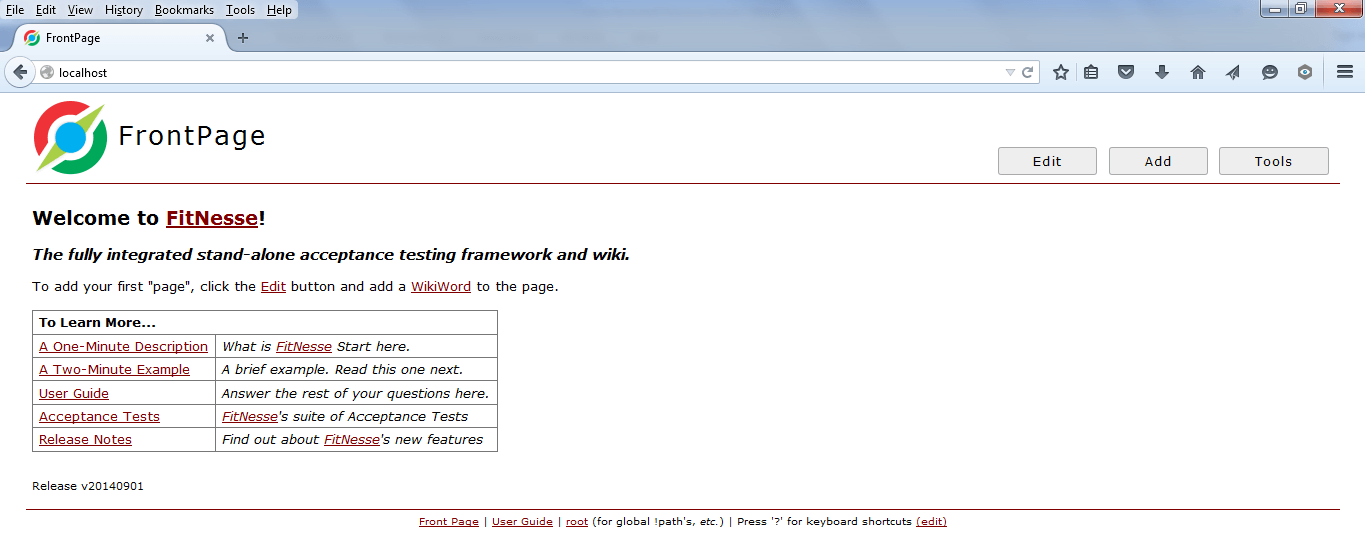
Step 3: Once started the server, the server can accessible over localhost. Open any web browser and enter that URL. Contents of the front page will be visible on the web browser as shown in the below screenshot. As discussed earlier, the front page showing the hyperlinks of the start-up documents such as a one minute description, a two minutes example, user guide, acceptance tests and release notes.
Kick-Start work on FitNesse Server:
At the left top corner of the front page there are three buttons and below are their functional descriptions.
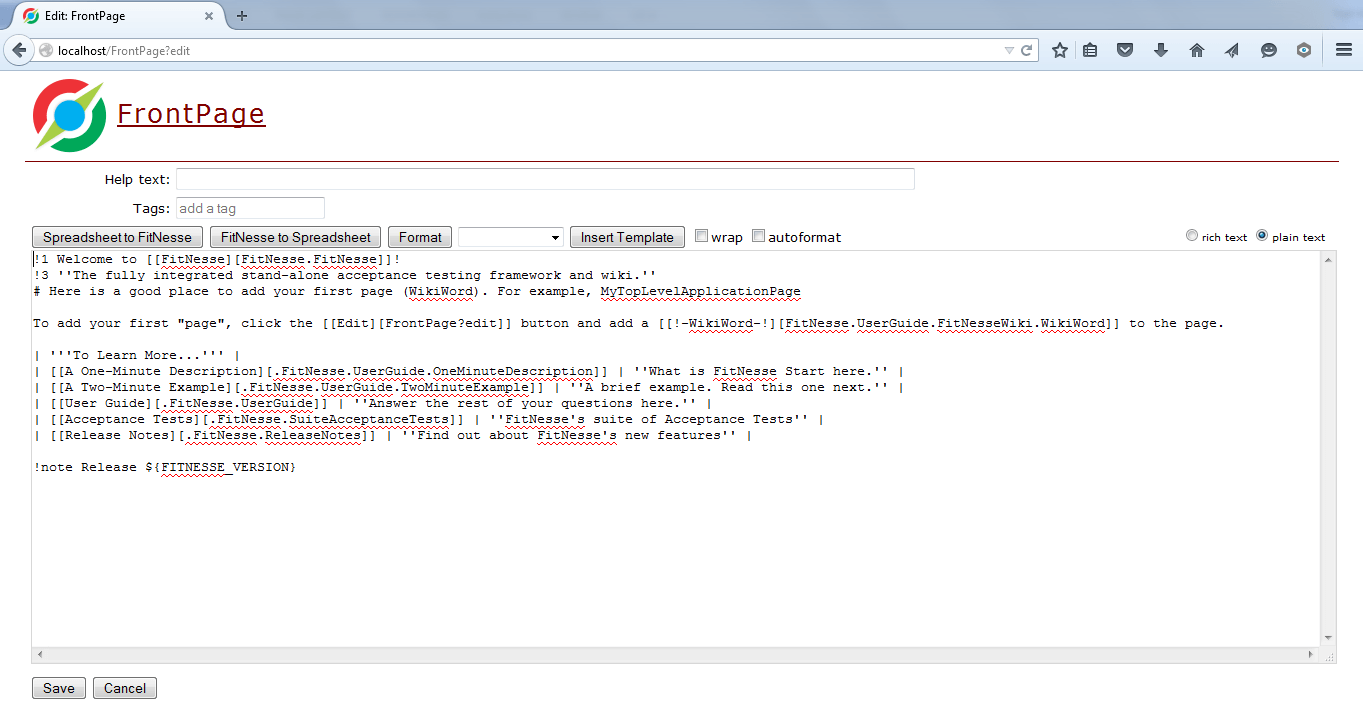
Edit:
On click of Edit button, server will allow to edit the page content. Here we can add, modify or remove the contents from the page, once completed we can click on the save button to save the content. Modified content will be visible immediately and it does not require the stop and start of the web server.
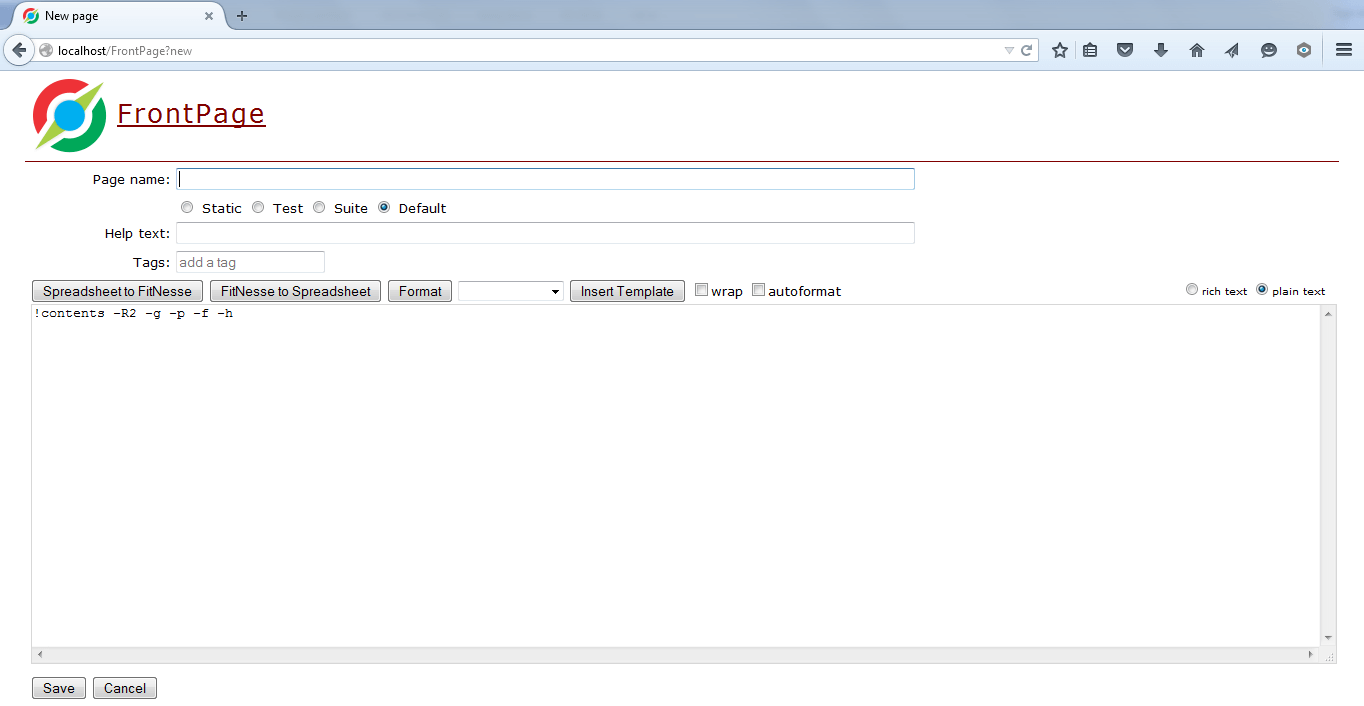
Add:
This Add button allows to add a page into FitNesse. You can provide the Page name by entering the text, select the radio buttons present on the page as Static, Test, Suite and Default through which we can directly define the page type, enter the help text, tags and the formatted contents on the web page. Once completed you need to click on the Save button to save the new page contents and this page will be available immediately. Refer below screenshot for the layout of page.
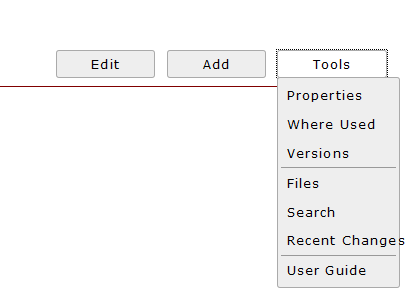
Tools:
On mouse hover over the Tools button, the dropdown menu will be visible showing the options such as Properties, Where Used, Versions, Files, Search, Recent Changes and User Guide.
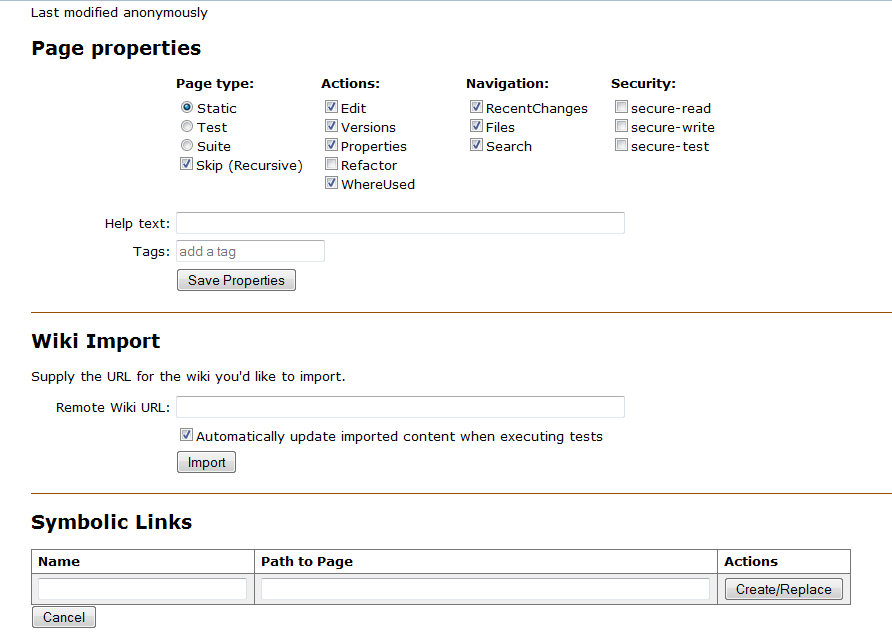
Properties:
On clicking on the Properties button of the drop down menu, below properties page will visible where you can set the properties of the current page on which this button was present.
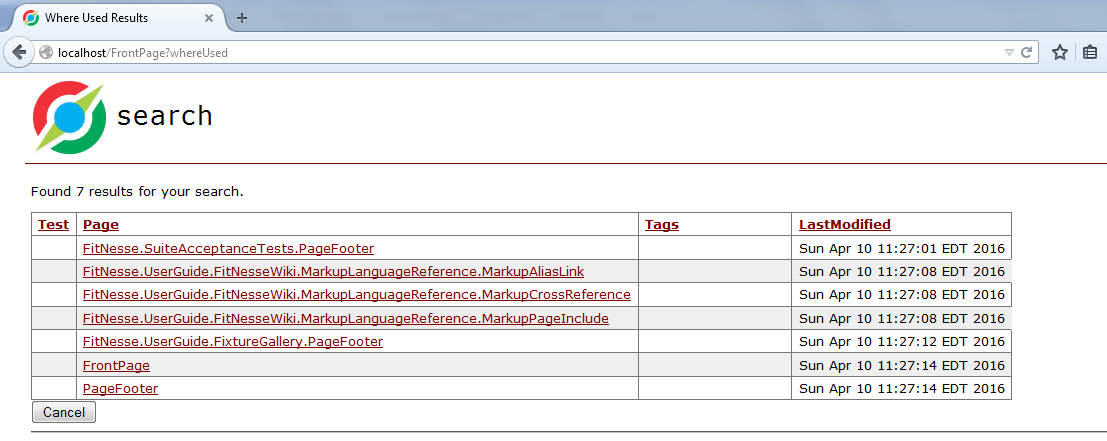
Where used:
when clicked, it will do the search operation and gather the pages where the current page is referring to.
Versions:
It will allow selecting any old version of the page and comparing its contents with the current version of the page.
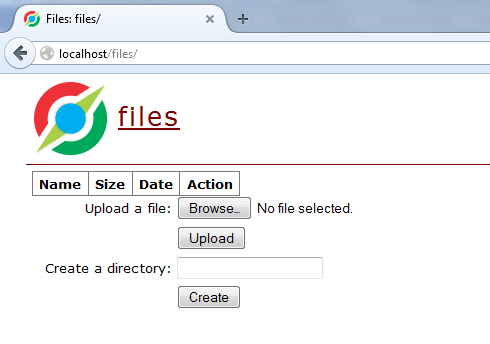
Files:
This feature allows browsing the file from the local machine and uploading it. Also we can create a directory after entering its suitable name and clicking on the create button.
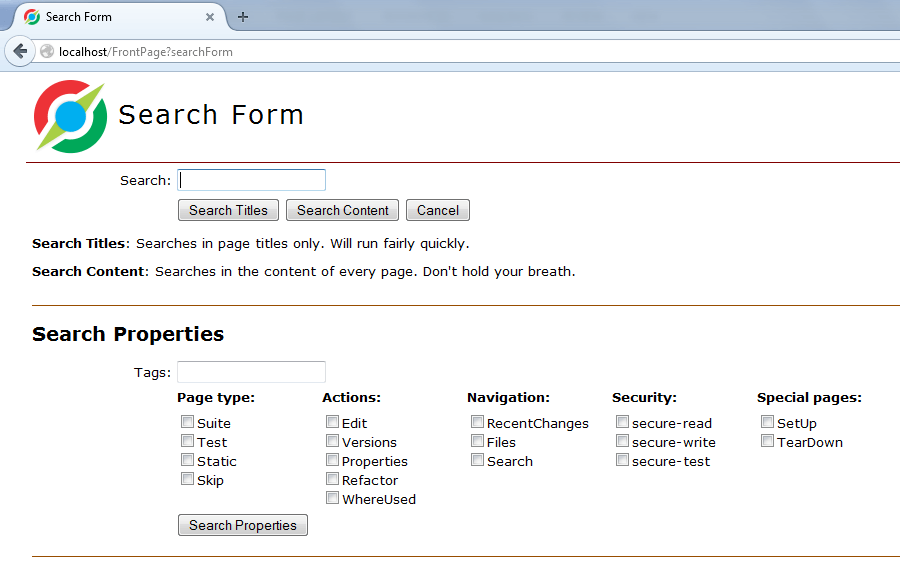
Search:
This feature provides the user to search FitNesse Pages based on their titles and contents. Below is the screenshot for the FitNesse Search form.
Hope you successfully installed FitNesse server and started using.
This article is written by STC team member Aparajita J. We will be more than happy to know any uncovered aspect around installation. Next article in FitNesse tutorial series will be “My first project using Fitnesse”.
If you like this article, consider subscribing to get all Testing Updates in your Inbox for FREE. To get testing tips Click Here.
Feel free to share your view/feedback.

⇓ Subscribe Us ⇓
If you are not regular reader of this website then highly recommends you to Sign up for our free email newsletter!! Sign up just providing your email address below:
Happy Testing!!!
