
Functional Testing, as we know it is a kind of behavioral testing which tests the functional or behavioral aspect of the software application. It is also known as black box testing where the system code is not visible to the tester and it appears to be black box. Tester is only focused on the given set of input parameters and validates the functionality of the system’s output result against expected output given in the requirements. If output result matches with the expected output, the tester declare the test case as passed. This is a brief description on functional testing, now let’s understand how this can be achieved using SoapUI tool. In the last tutorial, we prepared a sample project and learnt about how create Test Suite, Test Case and Test Step within it. Let’s take a quick recap of it and then we move to add assertions to Test Case which is the actual functional testing in SoapUI tool.
Following are the steps to do Functional Testing using SoapUI:

1) Creation of TestSuite, TestCase and TestStep:
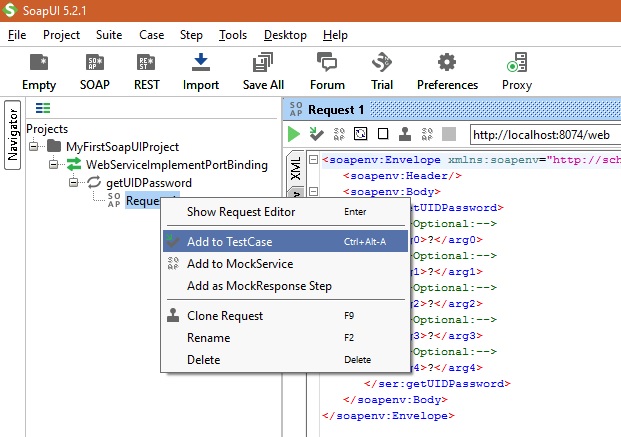
Step 1: Right click on the operation which was imported from the WSDL file and from the drop down window select “Add to TestCase”. It is demonstrated in the below screenshot.
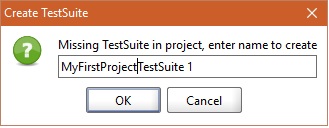
Step 2: After clicking “Add to TestCase”, a small window will be opened to create TestSuite where you can give this test suite a name. Below in the image given name is “MyFirstProjectTestSuite1”.
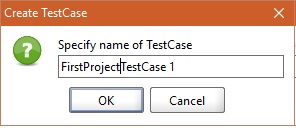
Step 3: After click Ok button of TestSuite window, another window will pop up asking to specify TestCase name. Specify the desired name there and click on the ok button.
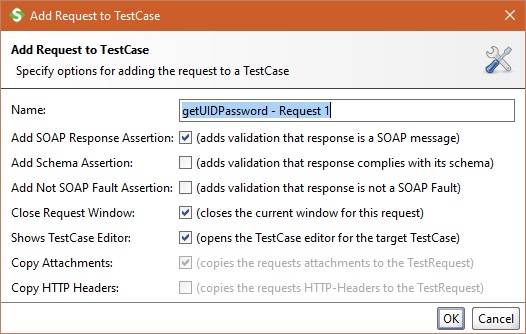
Step 4: Next pop up window will ask you to add WSDL request on which current test case is testing on. Under the “Name:” include the “getUIDPassword – Request 1”. Keep the checkboxes indicated below in the image as checked. This will allow to add SOAP Response Assertion, Close Request window after test and will open the TestCase editor for the target TestCase. Click on the OK button.
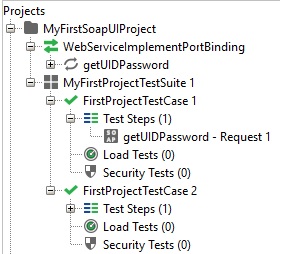
Similarly adding “FirstProjectTestCase 2”, the functional testing files hierarchical structure will look like as shown below in the screenshot.
Till here the testing skeleton is prepared, now we will do the actual functional testing by adding the assertions to the response message from web service in the next step of SoapUI functional testing.
2) Adding Assertions to the TestCase present in test Suite:
Using SoapUI tool, the response message is validated by the use of Assertions. Below are the assertions that are possible in SoapUI. Let’s understand these one by one.
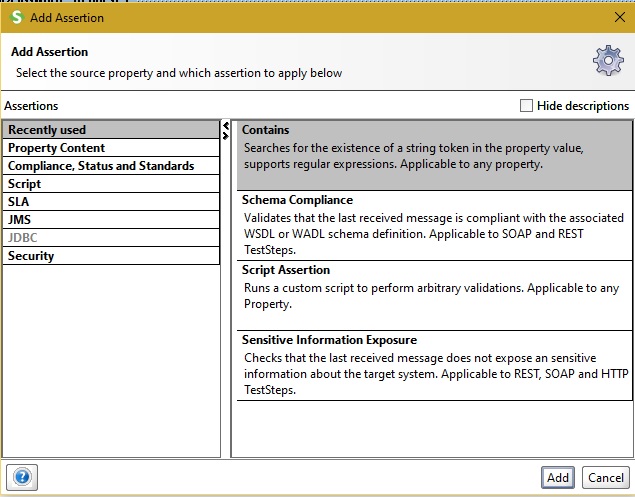
- Simple Contains: Adding Assertion to the Test Case is very simple, just click on the Assertion shown as “+” at the bottom of the Test step. Below popup window for assertion will be visible. On this select “Contains” assertion and click “Add” button to proceed.
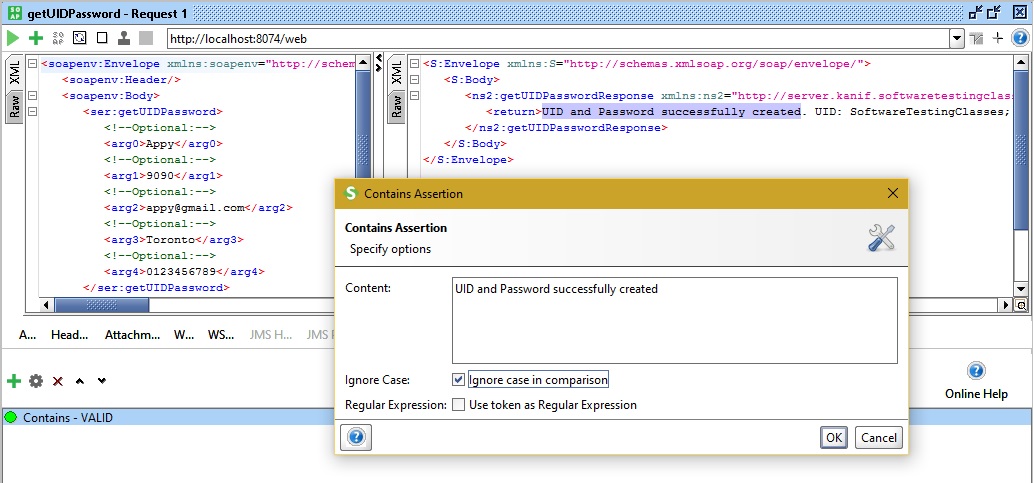
Next, add the text “UID and Password successfully created” which is required to be functionally present in the response message. Check the checkbox for “Ignore case in comparison” which will ignore the case of the text received in response as XML message. Finally click OK button to add the assertion to the TestStep.
- Simple Not Contains: As we added the Contains Assertion in the previous step, in the similar way, we may add Assertion as “Not Contains”, which will test that the response text in message under test should not be present in the response SOAP XML message.
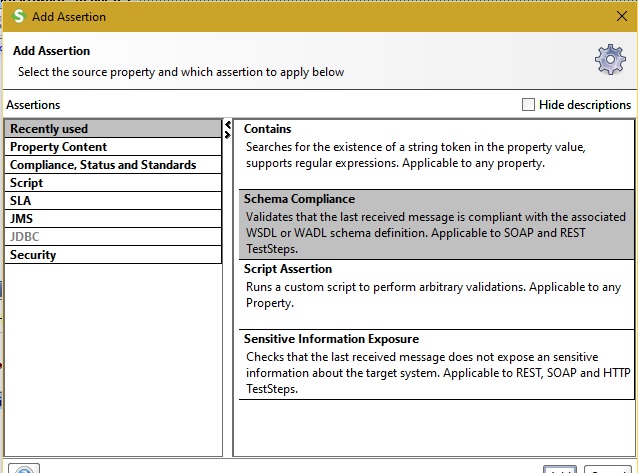
- Schema Compliance: This Assertion can be added to test the response message against any associated WSDL or WADL schema compliance. Steps are the same as we had discussed above. Click to add assertion to the TestStep, next click to add “Schema Compliance”, SoapUI will look up for any associated WSDL or WADL schema compliance and will add it to validate the response XML message.
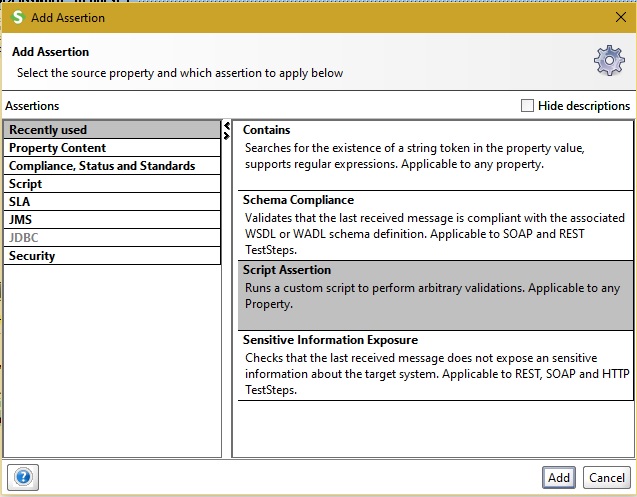
- Script Assertion: This assertion runs a custom script to perform arbitrary validation and it is applicable to any property. Steps to add this assertion is similar to what we discussed other assertions just now. Screenshot is given below.
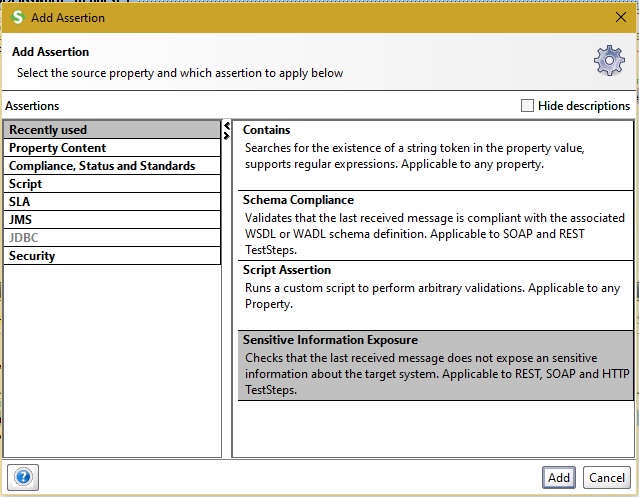
- Sensitive information Exposure: This is the assertion which could be added to test step to make sure that in the response message there is no sensitive information exposure like user id, password, etc. This assertion will fail, if the response message has any of such information or token is present in the XML response message.
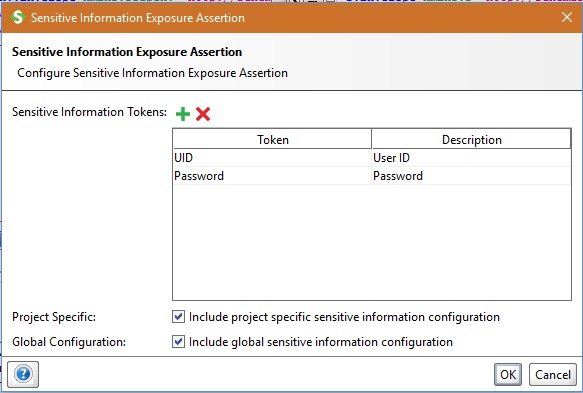
In the above assertion, we want to put a check on the response message that UID and Password tokens are not present in the response message. As we know both tokens are there in the response message therefore this test should fail.
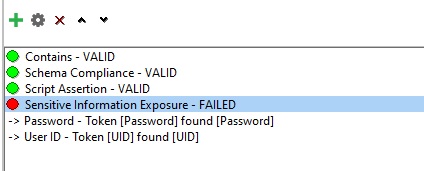
Let’s run the test case to check which all above assertions created has passed or failed.

Quick Explanation:
- Contains assertion is valid and green as we were checking for string “UID and Password successfully created” and it is present in the response message.
- Schema compliance is valid as the WSDL schema associated with the current test is compliant.
- Script Assertion is valid as it is passing the scripts test associated with the test.
- Sensitive Information Exposure Assertion has failed, this is because we were checking for the sensitive tokens “UID” and “Password” should not be present in the response message. Since they were present in response and hence the Assertion has failed.
Other Assertions:
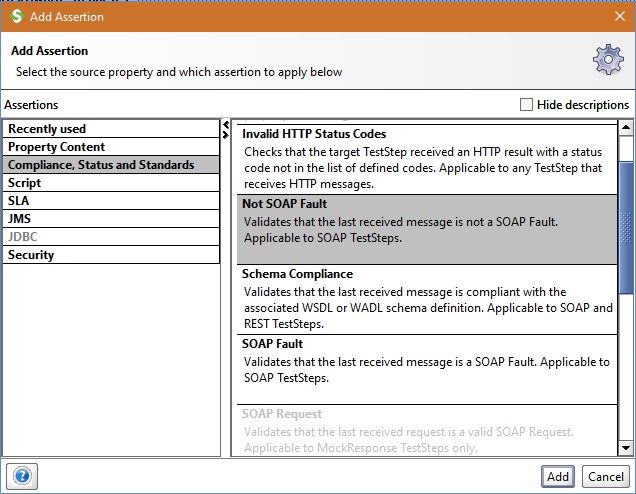
- SOAP Fault: This assertion will be visible under “Compliance, Status and Standards” menu. This assertion validates that the last received message is not a SOAP Fault. It is applicable to TestSteps.
- Not SOAP Fault: This assertion is present in the same menu which validates that the last received message is a SOAP Fault. It is applicable to TestSteps.
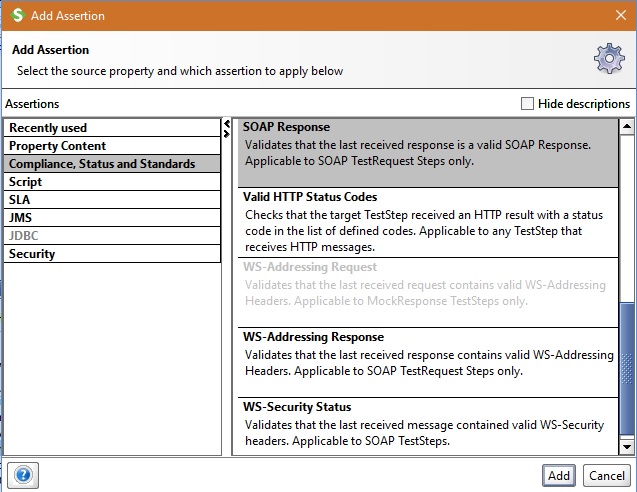
- SOAP Response: SOAP Response assertion validates that the last received response message is a valid SOAP Response or not.
- Valid HTTP Status Codes: This assertion checks that the target TestStep received an HTTP result with a status code in the list of defined codes. It is applicable to any TestStep that receives HTTP messages.
- WS-Addressing Response Assertion: It validates that the received response contained valid WS-Addressing headers or not. If present assertion will pass, otherwise fail.
- WS-Security Status Assertion: It validates that the last received message contained valid WS-security headers or not. If present assertion will pass, otherwise fail.
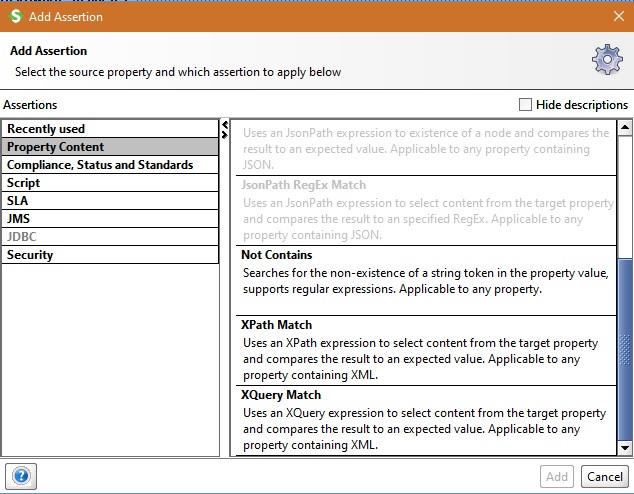
- XPath Match: This assertion uses an XPath expression to select content from the target property and compress the result to an expected value. It is applicable to any property containing XML.
- XQuery Match: This assertion uses an XQuery expression to select content from the target property and compares the result to an expected value. It is applicable to any property containing XML.
Above listed assertions are the assertions which are very frequently used as a part of functional test in SoapUI tool. There are more assertions which can be explored using the SoapUI and its Pro version.
3) Run the TestSuite:
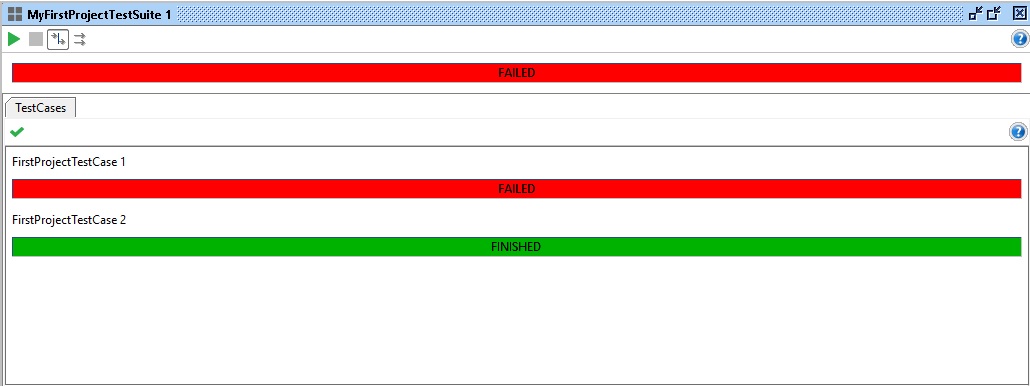
Once all required assertions are added into the TestSteps of the respective Test Cases under the Test Suite run the complete Test suite. Below screenshot indicates that the TestCase 1 has failed while the Test Case 2 has passed, so the overall TestSuite has failed. This is because the assertion “Sensitive information Exposure“ has failed as “UID“ and “Password“ tokens are present in the response message.
Conclusion:
Hope this quick tutorial will help you to execute your Functional Testing using SoapUI tool. Our team is here to help you guys understand, learn and resolve your queries. Feel free to ask your queries in the comment below. You can also share your experience in comment with all testing professionals.
If you missed any article on SoapUI then checkout Full SoapUI Tutorial Series here.


⇓ Subscribe Us ⇓
If you are not regular reader of this website then highly recommends you to Sign up for our free email newsletter!! Sign up just providing your email address below:
Happy Testing!!!