In the previous tutorial, we learned about How to test Mock services using SoapUI. Today we are going to learn how to do security testing using SoapUI. We will be using our existing SoapUI project as “MyFirstSoapUIProject1”, to demonstrate the security test using SoapUI tool. But before we can start, let’s understand the security testing definition.
Security testing is done to unveil the flaws and security gaps present in the security mechanism of the software system that protects data and other sensitive information. It is supported by SoapUI to ensure authorization and authentically in request and response model of web services and web APIs.
How to add new security test using SoapUI:
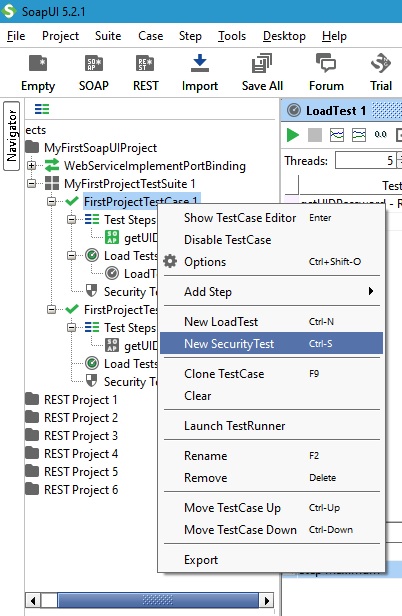
Step 1: Right-click on the TestCase “FirstProjectTestCase1” in the navigator, a drop drown menu will pop up from which select and click “New SecurityTest” as shown in the screenshot below.
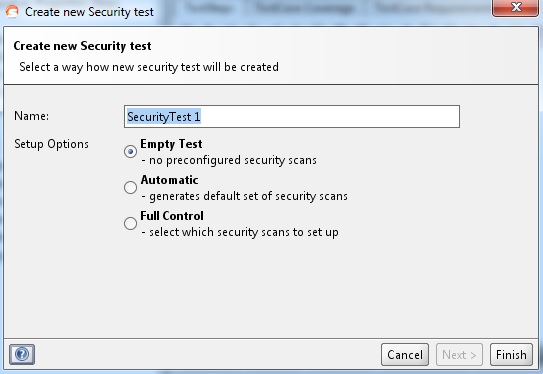
Step 2:After selecting the “New Security Scan” option, it will open a dialogue window with setup options of Empty Test, Automatic, and Full control. Each of these setup options do the following. Empty Test: It will create an empty security test and you have to manually select and configure desired security test scans.
- Automatic: It will create the default setup which has common security scans and default assertions.
- Full Control: I provide the full control of which security scans to add and how to configure them initially.
- We are going to select the Empty Test so that we can add desired tests later.
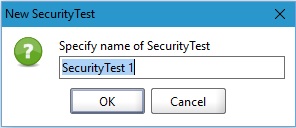
Step 3: This will open a dialogue window asking you to specify the name of the SecurityTest. Either enter any customized name that you think of or just use the default one as shown below in the screenshot. Click on the OK button to proceed to add the security test node into the navigator.
Step 4: After the click of the OK button, the security test console will get opened as shown in the below screenshot which is empty and has no security scans in it. In the next step, we are going to add the boundary value security scan.
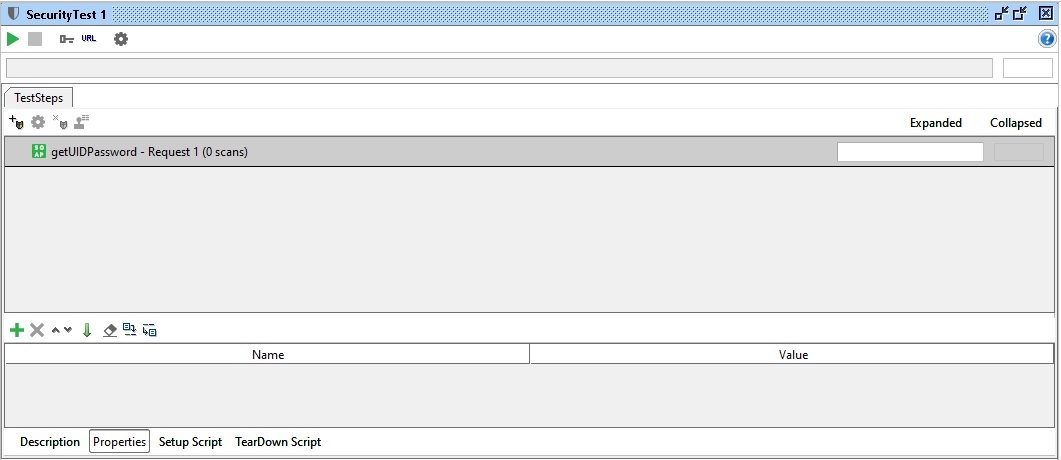
Step 5: On the security test console click on the”+” button present just below “TestSteps”, it will open a drop-down menu that has all the security scans that can be added to the security test. To proceed with any of these scans just select it and click on the OK button to add it to the current security test.
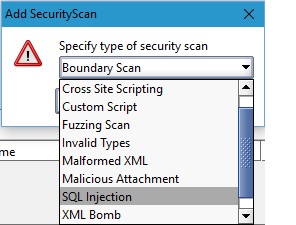
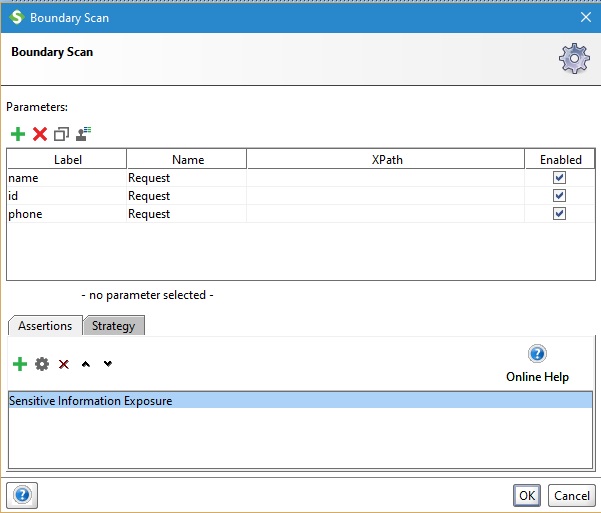
Step 6: Click on the Boundary Scan and click on the OK button. It will open below dialogue below where you can add the actual assertion by clicking the green “+” button and choosing the appropriate assertion as follows.
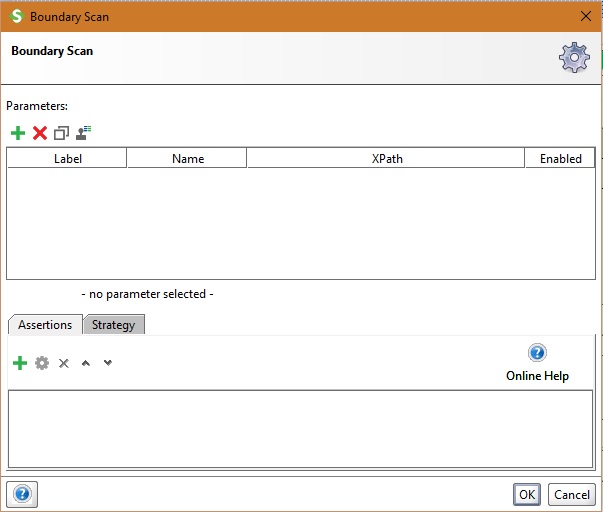
Step 7: In the above window dialogue, you can add the parameters and assertion to proceed with the required security test. Again click on “+” to add the assertions which we discussed earlier. Below dialogue box shows the type of assertions that could be added.
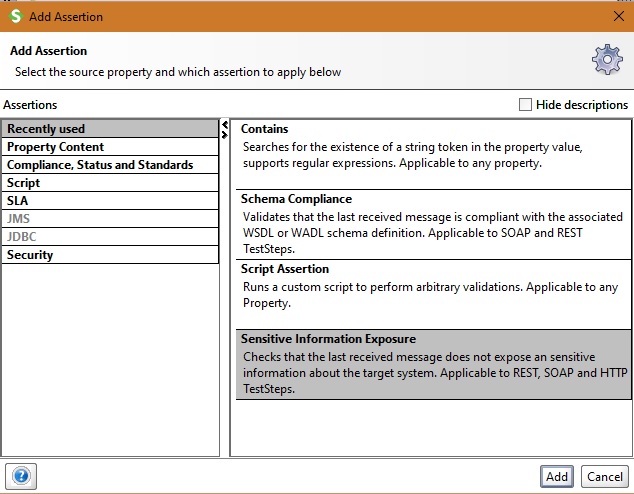
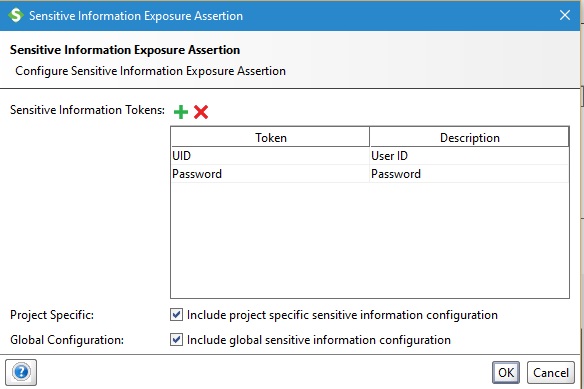
Step 8: Select “Sensitive Information Exposure” to check for tokens UID and Password which could be added by the “+” button. Click OK to complete the adding of this assertion.
Step 9: Add the required parameters for boundary-scan as shown in the below screenshot, click OK to complete it.
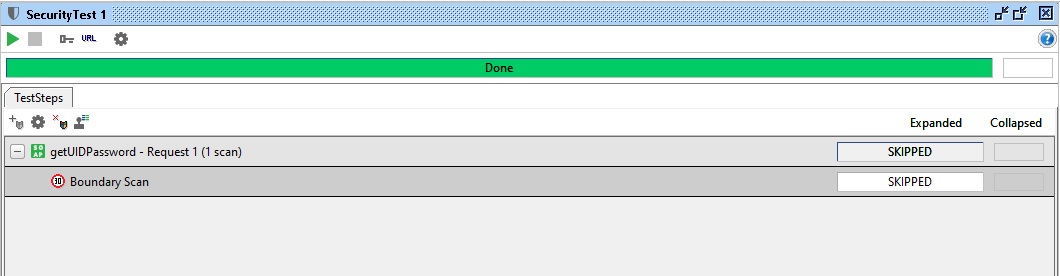
Step 10: Once the boundary scan is set, click on the green arrow button at the left corner to start the security test. The below screen represents the result of the Boundary-scan security test once it is completed. In the Pro version, you may get the detailed PDF Report.
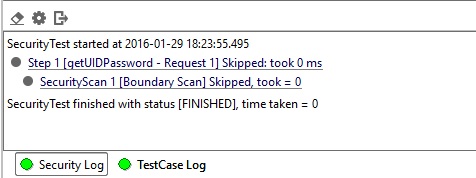
Step 11: Check the security log, after clicking on the Security Log button present on the left bottom corner of the SoapUI tool. This is shown in the below screenshot.
So far in this tutorial, we have learned to create the security test and add the security scan in it with the example of boundary-scan. Let’s understand all scans present under security testing in SoapUI.
- SQL Injection: SQL Injection scan in SoapUI exploits bad database integration coding. It scans and detects for any potential SQL injections that could harm the database, thus securing the database.
- XPath Injection: XPath Injection exploits bad XML processing inside the web service as a target.
- Boundary Scan: Boundary-scan checks for the bad handling of the values for the web service which are outside the range definition.
- Invalid Types: This type of security scan checks and exploit invalid input data.
- Malformed XML: This type of security scan checks and exploit bad handling of invalid XML which may be either present on the server or in web service.
- XML Bomb: The term XML Bomb is used as it does the security scan for the handling of malicious XML requests which may corrupt the entire web service on the server or steal sensitive information.
- Malicious Attachment: This security scan exploits the bad handling of the attached files.
- Cross-Site Scripting: This type of security scan finds any vulnerable cross-sites scripts. It scans and detects for any exposure of service parameters in the structured messages during cross-site scripting.
- Custom Script: This type of security scan permits us to use a script for preparing custom parameters fuzzing values.
Other SoapUI Security Scan features:
- Stack Overflow: SoapUI has the capability to scan and detect for huge documents within the message that could cause a stack overflow.
- Lifesaving Scans: SoapUI has the capability to do a number of scans and ensures the security of web services and web APIs. These scans are vulnerability scans, fuzzing scans, and boundary scans to mitigate the potential erratic behavior of web services.
We all know how much importance should be given to security testing and how important is to check each and every aspect of it. If any sensitive information is leaked or hacked then the loss of business and reputation cannot be regained easily. Testers should understand each security scan mentioned above in detail and should be able to add their test cases at appropriate places.
You can also try and select “Automatic” and “Full Control” options under the “Create new security test” window to see what they have to offer and how it can be used for your project. Hope this tutorial helped you in understanding the basic security testing in SoapUI.
⇓ Subscribe Us ⇓
If you are not regular reader of this website then highly recommends you to Sign up for our free email newsletter!! Sign up just providing your email address below:
Happy Testing!!!
