In this tutorial, we are going to learn how to test RESTful Web Services using SoapUI tool. In this tutorial, we have already developed a sample project on RESTful Web Service. Therefore REST Testing using SoapUI is demonstrated below.
Let’s understand the steps to create a REST Project in SoapUI:
Step 1: Before opening the SoapUI console make sure your RESTful web service project is properly deployed on the tomcat web server which was created during this tutorial series. To check the web service project is working smoothly, please check on the below link response.
HTML file:
http://localhost:8085/webservice-project-restful/
XML REST Response:
http://localhost:8085/webservice-project-restful/rest/account
Plain text REST Response:
http://localhost:8085/webservice-project-restful/rest/plaintext
HTML REST Response:
http://localhost:8085/webservice-project-restful/rest/htmltext
All of the above links will be used to demonstrate RESTful web service during this tutorial. Let’s see REST Testing using SoapUI tool.
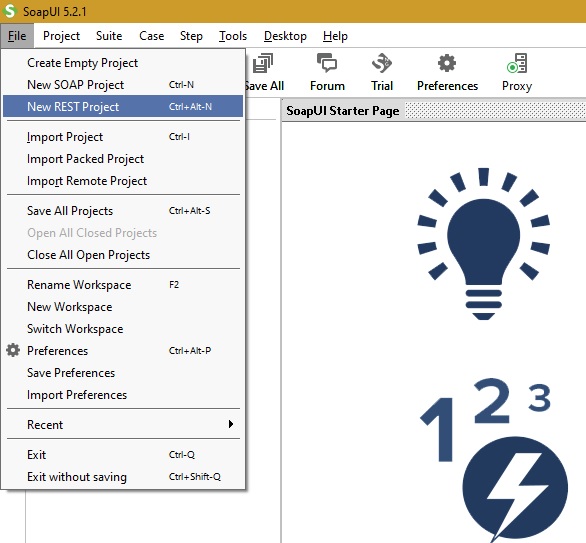
Step 2: Click on the File and from the drop-down menu select “New REST Project”. Alternatively, use the shortcut as Ctrl+Alt+N. The Dropdown menu is demonstrated below in the screenshot image.
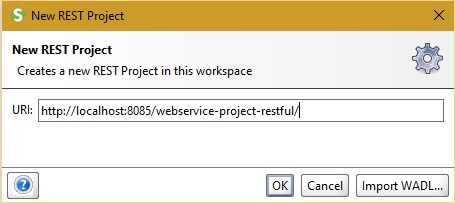
Step 3: After clicking on the “New REST Project”, it will open a pop-up window asking for a web URL for RESTful web service as New REST Project. Enter the URL as indicated below. This the base URL for index.html.
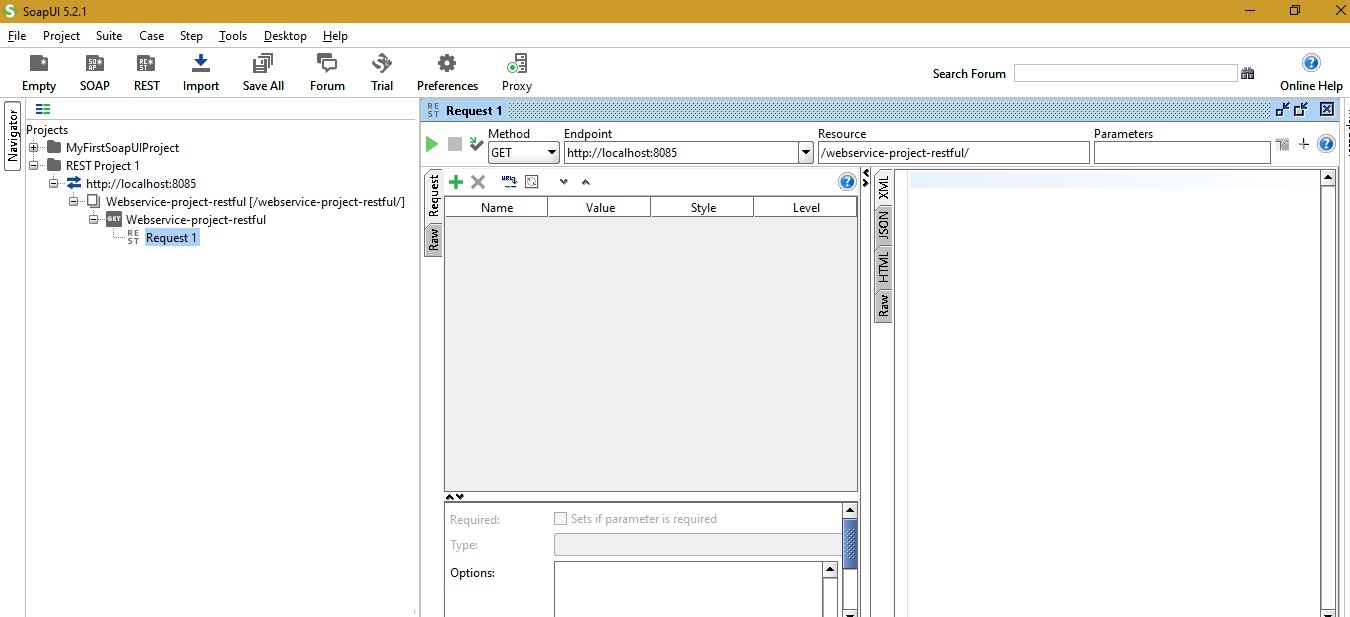
Step 4: After clicking the OK button, Request 1 window will get opened which has left pane which is request pane and the right pane for a response. We can simply trigger the response test by clicking the green arrow button at the top left corner of the screen. This is demonstrated below in the screenshot.
Step 5: Right pane will show the XML response as shown below upon the click of the green arrow button.
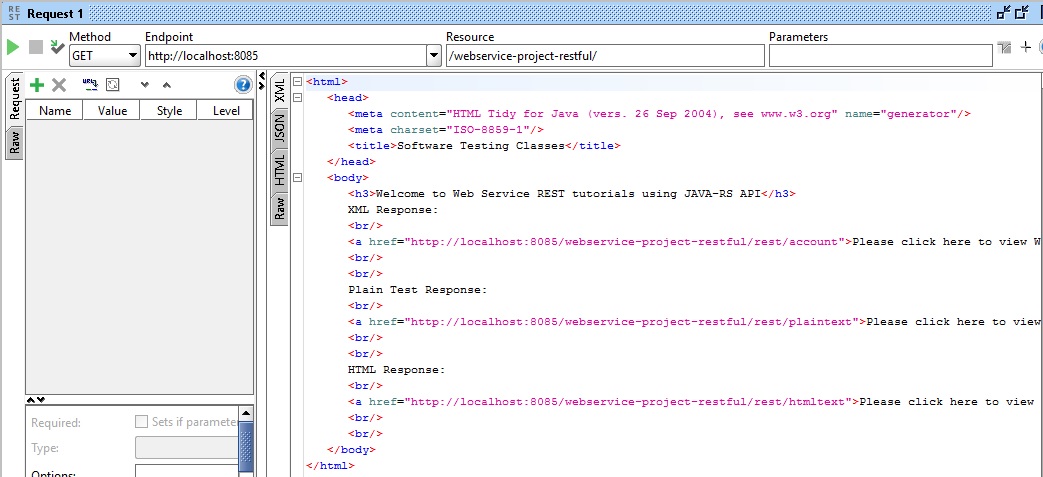
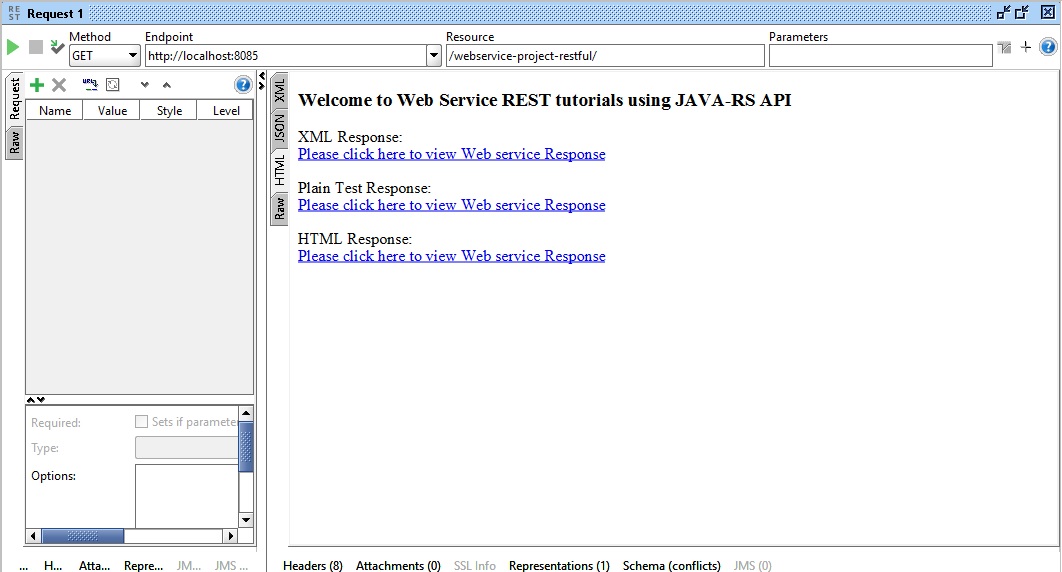
Step 6: Right pane will show the HTML response as shown below upon the click of the green arrow button.
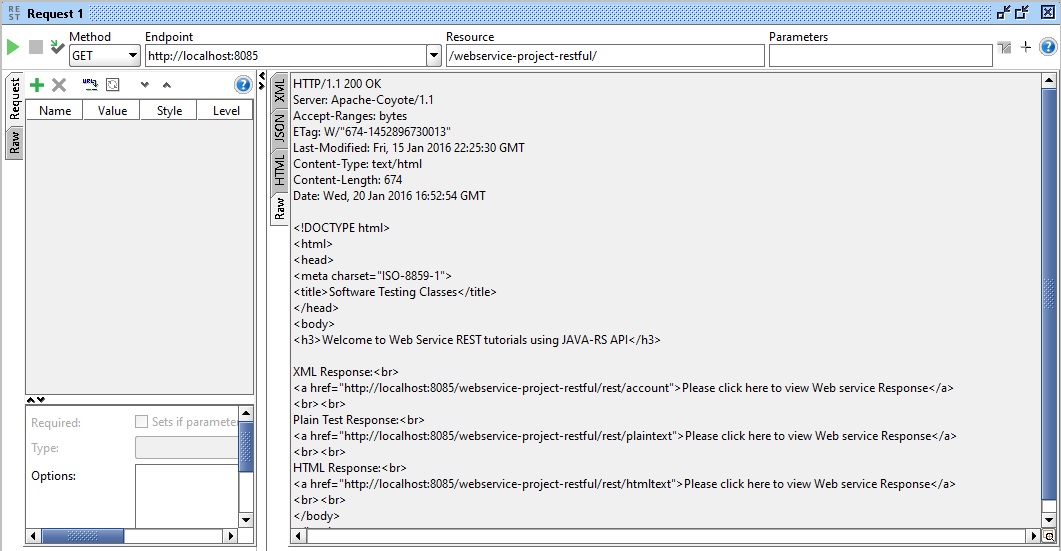
Step 7: Right pane will show the raw response as shown below upon the click of the green arrow button.
Till now, we have covered the basic smoke test part where after setting up the web URL and doing the dry run how the system responds. Below in this tutorial we will learn to create the test suite and test cases within the test suite. In this tutorial, we are going to cover the testing for RESTful web services responses for XML, Plain Text, and HTML Response as three different REST Projects.
REST Project 1 for XML Response:
Here we are going to prepare test suite for XML Response from RESTful Web Service. Like any other testing we will write the test cases first.
Step 1: Prepare the test cases as shown below.
| Test Case ID | Description | Input Value | Response Output |
| RS1 | Click to check the response in XML format. | None. Just look up the valid RESTful Web service URL. | XML Response should be received. |
| RS2 | Assertion, check for the string “SoftwareTestingClasses” present in XML format. | None. | Assertion should be shown as VALID after the test completes. |
| RS3 | Schema Compliance Assertion. | None. | Assertion should be shown as VALID after the test completes. |
| RS4 | Script Assertion. | None. | Assertion should be shown as VALID after the test completes. |
| RS5 | Sensitive Information Exposure. | None. | Assertion should be shown as VALID after the test completes. |
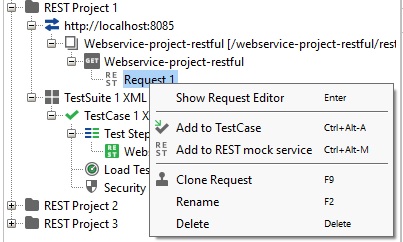
Step 2: Right-click on Request 1 on the left project window as shown in the image below. A drop-down menu will get opened asking to “Add to TestCase”. Click on it.
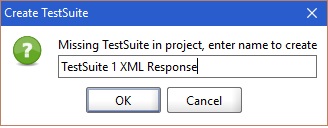
Step 3: After click on “Add to TestCase”, it was asking you to create as TestSuite and enter a name for that. Enter a test suite name of your own choice and click the OK button.
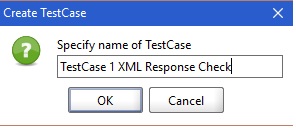
Step 3: After clicking on the OK button, another pop-up window will open asking you to specify TestCase name. Enter the TestCase name of your choice or specify the one indicated in the below image.
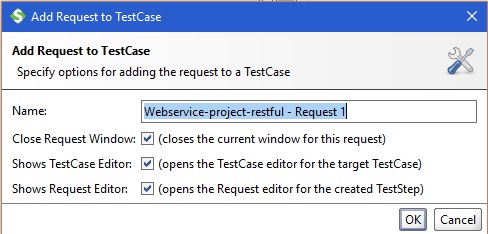
Step 4: After clicking on the OK button, another pop-up window will get open, asking you to “Add Request to TestCase”. Add the request showing as default and click on OK button to proceed.
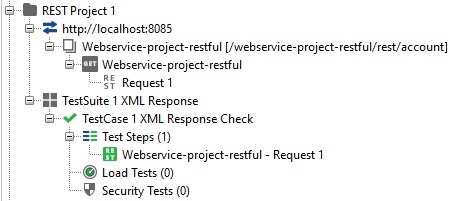
Step 5: Left-hand project windowpane will show the project hierarchy as shown below in the screenshot image.
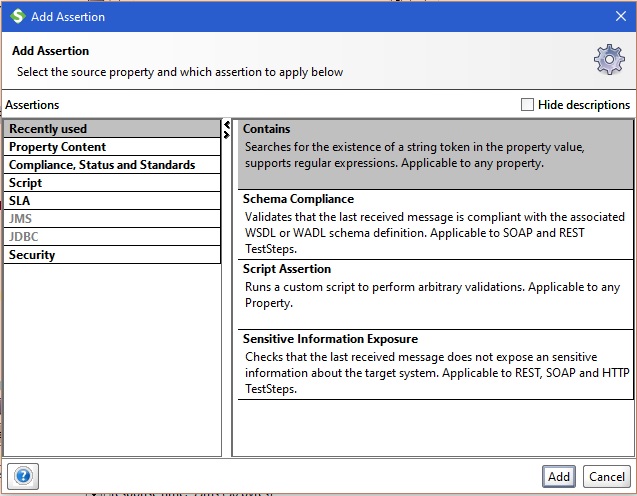
Step 6: Let’s add the required assertions to this test case on RESTful web service XML Response. Below are the steps, open the assertion window and select “Contains” assertion and click on Add button.
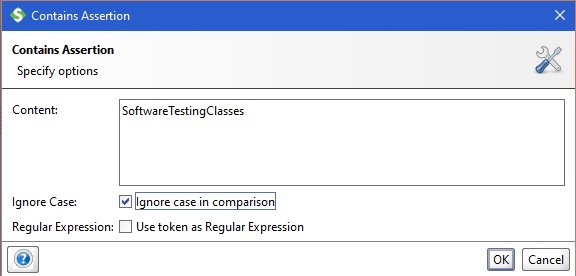
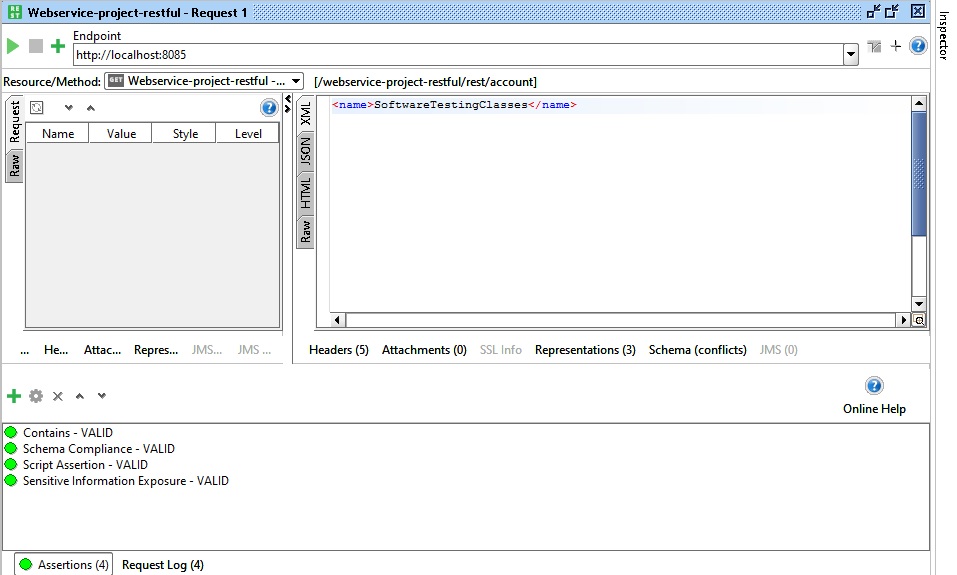
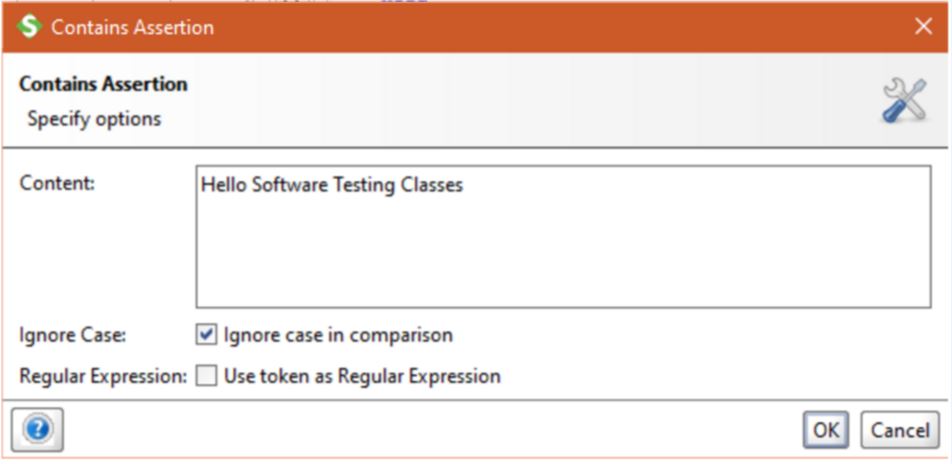
Step 7: On the below “Contains Assertion” window add the string “SoftwareTestingClasses” and after that click, checkbox to Ignore Case and then click OK button to proceed.
Step 8: Similarly add other assertions such as Schema Compliance (if any), Script Assertion (if any), and Sensitive Information Exposure looking for tokens that are sensitive and should not be present in the REST response XML message at all.
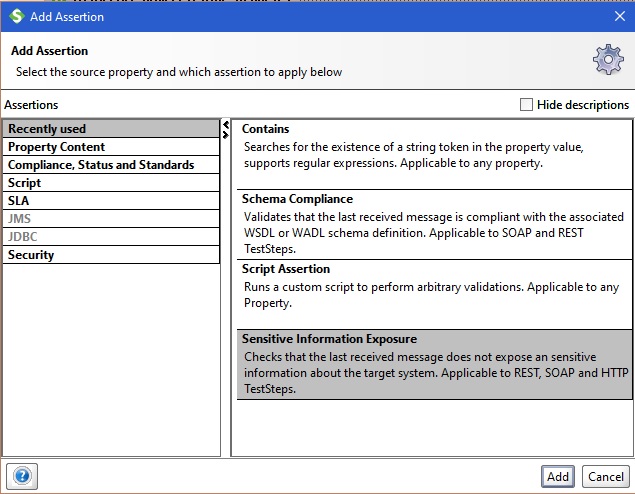
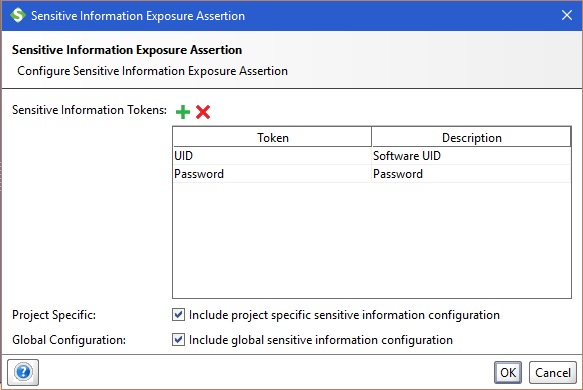
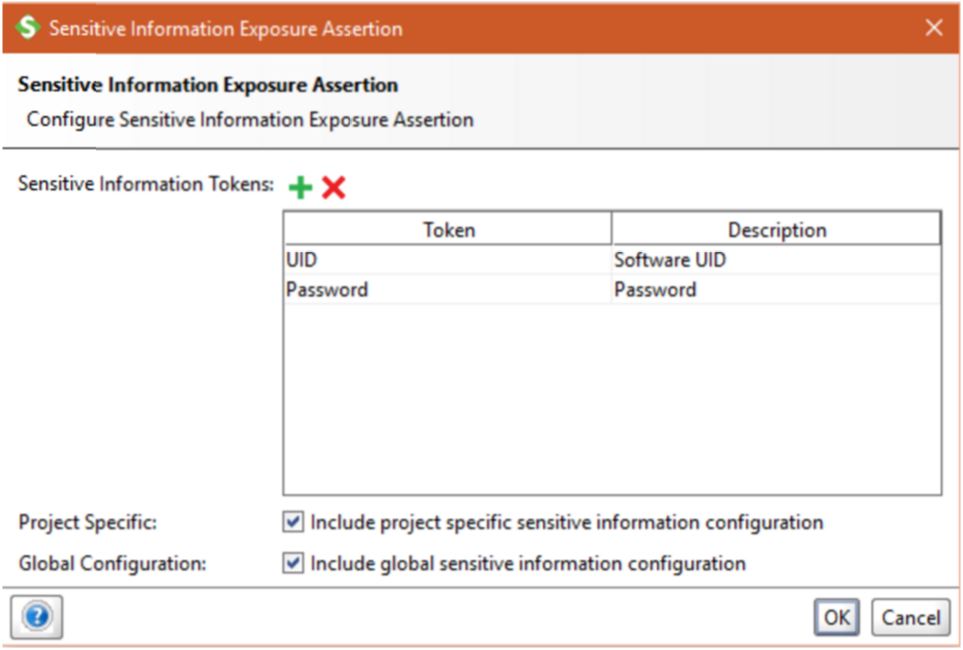
Step 9: Click on the Add button for assertion “Sensitive Information Exposure”, check for the tokens UID and Password which are sensitive and should not be there on the XML response message. Click on the OK button to add this assertion to the test case.
Step 10: From the left-hand project window, run the TestCase and check for the response message and all assertion should pass as VALID as shown in the screenshot below.
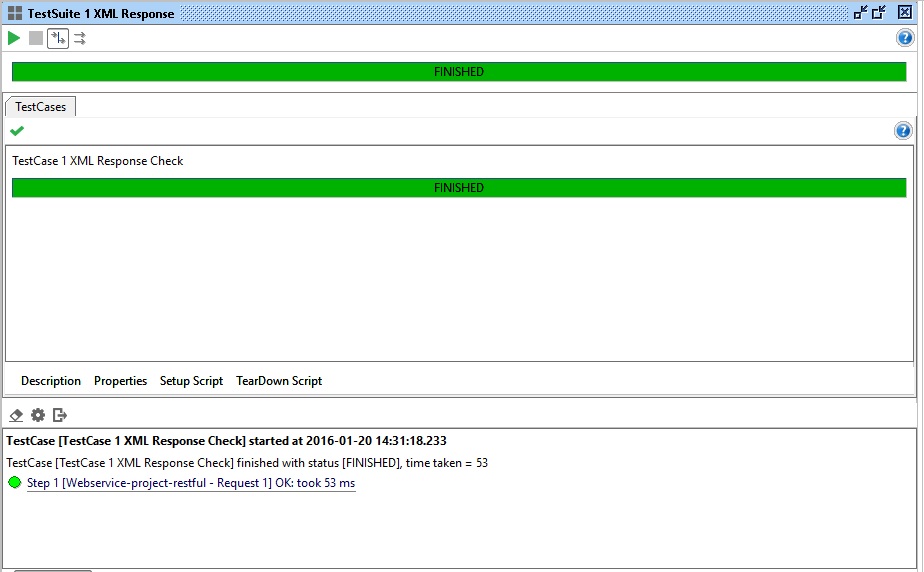
Step 11: Also, we can run the entire test suite after clicking on Test Suite and the left corner green arrow button. The below screenshot demonstrates the “TestSuite 1 XML Response” after it completes its execution successfully.
Please note that all test logs like SoapUI log, Http log, memory log, test suite log, etc. can be accessed from the same location as we discussed in the last tutorials.
REST Project 2 for Plain Text Response:
Here we are going to prepare a test suite for Plain Text Response from RESTful Web Service. Like any other testing, we will write the test cases first for REST Testing using SoapUI.
Step 1: Prepare the test cases as shown below.
| Test Case ID | Description | Input Value | Response Output |
| RS1 | Click to check the response in Plain Text format. | None. Just look up the valid RESTful Web service URL. | Plain Text Response should be received. |
| RS2 | The assertion, check for the string “Software Testing Classes” present in Plain Text format. | None. | The assertion should be shown as VALID after the test completes. |
| RS3 | Schema Compliance Assertion. | None. | It should be shown as VALID after the test completes. |
| RS4 | Script Assertion. | None. | Shown as VALID after the test completes. |
| RS5 | Sensitive Information Exposure. | None. | The assertion should be shown as VALID after the test completes. |
Step 2: Right-click on Request 1 on the left project window and from the drop-down menu select “Add to TestCase”. Click on it. After giving the TestSuite name, TestCase name, and add request to Test Case, below screenshot is the project hierarchy which will be visible on the left-hand side of the project window pane on SoapUI.
Step 3: Let’s add all the four assertions. On the below “Contains Assertion” window add the string “Software Testing Classes” and after that click, checkbox to Ignore Case, and then click OK button to proceed.
Step 4: Similarly add other assertions such as Schema Compliance (if any), Script Assertion (if any), and Sensitive Information Exposure looking for tokens that are sensitive and should not be present in the REST response Plain text message at all. Click on the Add button for assertion “Sensitive Information Exposure”, check for the tokens UID and Password which are sensitive and should not be there on the Plain text response message. Click on the OK button to add this assertion to the test case.

Step 5: From the left-hand project window, run the TestCase and check for the response message and all assertion should pass as VALID as shown in the screenshot image below.
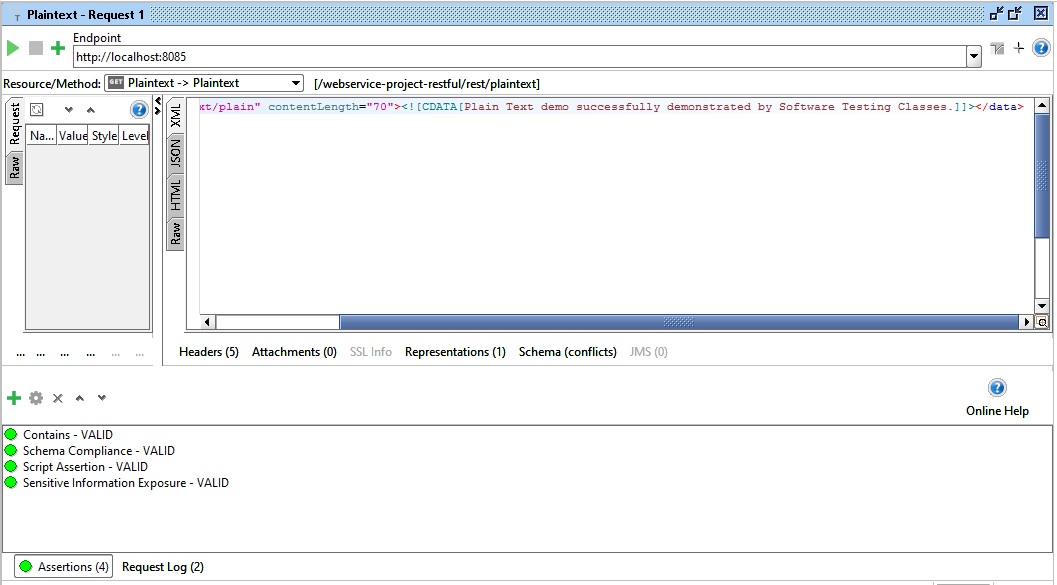
Step 6: Also, we can run the entire test suite after clicking on Test Suite and the left corner green arrow button. The below screenshot demonstrates the “TestSuite 2 Plaintext” after it completes its execution successfully.

REST Project 3 for HTML Response:
Similarly as above two REST projects, here again, we are going to prepare a test suite for HTML Response from RESTful Web Service. Like any other testing, we will write the test cases first for REST Testing using SoapUI.
Step 1: Prepare the test cases as shown below.
| Test Case ID | Description | Input Value | Response Output |
| RS1 | Click to check the response in HTML Text format. | None. Just look up the valid RESTful Web service URL. | HTML Text Response should be received. |
| RS2 | The assertion, check for the string “Hello Software Testing Classes” present in HTML Text format. | None. | The assertion should be shown as VALID after the test completes. |
| RS3 | Schema Compliance Assertion. | None. | It should be shown as VALID after the test completes. |
| RS4 | Script Assertion. | None. | Shown as VALID after the test completes. |
| RS5 | Sensitive Information Exposure. | None. | The assertion should be shown as VALID after the test completes. |
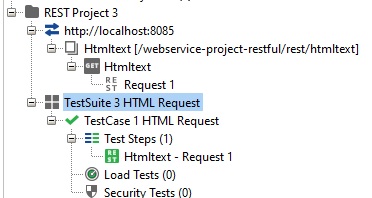
Step 2: Right-click on Request 1 on the left project window and from the drop-down menu select “Add to TestCase”. Click on it. After giving the TestSuite name, TestCase name, and add request to Test Case, below screenshot is the project hierarchy which will be visible on the left-hand side of the project window pane on SoapUI.
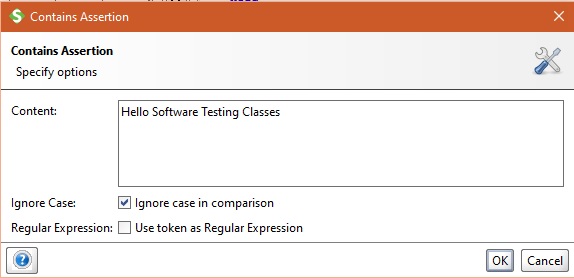
Step 3: Let’s add all the four assertions. On the below “Contains Assertion” window add the string “Hello Software Testing Classes” and after that click, checkbox to Ignore Case, and then click OK button to proceed.
Step 4: Similarly add other assertions such as Schema Compliance (if any), Script Assertion (if any), and Sensitive Information Exposure looking for tokens that are sensitive and should not be present in the REST response HTML text message at all. Click on the Add button for assertion “Sensitive Information Exposure”, check for the tokens UID and Password which are sensitive and should not be there on the HTML text response message. Click on the OK button to add this assertion to the test case.
Step 5: From the left-hand project window, run the TestCase and check for the response message and all assertion should pass as VALID as shown in the screenshot image below.
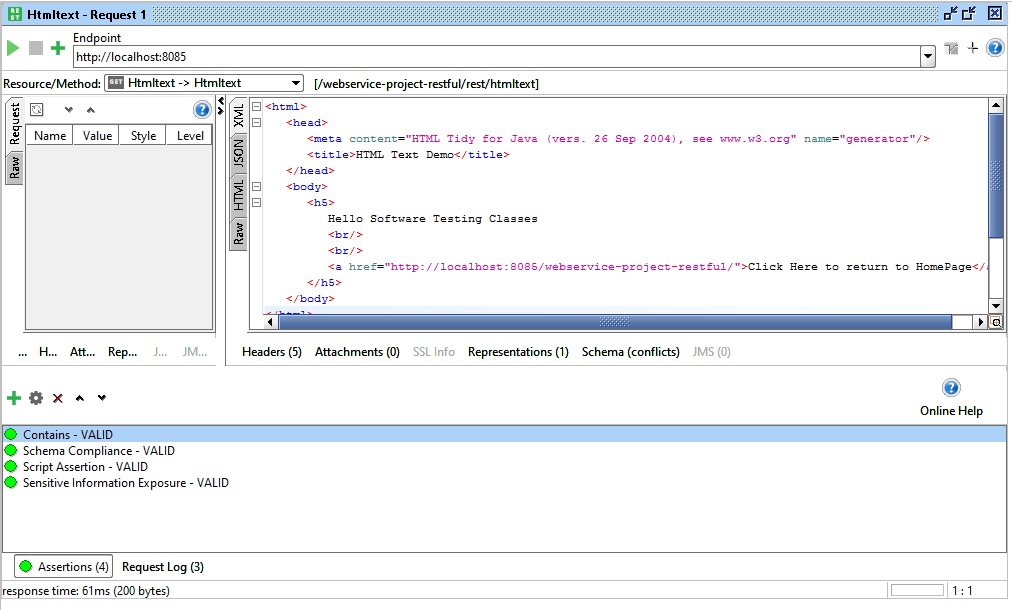
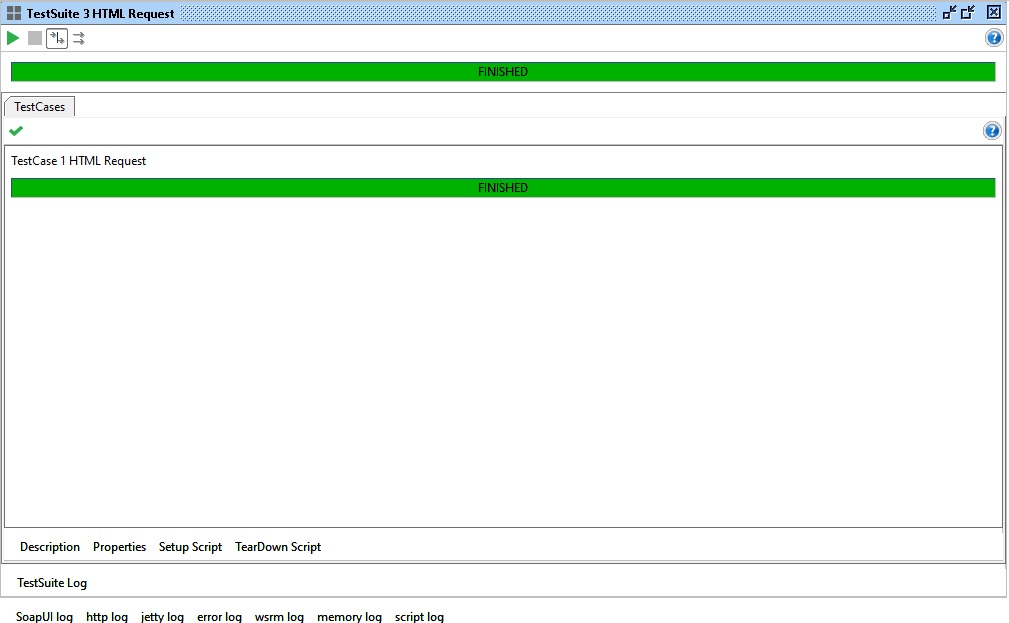
Step 6: Also, we can run the entire test suite after clicking on Test Suite and the left corner green arrow button. The below screenshot demonstrates the “TestSuite 2 HTML Request” after it completes its execution successfully.
Conclusion:
Hope you have a clear understanding of how to do testing for RESTful Web services for XML, Plain text, and HTML text response.
To REST Testing using SoapUI, did you find the above steps to create a REST Project in SoapUI are helpful? Let us know the steps you are used to creating RESTful Web services in comments.

⇓ Subscribe Us ⇓
If you are not regular reader of this website then highly recommends you to Sign up for our free email newsletter!! Sign up just providing your email address below:
Happy Testing!!!
