
Mock Service is a very interesting feature of the SoapUI tool. Service Mocking is also known as the simulation, isolation, or visualization of an environment. It is the practice of developing a facsimile environment that works in a similar way the environment you’re facsimileing. Mock Service in SoapUI can be achieved for both SOAP as well as RESTful web service projects. In the Mock Services Testing tutorial we are going to learn how to create, edit, and invoke mock services for both of these projects.
SOAP Mock Service: Using this feature of SoapUI, we can mock the SOAP web services request message from its SOAP response message. This involves the below steps.

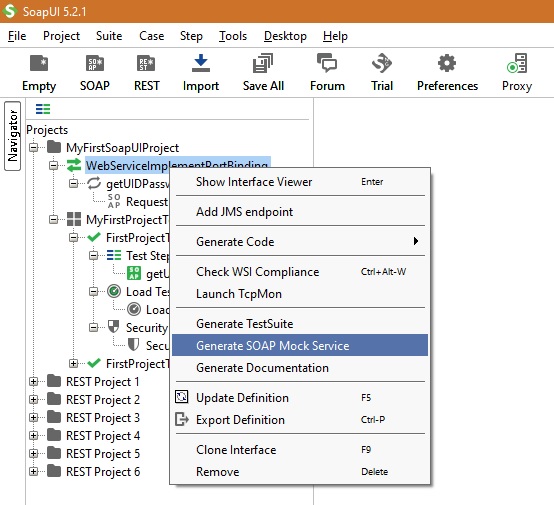
Step 1: Let’s create SOAP Mock Service. Choose the existing SOAP project and select “WebServiceImplementPortBinding” from Navigator to prepare a new SOAP mock service. Right-click on it and from the drop-down menu select and click on “Generate SOAP Mock Service” as shown in the below screenshot.

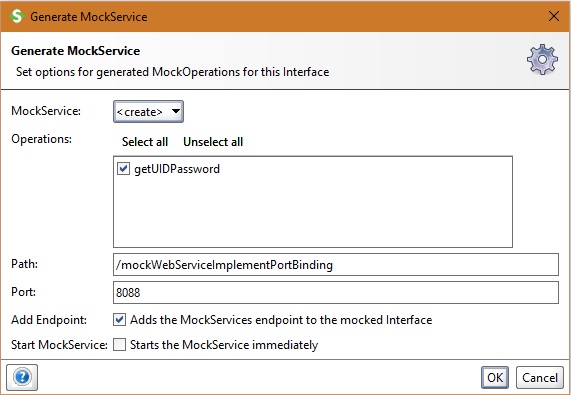
Step 2: Above step will open a dialogue window asking for details to generate Mock Service as shown in the below screenshot. It will also ask you to include operations, path, port, and endpoint in this new Mock Service. If you want to start this mock service immediately then keep the last checkbox checked. Click the OK button to proceed further.

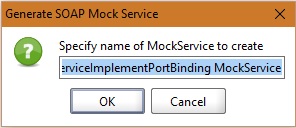
Step 3: Next it will ask you to specify the name of the Mock Service. You can choose the default name or provide a new name. In the below screenshot, the default Mock Service name is used.

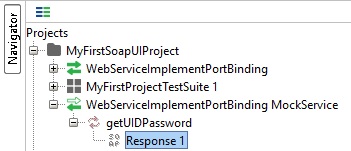
Step 4: This will create a SOAP Mock Service which can accessed from the Navigator as shown in the below screenshot.

Now let’s learn how to edit a MockService.
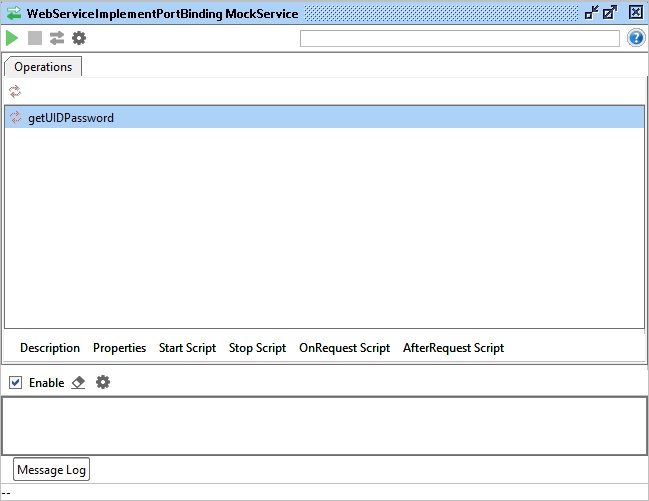
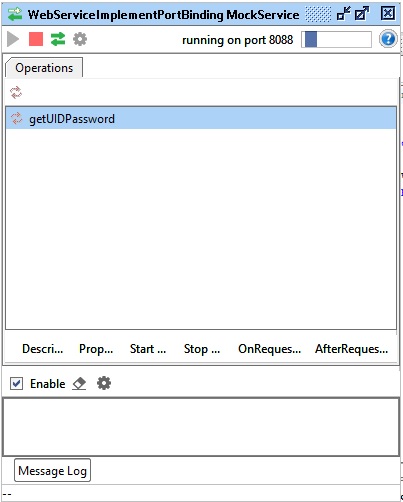
Step 5: Double click on MockService to open the editor as shown in the below screenshot. In the editor we can see the associated operations and the Message logs for request and response from web service.

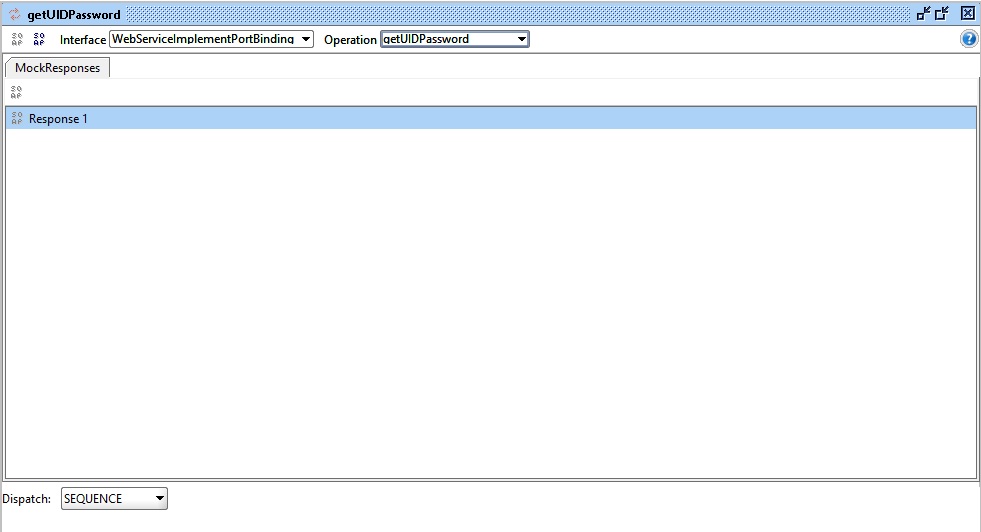
Step 6: Double click on the operation getUIDPassword to view the response present in the MockService as shown in the below screenshot.

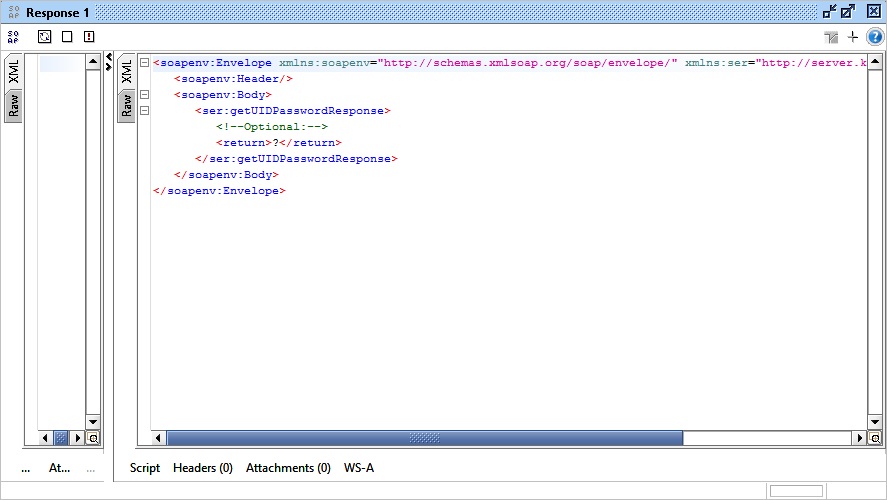
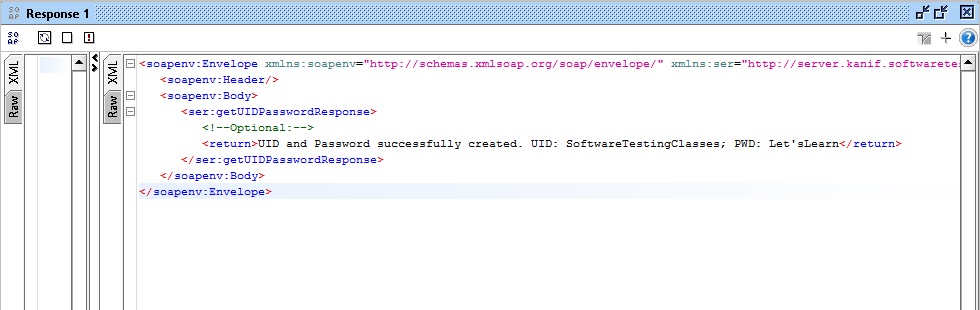
Step 7: Double click on the Response to open the response editor as shown in the below screenshot. SoapUI response editor is similar to the normal SoapUI request editor. But unlike normal SoapUI request editor, here we edit the response to get the SOAP request. This helps in debugging the client request calls.

Step 8: Edit the response editor with some value like (UID and Password successfully created. UID: SoftwareTestingClasses; PWD: Let’sLearn) as shown in the below screenshot.

Next, we will learn how to invoke and execute this SOAP Mock Service.
Step 9: Invoke the MockService by clicking on the green arrow button present on the left top corner of the MockService Editor. Below screenshot demonstrate a running MockService on port 8088 after click of the green arrow button.

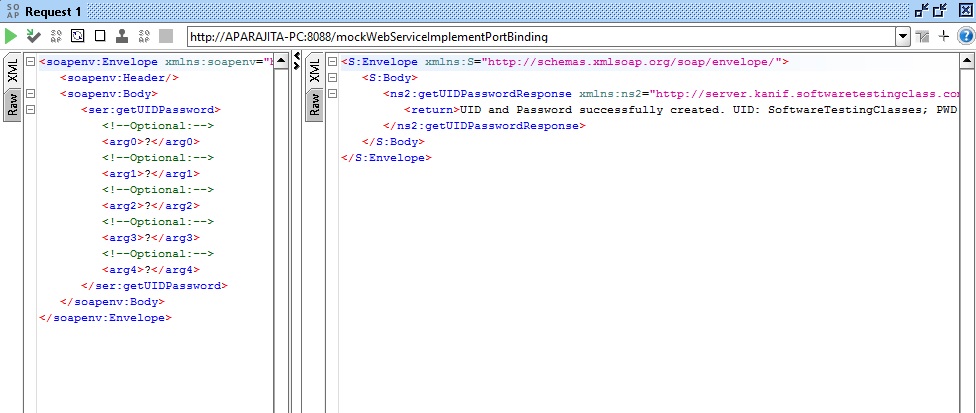
Step 10: In the MockService Response editor, Click on Create Request.
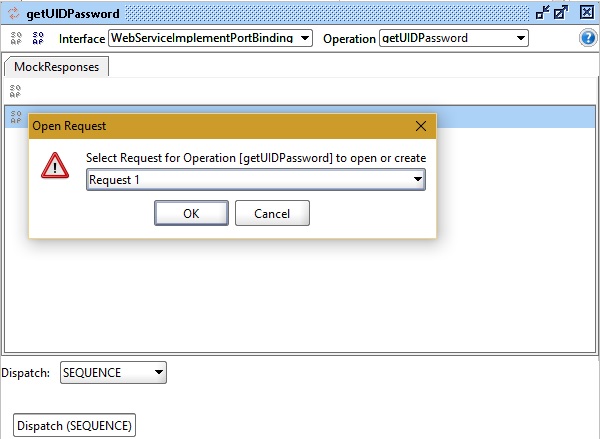

Step 11: Select the Request1 from the drop-down menu and click the OK button.The actual client call SOAP request message which is mocked from the SOAP response message will be visible as shown below in the screenshot.

Step 12: Your first SOAP Mock Service has been completed successfully and it is ready to use.
RESTful Mock service: Using this feature of SoapUI, we can mock the RESTful web services request messages from its REST response messages that could be of format like JSON, HTML, XML and Plain Text. This involves the below steps.
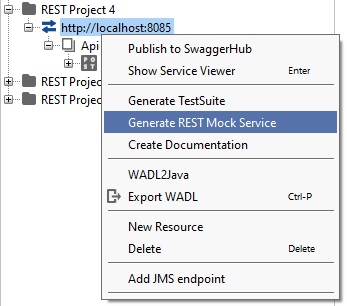
Step 1: Choose an existing RESTful project (REST Project 4) and select the operation from the Navigator to prepare a new REST mock service. Right-click on it and from the drop-down menu select and click on “Generate REST Mock Service” as shown in the below screenshot.

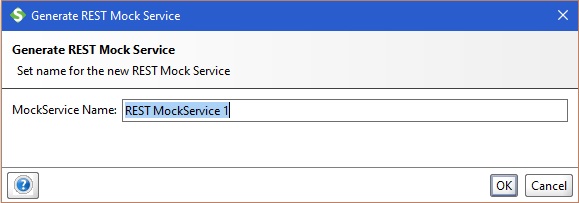
Step 2: It will open a dialogue box where we may enter the MockService Name as shown in the below screenshot.

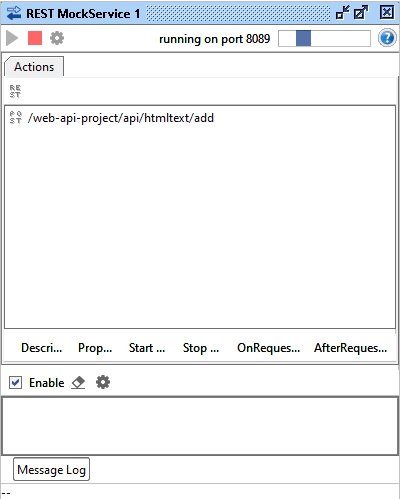
Step 3: It will generate and start a mock service at an available port, in the below screen shot REST Mock Service is running on port 8089. REST Mock Services provides services by exposing Mock Actions which could be GET or POST method or both. Each action in turn can have any number of Mock Responses. Thus a Mock service in SoapUI has below hierarchy.
-
- Mock Service.
-
- Mock Action.
- Mock Response.

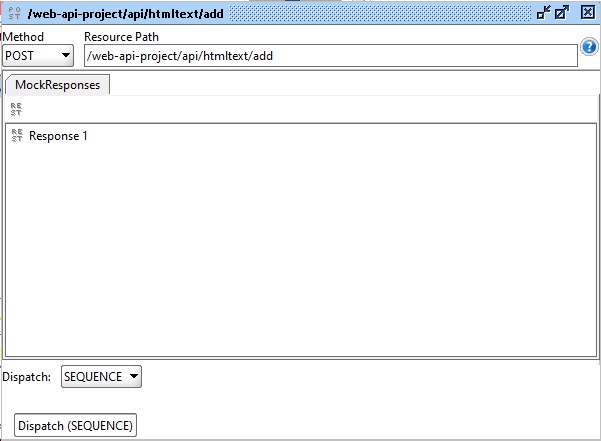
Step 4: Double click on Actions to open the Mock Responses window. It shows the Method as POST, the Resource path, and list of Mock Responses. In this example, the Mock Service contains only one POST method. When we open the POST action, we can see the response contained by it. Using the dispatch setting as SEQUENCE indicates responses will be dispatched in a sequence from the beginning. All demonstrated in the below screenshot.

Step 5: Double click on Mock response to open the REST Response window. The Http Status code 200 as “Successful” response will be visible along with Editor as shown in the below screenshot. In the editor, we can edit the response to procure the corresponding client call request after choosing the content or media type from the drop-down menu.REST Mock service is ready to use now.


Pros and Cons of the Mock Services:
Pros:
-
- Using mock services, we can prepare the test cases in advance as from the response or output we can infer the request or input parameters.
-
- Both the testing team and development team can work in parallel. While the development team is writing the code, the testing team can use the mock service to test on the functionality which is in progress.
-
- Mock services are very useful in POC (proof of concepts) or presentation demos.
-
- Mock can be delivered to the client as a project prototype.
-
- Using Mock services tests can be written for resources that are not accessible.
- It allows us to test the live environment before the actual services installed on it.
Cons:
-
- Double the work. Mock Service tests are of short span and later are replaced by the actual tests. So, to cover a test case it actually written twice.
-
- Even Mock service get bugs and demand resource to understand and fix it.
-
- Using Mock services, there may be deployment constraints as to where it can be deployed on a machine.
- It is not live yet, therefore the testing team cannot infer the tests with mock services and cannot provide Go live sign off.
Here we talked about Mock Services Testing, we need your feedback on the SoapUI tutorial series – How we are doing, anything you wanted to add/remove here. You can feel free to add your views in the comments below. We are focusing on tutorials which are very much helpful to our readers.
Your inputs are really appreciated and definitely consider for our upcoming tutorials. Thanks in advance.


⇓ Subscribe Us ⇓
If you are not regular reader of this website then highly recommends you to Sign up for our free email newsletter!! Sign up just providing your email address below:
Happy Testing!!!