In the previous article, we learn “Tutorial #4: Project Management in Mantis Bug Tracker“. If you missed any of the article
Getting Started with MantisBT:
- Login is the first screen displayed when MantisBT is started. Login in to the MantisBT using the “Bitnami” Application. Open the application and click on “Go the Application”. Once Mantis is installed in the system, you can also directly access MantisBT using URL: http://127.0.0.1/mantis/login_page.php.
- Enter the valid user name and password which was registered during installation using Bitnami.
- The user will be redirected to “Manage” Page. The Mange Page shows many functions. Let us check the Manage Projects tab.
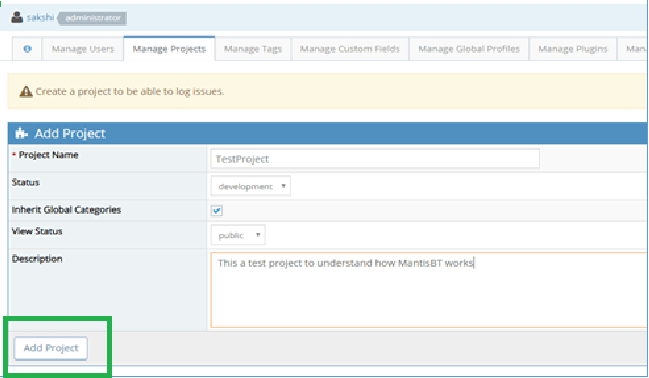
- Fill the Create Project form
- Enter the Project name
- Select the Status of Project from the dropdown
- Check the “inherit global categories” checkbox
- Select the view status from the dropdown
- Add some description to project.
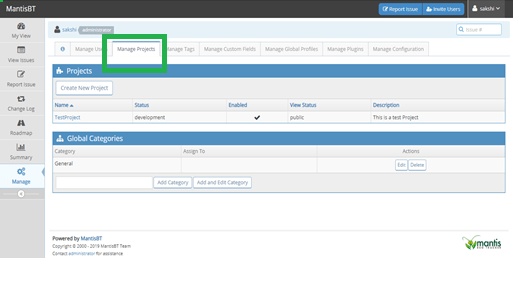
- Now the project is successfully created. If the user wants to change any Project Configuration. Likewise the user can also delete the project from “Manage Projects” Page.
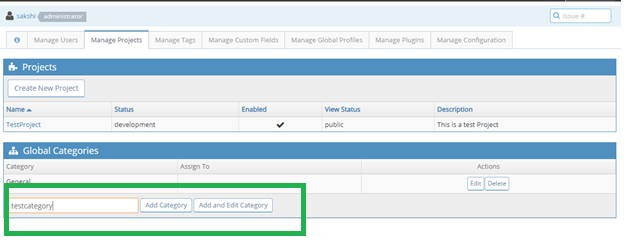
- Next the user can add the categories to divide the issues into specific areas. With categories the user creates an issue against a category and this category of issues is assigned to a user. The categories can be added from “Manage Projects” page. The “Edit“ and “Delete” Category button can be used to change the category name or assign the category to some user.

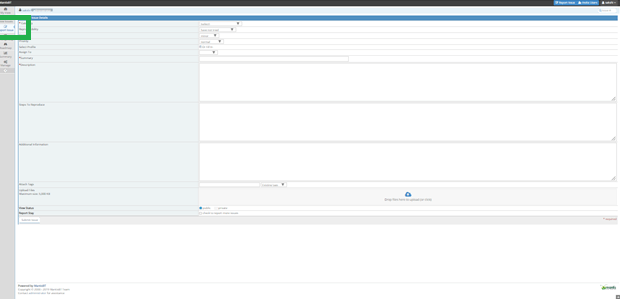
- Next, the user is now ready to report issues. For this go to the “Report Issue” Page. Add the following fields:
- Category: Select the category from the dropdown. These categories are added by the administrator.
- Reproducibility: Select option from the dropdown which fulfills the current condition of bug the most. If the bug persists every time the function is run, then select “always”. The status of reproducibility is set by tester depending on the situation when the bug is seen.
- Severity: Select the level of severity of the bug. If the bug has a high impact on complete functionality, select major.
- Priority: Select Priority from the dropdown. This will depict how sooner the tester wants the bug to be fixed. Select high priority, if the bug needs to be fixed sooner than other bugs.
- Select Profile: This field can be used to put more details regarding the reproducibility of bugs such as Platform, OS, and OS version. It is an optional field.
- Assign To: Select the user (developers, or team leader) to which the bug is assigned. A notification will be sent to that user.
- Summary: This is a mandatory field where a short description of the bug is added. It will show the actual description of the bug in short note.
- Description: Write down detailed information of the bug found here.
- Steps to Reproduce: The tester will write down the steps to reproduce that bug in the application. The steps will be written as points.
- Additional Information: If the tester wants to give some other details which are not covered in the
above points, those can be added here. - Attach Files: Any screenshot, requirements or design documents for reference relevant to the bug can be attached here. The max doc size is 5000kb.
- Add Tags: To tag the issue under a name, tags are added
- As the issue is submitted, the user will be redirected to “View Issue” Page. This page will show the user, all the bugs which are raised by him. As the bugs are raised, this page gets populated, so to find a particular issue, filters are applied. Filters can be applied to
search for any issue. Mantis provides flexible filter functionality where the user is able to apply filters on various parameters of a bug.
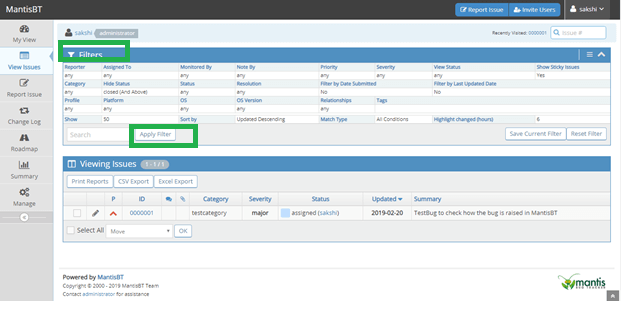
“View Issues” Page has following features:
- Filter Function: To filter the bugs. User is also able to Save the filters applied. For this user can :
- Click on the View issues page
- Click on the filters like Reporter, Assigned To etc.
- Dropdown will appear with relevant options
- Select the option you want to apply filter to.
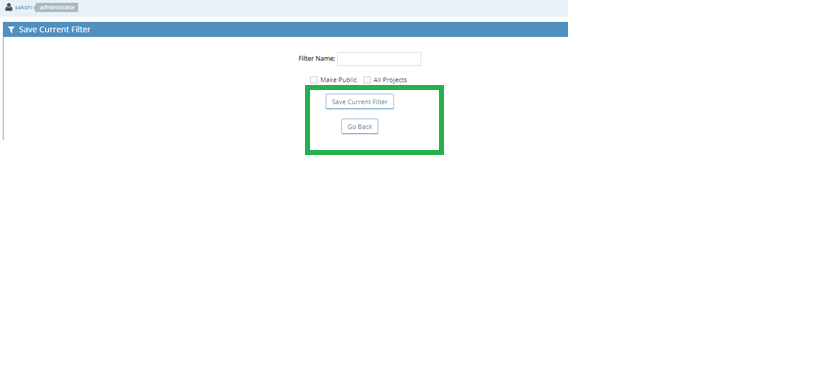
- Click on Apply filter. Mantis also has a feature to save the filters applied. For this click on “Save Current Filter”.
- Print: Print the Issue Reports. Below is a screenshot of print version

- Export to Excel: The bug list can be exported to excel file. The exported file will be open in Excel Format.
- Export to CSV: The export file will be a MS Excel file with .CSV format.

- Change the Status of the bugs selected: The user can select the bugs and make modifications to it.
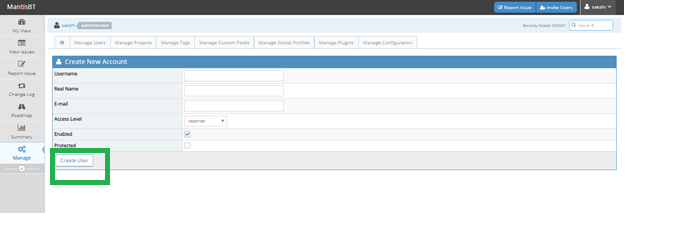
- Next, the administrator can create user accounts to add the team members, project employees to MantisBT. Each user will have its own login user name and password. Go to Manage Tab, select “Manage Users”. Complete the create new user form:
- Username: This will be used by the person to log in.
- Real Name: The real name of the user to register his account.
- Email Id: The notifications will be sent to this email.
- Access Level: Select the appropriate role of the user. He can be a developer, administrator, manager,
etc . Depending on the role selected the access level functionalities will be shown to the user. - Enabled and Protected: Enabled to activate and deactivate the account.
- Once the user is successfully created, the admin can :
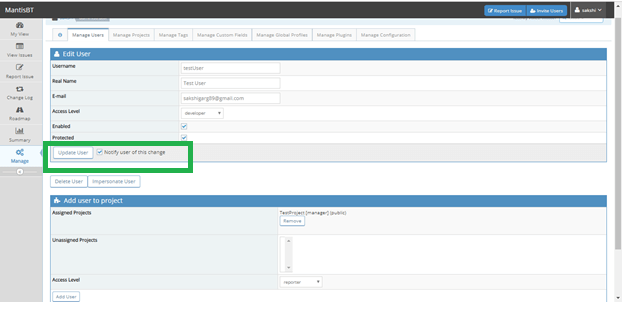
- Add the user to the project. The admin can also assign a different role on per project basis to the user.
- Update the user details like user role, name, and email.
- Impersonate User: Login as the user to view how his account looks for a particular role.
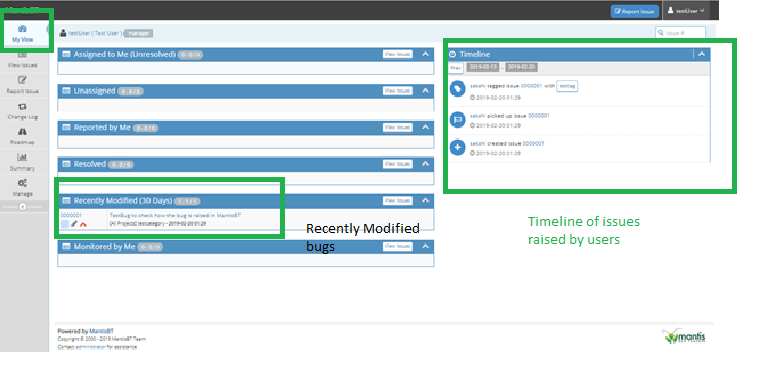
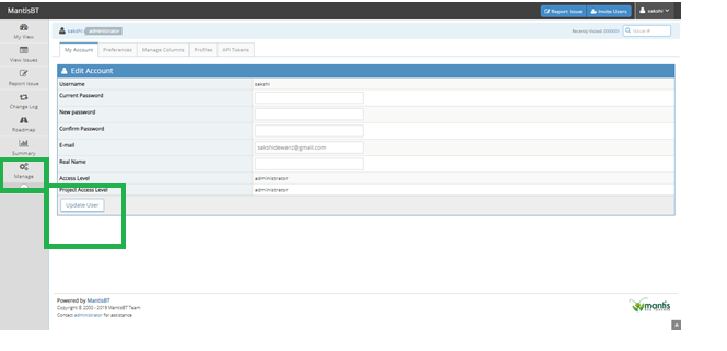
- The administrator or any other user role can manage his account from “My Account“ tab at the top of the page. The user is able to change the password and real name . Only the administrator of the MantisBT account has the privilege to edit the access level and project access level of the user.
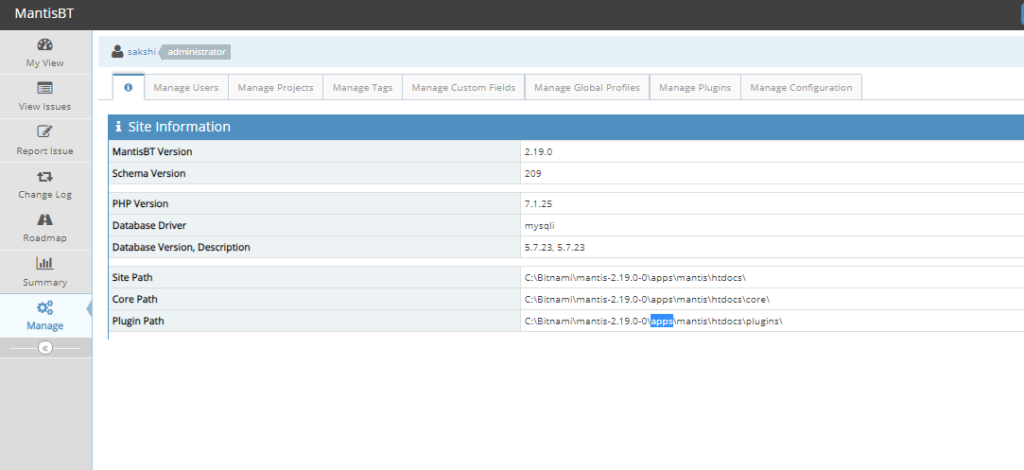
- The user can see the Mantis Bug Tracker site information such as its version, site path, core path and plugin path from the Manage tab.
Conclusion
Mantis Bug Tracker allows admin to create bugs efficiently by features like categorizing, setting severity and priority, screenshots and many other features. It also reduces our time in searching bug by providing filter option. So with a systematic flow of creating users, projects, raising issue MantisBT proves to be a good tool to be used a defect management system.
⇓ Subscribe Us ⇓
If you are not regular reader of this website then highly recommends you to Sign up for our free email newsletter!! Sign up just providing your email address below:
Happy Testing!!!
Related posts:
- Tutorial #1: Introduction to Mantis Bug Tracker
- Tutorial #2: Features of Mantis Bug Tracker And User Interface
- Tutorial #3: Installation of Mantis Bug Tracker on Windows
- Tutorial #5: Project Management in Mantis Bug Tracker
- Tutorial #6: Bug Life Cycle in Mantis Bug Tracker
- Tutorial #7: Mantis Bug tracker account management
- Tutorial #9: Mantis Bug Tracker: Other functionalities
- 10 Tips of Writing Efficient Defect Report
- Tutorial #10: Demo of Mantis Bug Tracker Features
- Web Service Sample Project & Testing

