Mantis Bug Tracker helps to effectively manage projects and keep the team members, project managers informed about the changes and updates in the project. It supports multiple projects, sub-projects, categorization of the project and many other features. We will be discussing these features in great detail.
Mantis Bug Tracker allows admin to create projects from Manage Tab. Under administrator login,
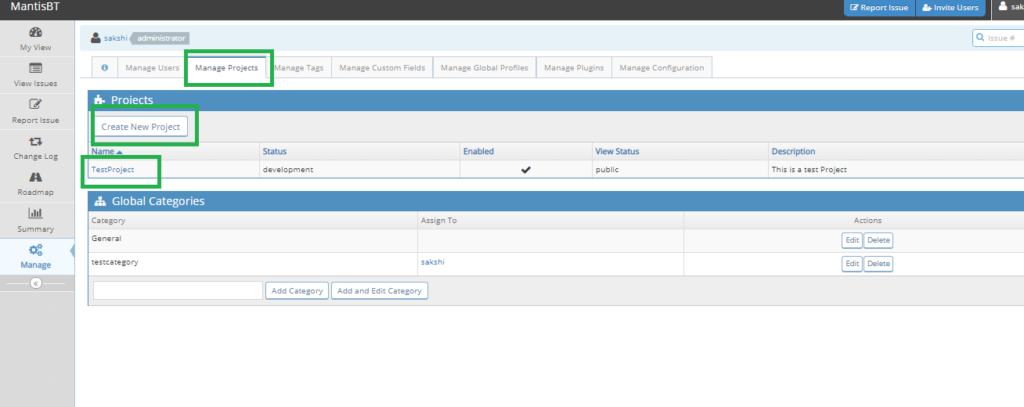
- Go to “Manage” tab.
- Click on”Manage Projects” tab in the menu bar.
- Click on “Create new Project”.
- To edit the already added Projects, Click on the “Project name” in Projects Section.
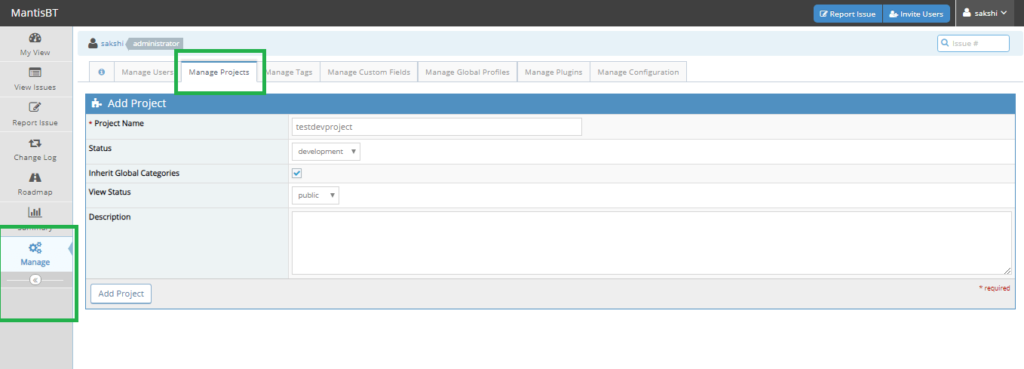
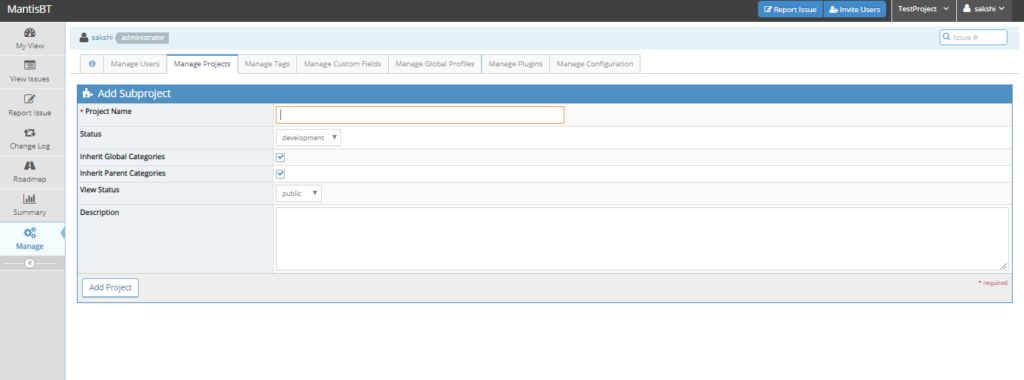
Following steps are added while creating a project:
- Project Name: It is a mandatory field. Enter the name of the project.
- Status: The status of the project shows the current status such as:
- Development: The project is under development phase.
- Release: A new patch of the project is released for testing.
- Stable: When the project development is stable for testing.
- Obsolete: When the project is old or not used currently.
- Inherit Global Categories: Some default categories are added in Mantis BT. These categories help the projects to be assigned directly to the user to which the category is assigned.
- View Status: View Status projects allows the administrator to make the project either private or public. If a project is assigned “private” then it is visible only to users to which project is assigned.
- Description: Add some details of the project here.
- Click on “Add Project” button.
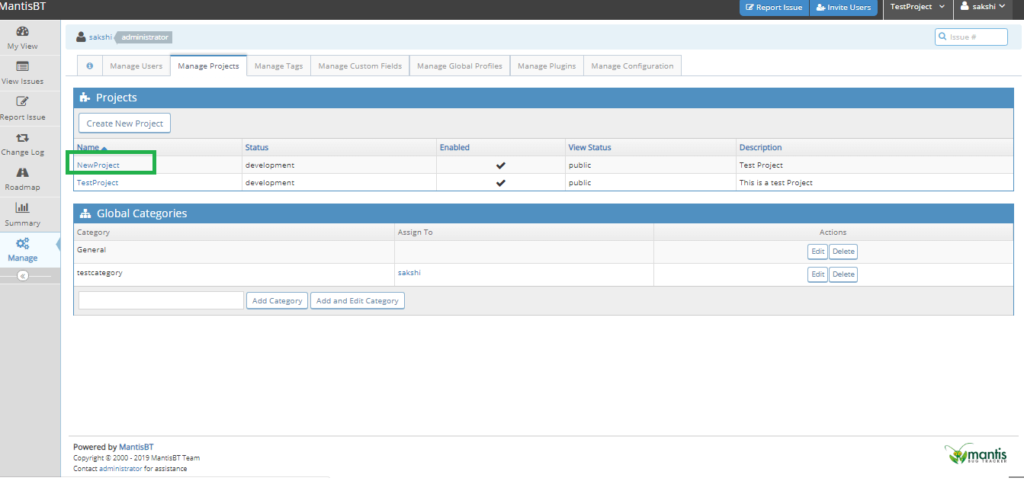
Finally, a project is created. Admin has displayed a successful message and redirected to Manage Projects Page.
Edit Project in MantisBT
As a project is added, if some changes are to be made, edit project option is available. To edit a project in MantisBT:
- Click on “Manage Projects” Page.
- Click on the name of the project in the “Projects” Section.
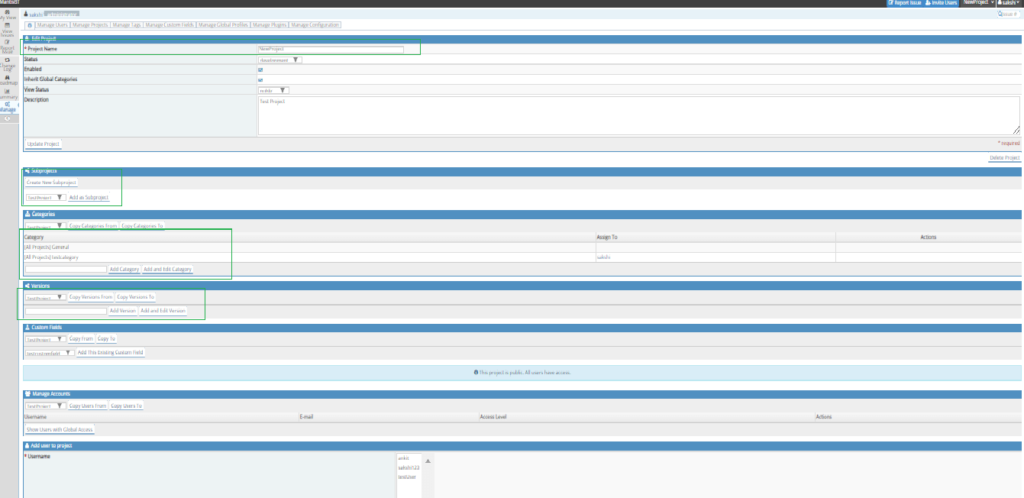
- Edit Project Page shows the current information about the project. The admin can edit Project Name, Status, View Status, and Description.
- Edit the project details and click on “Update Project” button.
- To delete the project click on “Delete Project” button.
- Sub Projects: Admin can create a subproject under the current project from this section.
- Click on “Create SubProject” button.
- Add the appropriate information while creating the subproject
- Click on Submit button.
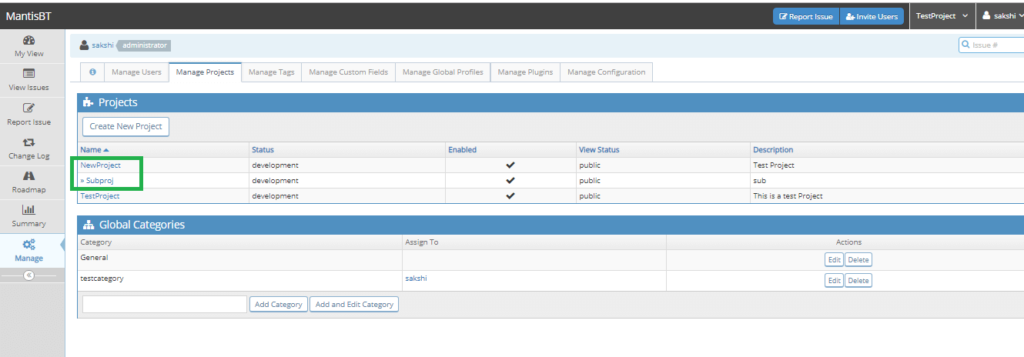
- A new subproject is created and displayed under the main project with “>>” sign in “Projects” section.
- Admin can also make other main projects is a subproject of the currently opened main project.
- Once a subproject is created, it will have all provisions of the main project.
- UnlinkSub Projects: Admin can also unlink the subproject from the main project by clicking on the “unlink” button.
- Categories: Under the Categories Section, The admin has the privilege to add a new category for the project. Also, copy categories from one project to the current project is available.
- Versions: Under Versions, admin is able to add and edit the version of the project
. Versions can be named numerically such as 1.0, 1.1. - CustomField: Custom Fields added by the administrator can be assigned to the project from “Custom Field” section.
Various Section of Edit Project Page
Let us look at the various sections of the Edit Project Page in details:
1) Categories:

- Go to the “Categories” Section.
- Add a category name and click on “Add and Edit Category” button.
- Edit Project Category Page is opened.
- Edit name and assigned person of the category.
- Click on “Update Category”.
- Admin is also able to delete a category by “Delete Category” button.
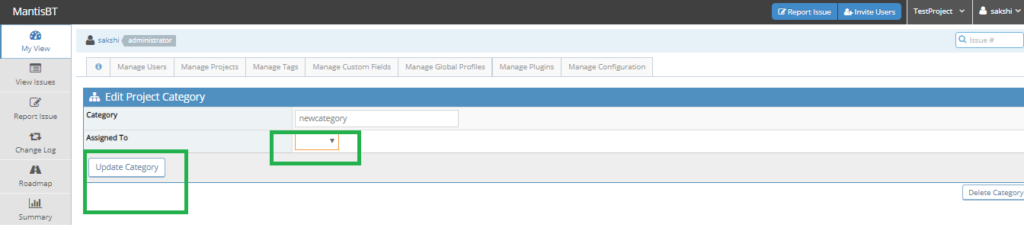
- Another feature for admin is to add categories from other projects to the current project. Select the appropriate project from the dropdown. Select the button “Copy Categories From”, “Copy Categories To”.
2) Versions:
- The administrator can manage the project versions from this section.
Go to “Versions” Section. - Add a version, for example, 1, 0.1 or 2822019
- Click on “Add and Edit Version”.
- Edit Project Version Page is displayed. Admin can edit the date order of the version, mark the project as released or obsolete.
- Click on “Update Version” button.
- Also “Delete Version” button is available to delete the version of the project.
- Once the version is added, it will be added to the “Version” section in
- Edit Project Page.
- Admin can also copy the versions from another project to the current project by selecting the project name from the dropdown and clicking on the button, “Copy Versions From” and “Copy Versions To”.


3) Custom Fields:
- Another feature here is, the admin can select the custom fields from the dropdown.
- Click on “Add The Existing Custom Field”.
- Once the button is clicked, the custom field will get added to the Custom Field section.
- Update the sequence number of the field.The admin is able to add custom fields from one project to the current project using “Copy From” and “Copy To” button.
Also, the option to remove the field is available


- Manage Accounts and Add User to Project
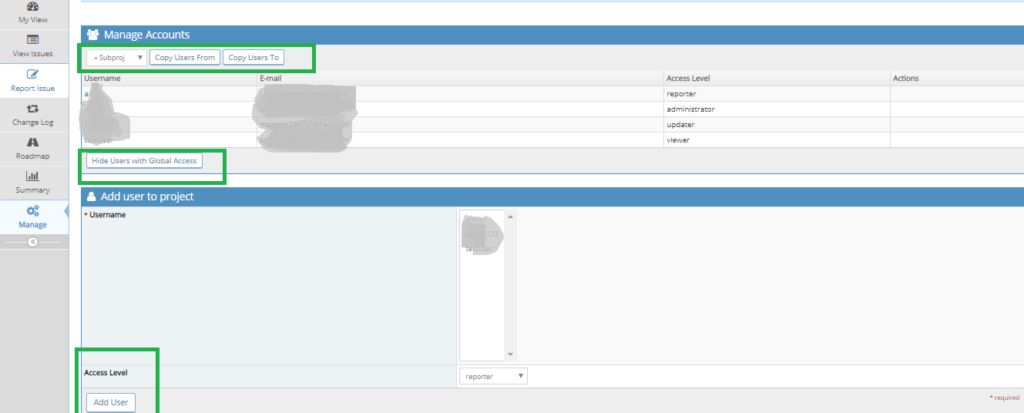
This section will allow the user to add, edit and manage the users of MantisBT to the current project.
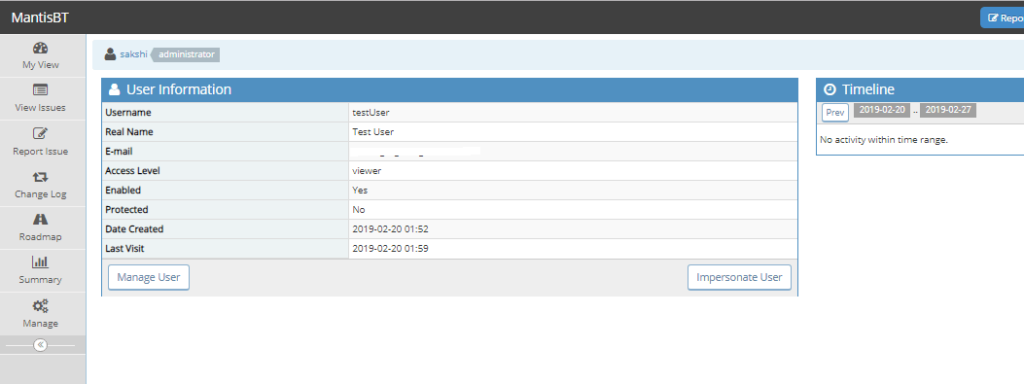
- Manage Accounts shows the list of users added to the MantisBT account. The list will show the username, email id, access level, and actions. The administrator is able to click on a username and view the details, activities of the user.
- On click to the username link, the admin will be redirected to user information from where it can manage the user individually.
- From Manage Account Section, the admin also has an option to copy the users from another project to the current project.
- From add user to the project section, the admin will select a username and assign a role, which is other than the assigned default role, only specific to this project.
- Click on “Add user”. The user will be assigned to a new role.
- The list of users will be updated and displayed with a new role. Action will show the “Remove” button.
- Option to remove the user assigned role from the project is available.
Conclusion:
MantisBT offers a big range of features for managing projects under testing. The administrator is given full flexibility to use many features such as versions, categories, add custom fields, assigning project-specific roles to users. Thus Mantis Bug tracker is an enriched tool to use as a defect tracking tool with powerful management of project under testing.
⇓ Subscribe Us ⇓
If you are not regular reader of this website then highly recommends you to Sign up for our free email newsletter!! Sign up just providing your email address below:
Happy Testing!!!
