API testing (or web service testing in the context of a web application) is no longer performed solely by the original developers. It is now a common practice among outsourcing teams who independently verify and validate their products.
Amid the rise of API testing, it’s critical to have the right process, tools, and solution for performing API automation tests. If you are completely new to Katalon Studio or have just begun testing with the app, you’ve come to the right place. This tutorial will provide you with a step by step guide on the process of triggering your first API test with Katalon Studio.
Before we start, make sure you already downloaded Katalon Studio at www.katalon.com
API Testing with Katalon Studio – Step by Step for Beginners
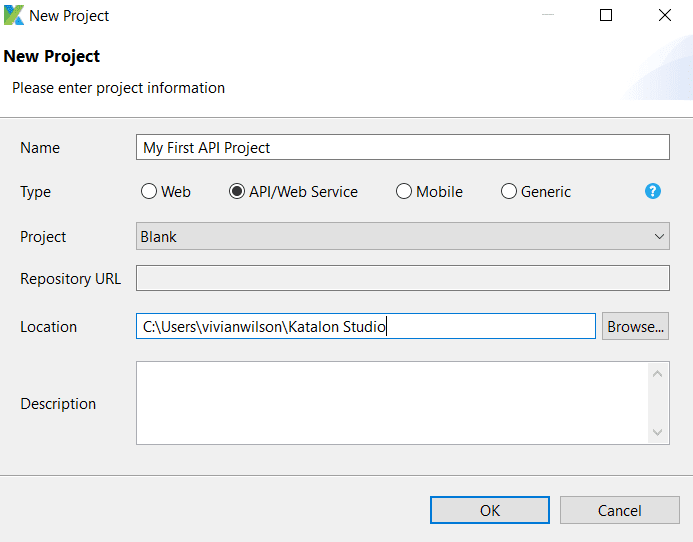
Step 1: Create a new project
- Go to File -> New -> Project
- Enter the project name and its location in the window that shows up
- After completing the steps above, you will see the project’s predefined folder structure in the Tests Explorer panel.
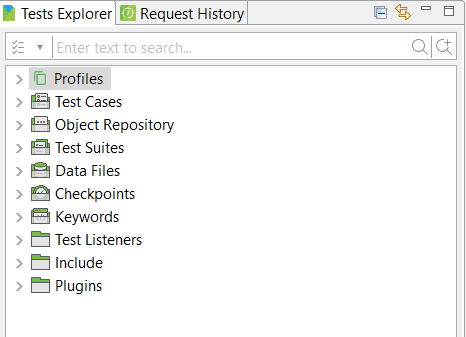
There are three important folders you need to be aware of:
- Test Case is where all test scenarios are located and grouped. Each test case consists of test steps demonstrating a test scenario.
- Object Repository is used to store all the Web service endpoints and/or requests, including URL, header, content, and authentication.
- Test Suites contains all test suites, which are a collection of test cases verifying a specific target. Test Suite Collection is a collection of test suites that verify a larger target.

Step 2: Create a new RESTful endpoint at Object Repository
As mentioned above, all of the Web service endpoints are stored in the Object Repository.
- To create a new request, select Object Repository -> New -> Web Service Request

- You can either choose to create a RESTful or a SOAP request at the Create New Web Service Request dialog.
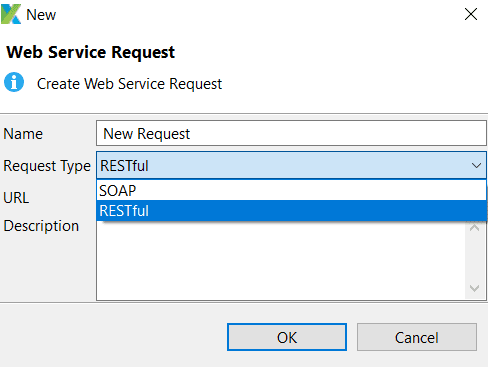
- In the Create New Web Service Request dialog, enter the Name, Request Type, URL, and description to create a request.
*Note: As URL is not a required field, you can set it up later in the next step. On the other hand, Request Type is a required field; therefore, you need to specify it precisely at this step.
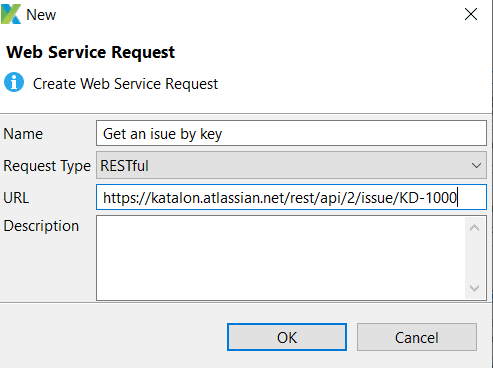
- Click OK, then the screen below will show up.
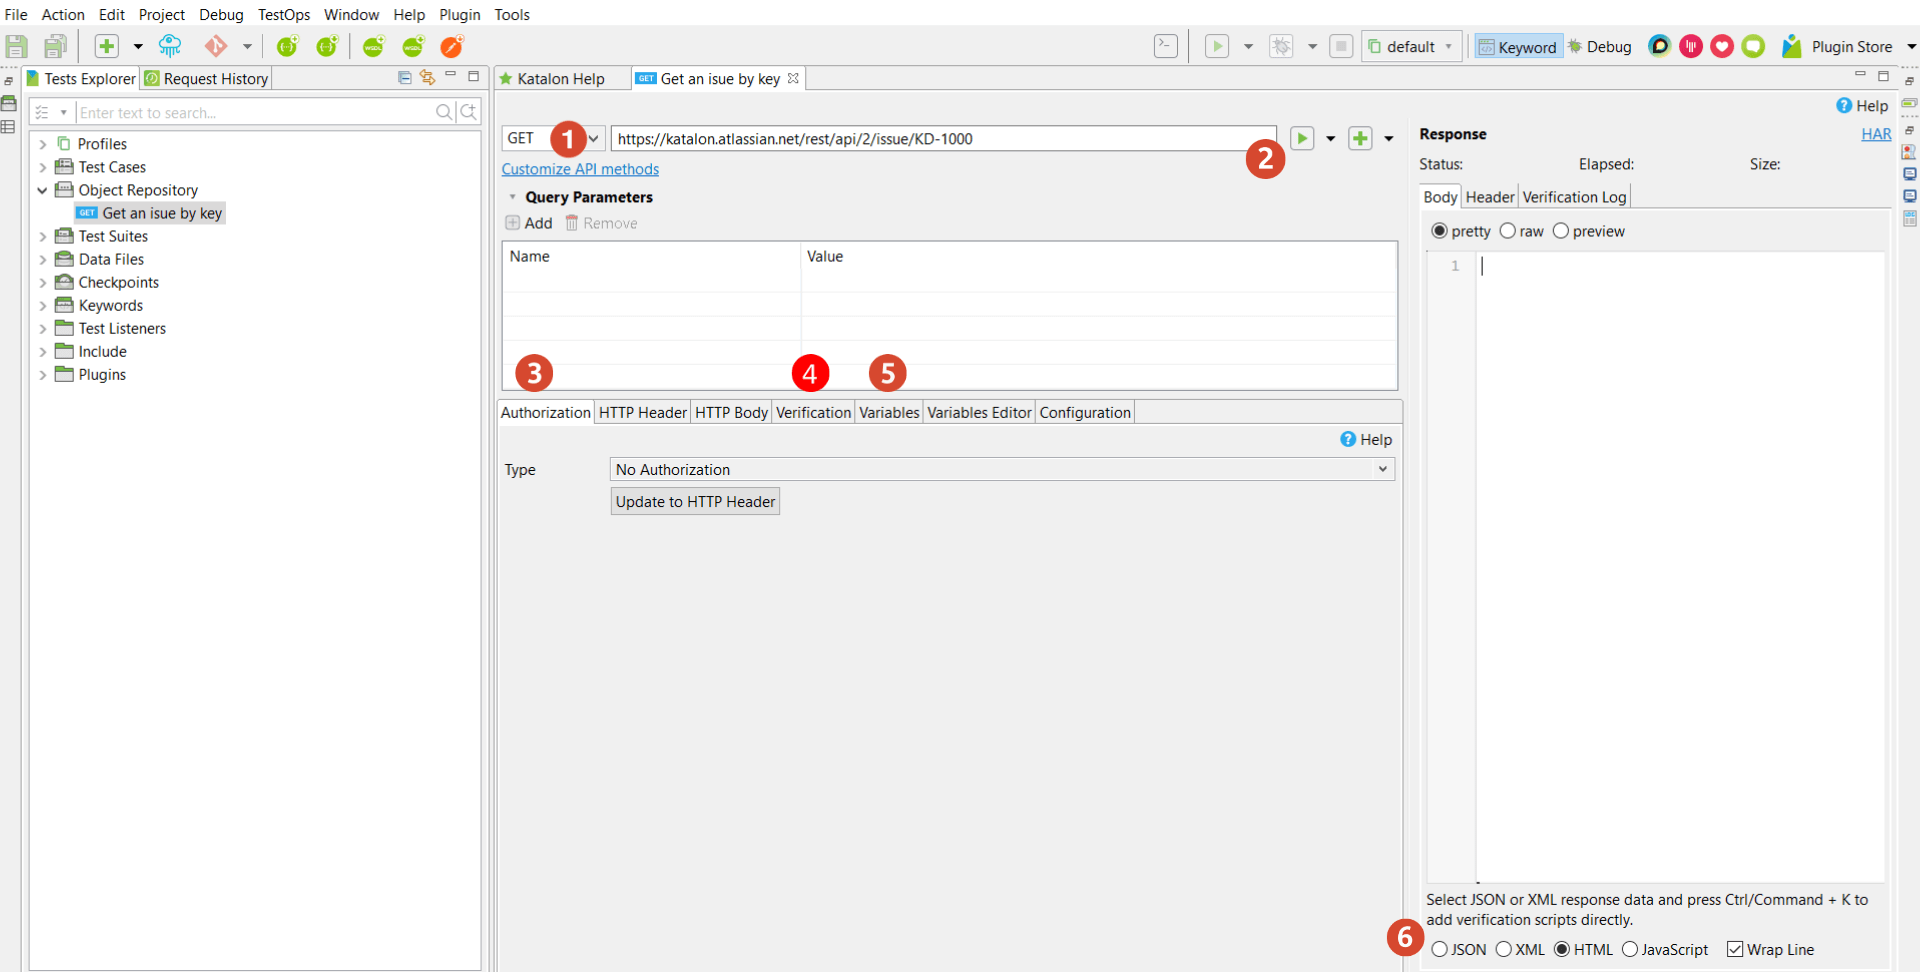
In this step, you need to specify a few items for a RESTful request:
(1) Request Method
You can choose one of these following methods for your request test: GET, POST, PUT, DELETE. Please note that the method you choose needs to match with the URL to have a valid request. Any mismatch between these two items will lead to invalid request exceptions at runtime or wrong data response.
(2) Request URL
The requested URL specifies the request’s address (E.g., Web server, port, and path).
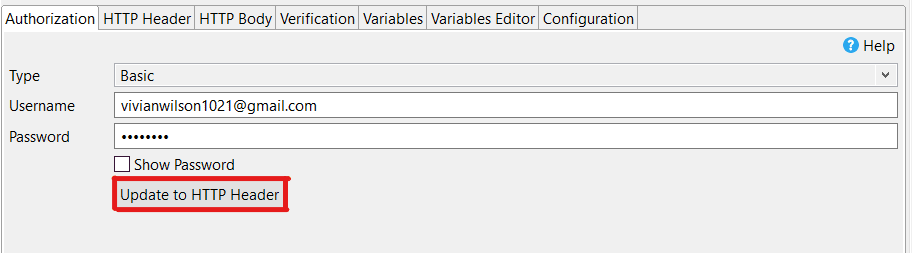
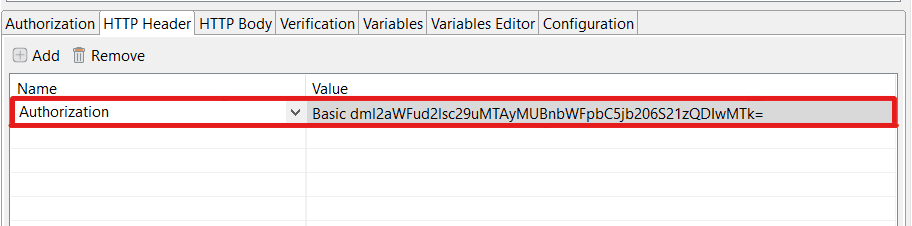
(3) Authorization
Authorization is used to authenticate the user and access the request. Katalon Studio supports common authentication methods, including Basic, OAuth 1.0, OAuth 2.0.
In the example below, we use the Basic authentication method. You will be required to enter your user name and password.
(4) Verification
Verification is used to define assertions ensuring that the response contains expected information. The verification tab of a request is similar to the Script tab of a test case.
In other words, you can write custom scripts with built-in keywords or Groovy/Java scripts to verify the response data.
If you find it challenging to deal with parsing and assert with JSON data format, Katalon Studio is for you. It provides not only the built-in keywords needed to reduce the effort of creating new tests from scratch but also supports built-in code snippets to help in generating assertions easily.
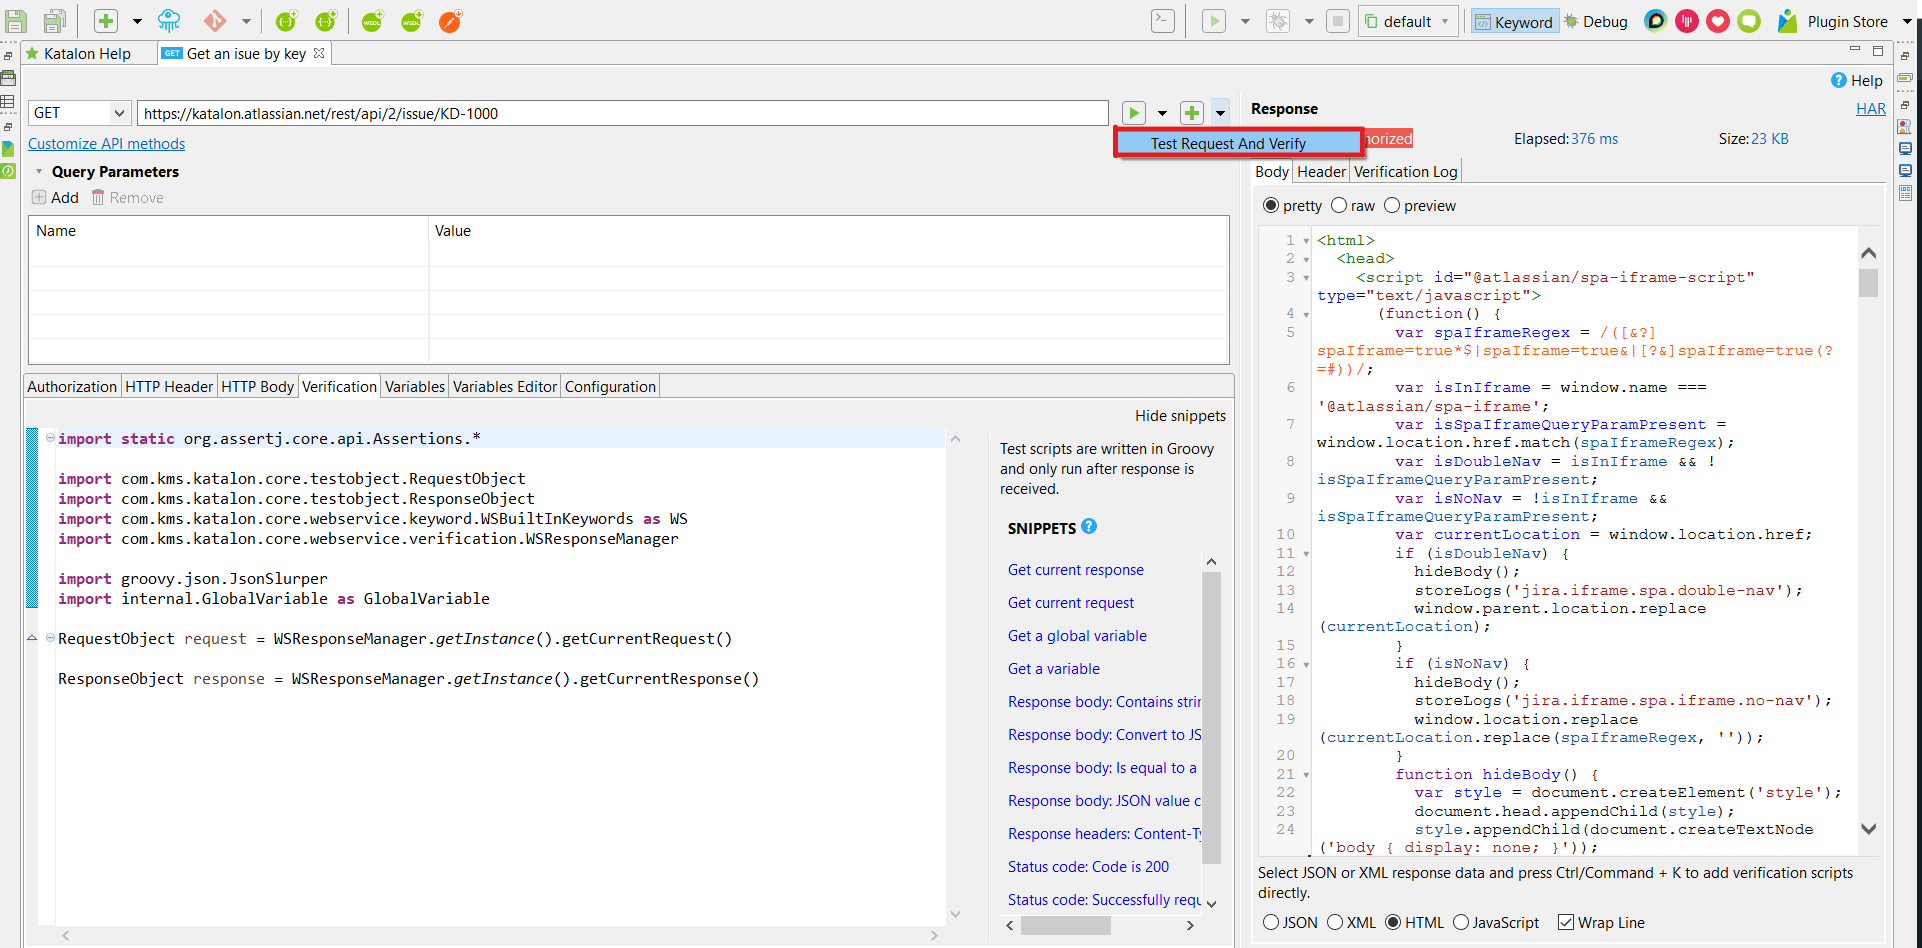
The right panel of the request consists of the responses displayed automatically in a friendly format, along with the verification results in the Verification Log. You need to choose the “Test Request and Verify” option from the execution button to include the verification script when sending the request.
The Verification script allows you to have quick feedback on the request status rather than the actual test. You can add more assertions to the test case level in the next step.
(5) Variables
Katalon Studio provides variables for RESTful and SOAP Web Service Test Objects. Having the ability to use variables in an object enables users to have more control of the objects and meet all of their testing requirements.
In other words, variables make API testing more robust and dynamic with the data-driven approach.
Every part of the request can be parameterized in Katalon Studio. That means dynamic data can be used for: URL, Authentication, HTTP Header, and HTTP Body to maximize the capability of data-driven testing.
(6) Formatter
Katalon Studio offers a quick view of the response status by automatically displaying it in a neat format: JSON, XML, HTML, and JavaScript.
Step 3: Create a new test case with an existing request
For better management and report, you can add request verification at the test case level.
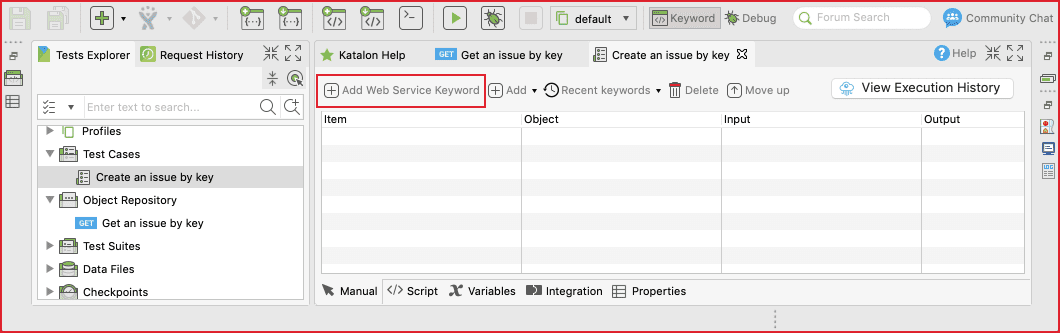
Step 4: Add an existing request to a test case
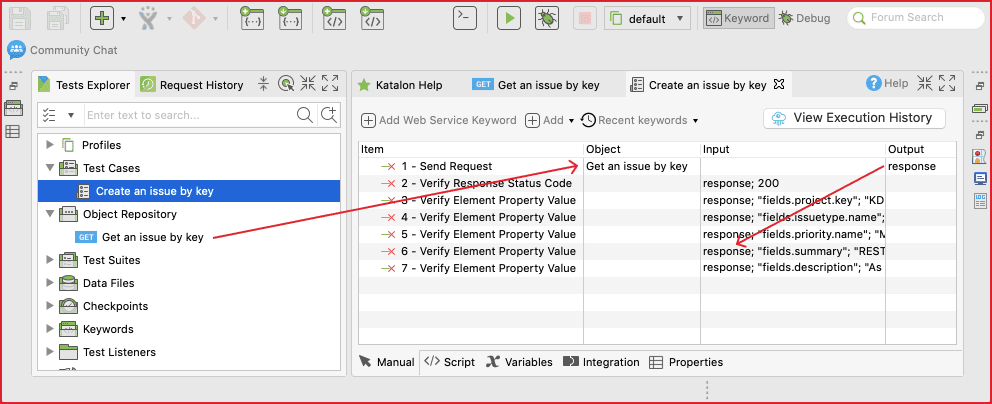
You can insert a request with Web service built-in keywords. There are many keywords that can be used to send the request, verify the response, and make the request part of a bigger testing flow.
The following test case demonstrates how to call a request in the verification steps:
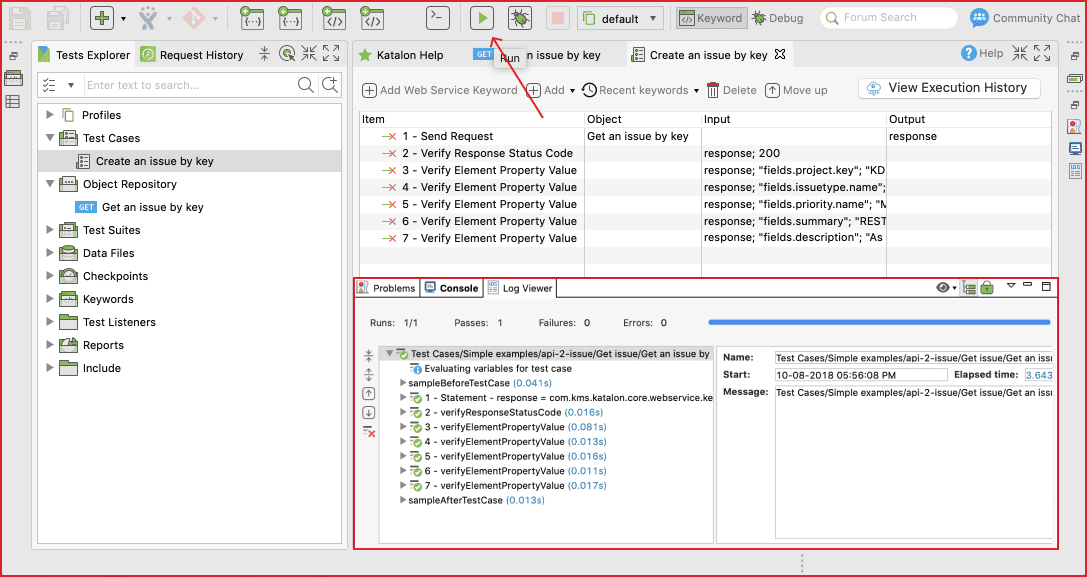
In Katalon Studio, the test case can be executed as a normal test case. Each verification step can be viewed in the Log Viewer.
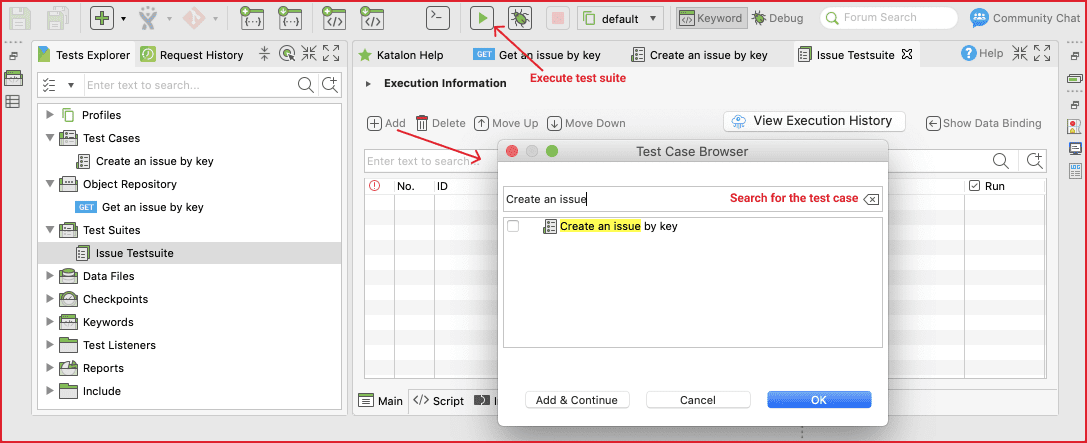
Step 5: Add the test case to the test suite
You can use either the drag-and-drop feature or the Add test case tool to add a test case to a test suite.
The test suite can be executed after the test case is added by clicking the Run button (without selecting a browser to run as in Web UI testing).
What to do next?
Congratulations! You’ve finished creating your first test. However, with a practical solution, you will need to create more tests with more techniques to reflect the real testing needs of your project in a better way.
Katalon Studio enables you to:
- Parameterize your tests
- Apply the data-driven approach
- Create custom keywords/packages
- Call tests and reuse code
- Include error handling
- View test reports after test suite execution
We hope this tutorial will help you understand all the steps and concepts needed to create your first API test using Katalon Studio. Happy testing!
>>> Checkout Katalon Tutorial List <<<
⇓ Subscribe Us ⇓
If you are not regular reader of this website then highly recommends you to Sign up for our free email newsletter!! Sign up just providing your email address below:
Happy Testing!!!
