This tutorial will guide you through the step-by-step instructions to create an automation test case in manual mode using Katalon Studio.
Before we start, make sure you have already downloaded Katalon Studio at www.katalon.com
Scenario:
- Open the browser
- Navigate to a website
- Click on a certain control
- Validate if the control exists on the page
- Close the browser
Here’s how you can automate the above test scenario in Manual view:
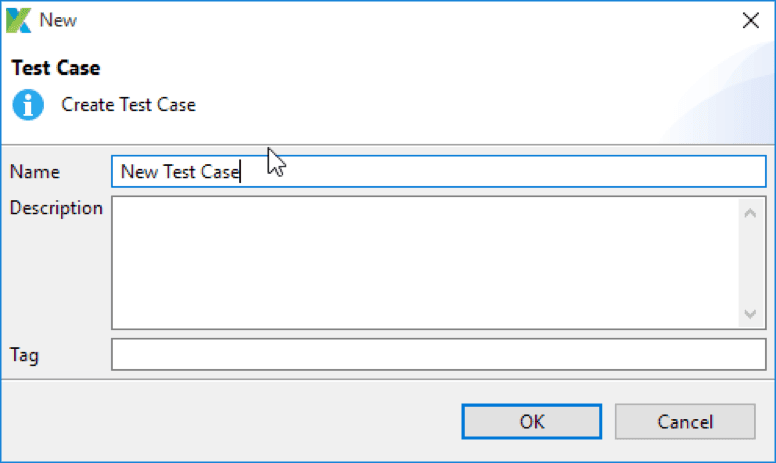
Step 1: To create a test case, go to File -> New -> Test case from the main menu. Then enter the test case’s name in the below window that shows up and click “OK.”
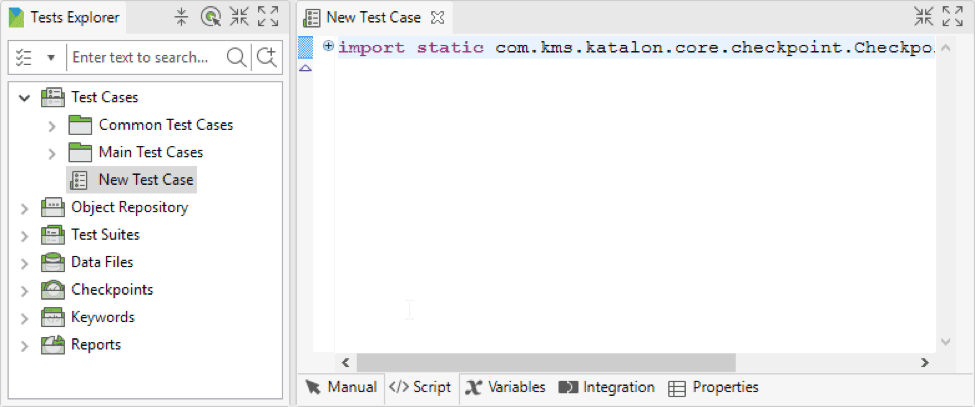
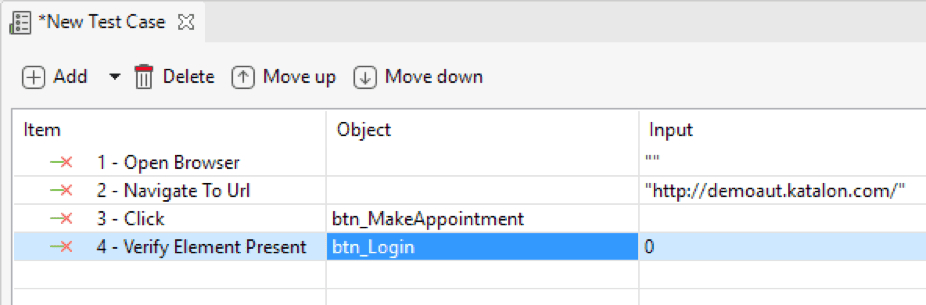
Step 2: Once a new test case is created, it is opened in the Manual view. This view allows users to define steps for the test case easily with little programming skills required.
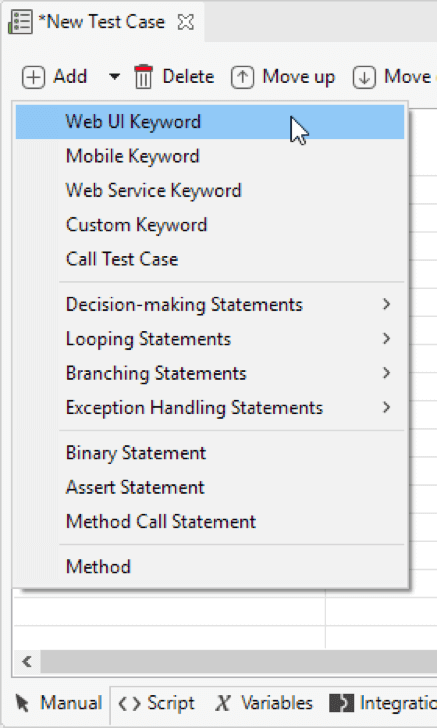
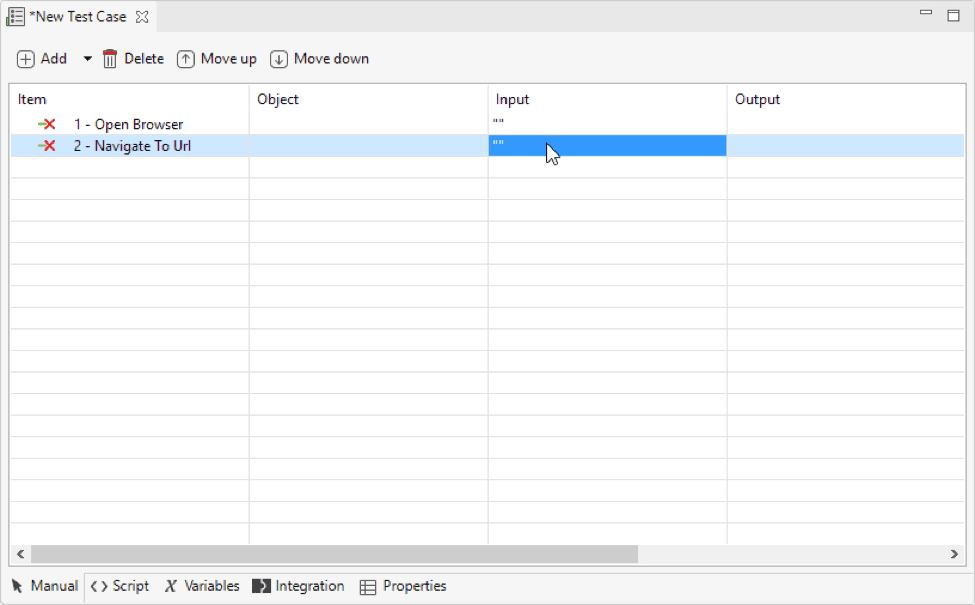
Step 3: Go to Add -> Web UI Keyword from the command toolbar.
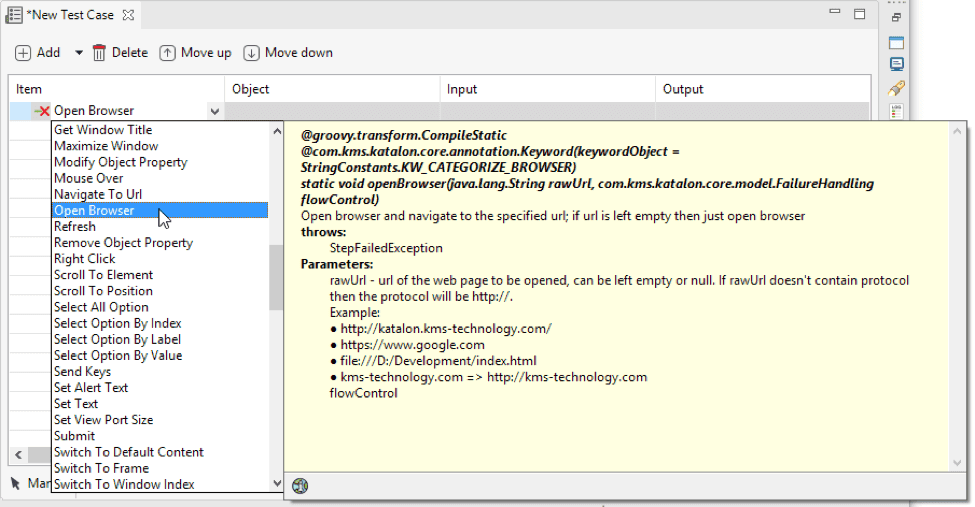
Step 4: Choose the Open Browser keyword. If the URL is provided, this keyword will open a browser and navigates to the previous specified URL. You will see the details for the selected keywords show up in the popup screen as shown below.
Step 5: Add the Navigate To Url keyword. This keyword navigates to a specified URL. To provide parameters for the keyword, double click on the Input cell.
Step 6: The Input dialog is shown below. Each row represents one parameter.
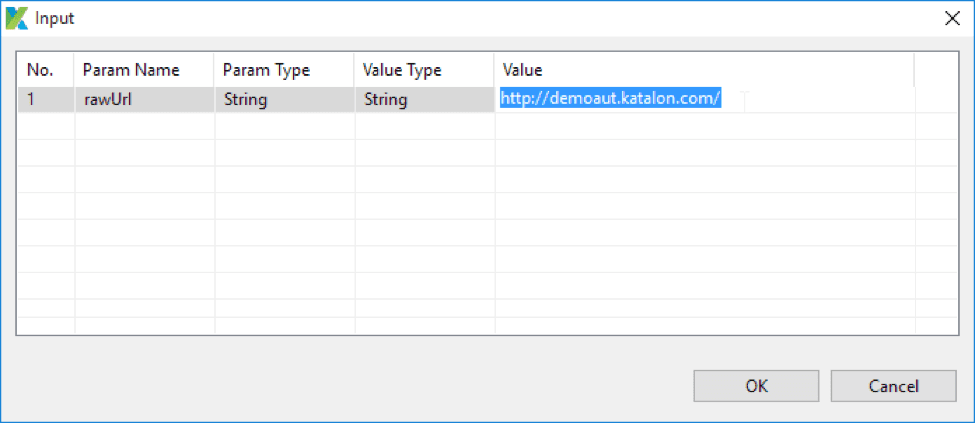
Where:
| Field | Description |
| No | The parameter order for the selected keyword. |
| Param Name | The name of the parameter. |
| Param Type | The data type of the parameter (e.g. String, Variable or Test Data Value…) |
| Value Type | The type of input value (e.g. String,Variable or Test Data Value…) |
| Value | The input value for this parameter.Input value varies depending on the specified Value Type. Refer to Value Types in Katalon for more details. |
For now, enter the URL of Katalon demo AUT (http://demoaut.katalon.com) into the Value column then click “OK.”
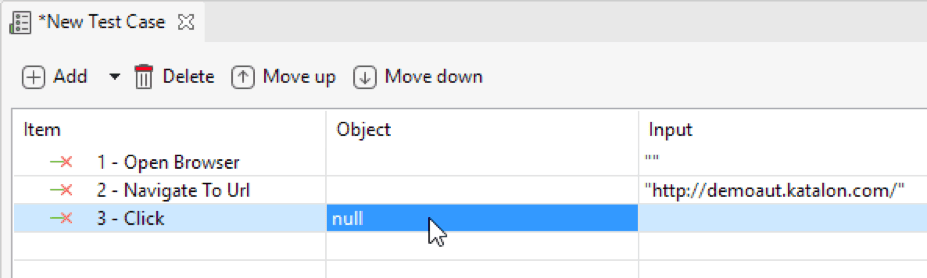
Step 7: Add the Click keyword. This keyword represents the click action on a given object. You need to specify an object for this action. To open the Test Object Input dialog, double click on the Object cell.
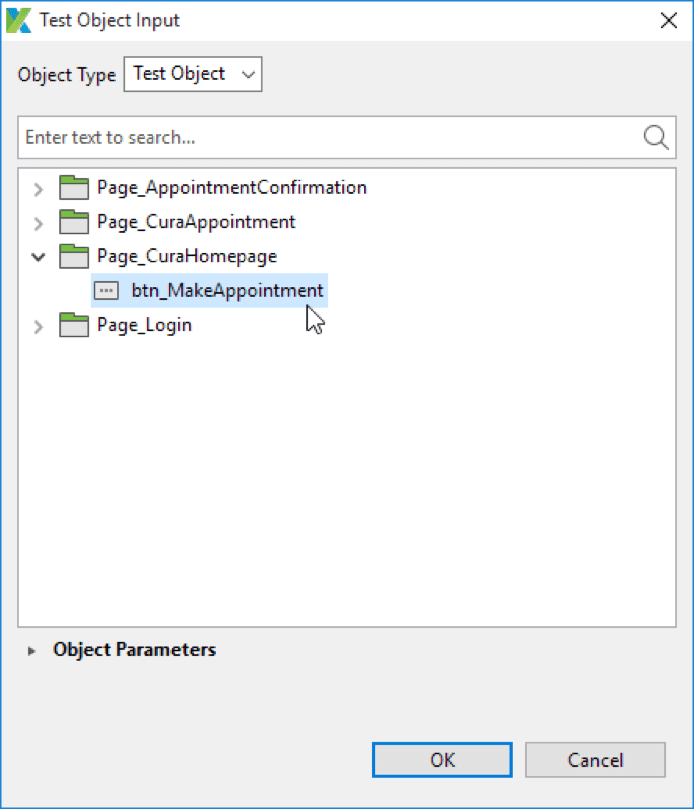
Step 8: All captured objects in Object Repository are displayed in the Test Object Input dialog (For details regarding how to capture objects, please refer to Spy Object). Select your object then click “OK.”
Step 9: To validate if a certain object is displayed on the executing browser, enter the Verify Element Present keyword. Same as the previous step, you need to specify the object to be used with this keyword.
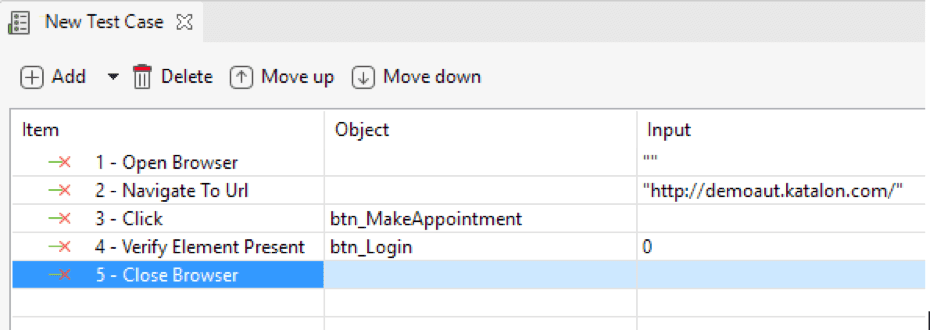
Step 10: Add the Close Browser keyword and save your test case.
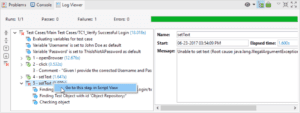
Step 11: To execute the test case, click “Run” in the main toolbar.

Katalon Studio should be able to execute all of the steps specified in the test case. Test execution results are shown in Log Viewer as below:
Congratulations! Now you have learned the first and basic steps when using Katalon Studio. For additional tutorials and guidelines please visit Katalon Studio documentation.
>>> Checkout Katalon Tutorial List <<<
⇓ Subscribe Us ⇓
If you are not regular reader of this website then highly recommends you to Sign up for our free email newsletter!! Sign up just providing your email address below:
Happy Testing!!!
