This tutorial provides an overview of how to set up a web testing project using Katalon Studio.
Make sure you already downloaded Katalon Studio at www.katalon.com
Get Ready
Step 1: Set up a project
A new project can be created from scratch or from one of the project samples we provided.
- Go to File -> New -> Project and select your preference.
- Provide the project’s name, the location to store the project data, and description (optional).
Notes: All of the Katalon Studio codes in this tutorial can be found in the Getting Started Sample.
Step 2: Create the first test case
- Right-click on Test Cases -> New -> Test Case
In Katalon Studio, test cases can be written in pure Selenium format. Below is an example:
WebDriver driver = new ChromeDriver();
String baseUrl = "https://www.katalon.com/";
driver.manage().timeouts().implicitlyWait(30, TimeUnit.SECONDS);
driver.get("https://katalon-demo-cura.herokuapp.com");
driver.findElement(By.id("btn-make-appointment")).click();
driver.findElement(By.id("txt-username")).clear();
driver.findElement(By.id("txt-username")).sendKeys("John Doe");
driver.findElement(By.id("txt-password")).clear();
driver.findElement(By.id("txt-password")).sendKeys("ThisIsNotAPassword");
driver.findElement(By.id("btn-login")).click();
driver.quit();
- To see how it works, Click ‘Run.’’
However, writing test cases can be very time-consuming and tedious. In Katalon Studio, the above test case would look like this:
WebUI.openBrowser('https://katalon-demo-cura.herokuapp.com/')
WebUI.click(findTestObject('Page_CURA Healthcare Service/a_Make Appointment'))
WebUI.setText(findTestObject('Page_CURA Healthcare Service/input_Username_username'), 'John Doe')
WebUI.setEncryptedText(findTestObject('Page_CURA Healthcare Service/input_Password_password'), 'g3/DOGG74jC3Flrr3yH+3D/yKbOqqUNM')
WebUI.click(findTestObject('Page_CURA Healthcare Service/button_Login'))
- Click ‘Run’ to see how it works
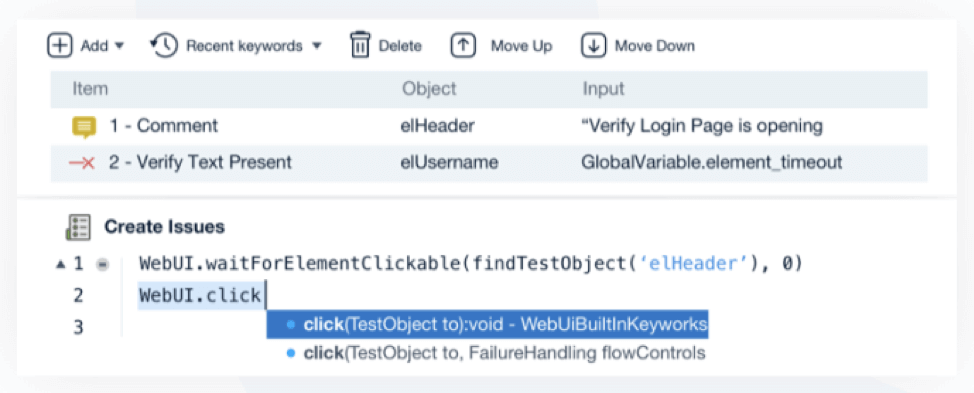
The Katalon Studio’s beginning steps seem relatively self-explanatory. However, you might wonder where the “BrowserDrivers” is, what the “click and setText” methods are, or how to use the “Page_CURA Healthcare Service/a_Make Appointment” argument. Let’s go through them together.
- Browser drivers: In Katalon Studio, browser drivers i.e., ChromeDriver are abstracted away from the code and set up at the execution time to make code inherently cross-browser-able.
- Click and setText: these are Katalon Studio’s open-source built-in keywords that wrap and enhance the limited set of Selenium keywords. You can also define your own set of custom keywords or import the shared custom keywords made by other Katalon Studio users.
- Page_CURA Healthcare Service/ a_Make Appointment: Recently, Katalon Studio has developed a feature named “auto-healing” that makes test object sustainable, despite the continuously changing nature of the AUT. Eventually, the above script and objects can be quickly generated by the ‘Recording’ and ‘Spying’ features.
Katalon Studio can be used to perform both manual and automated testing. This tools uniquely provides a dual for both manual and automated tests:
To put into practice, a team of testers and developers can apply the following steps to a complete workflow:
- First, the automation experts need to prepare all the scripts needed to build test cases such as custom keywords, test listeners, calling test cases, etc.
- Then, all the prepared scripts as mentioned above will be transferred to the manual QAs to utilize.
- Eventually, the manual QAs —who are not familiar with scripting, now can gradually learn how to script and become automation scripters.
Step 3: Verification in the test case
To know whether the login process is successful or not, you need to add the verification script to the test case.
Now, as you have known the basics of how Katalon Studio script works from the first test case, let’s move further to create a more realistic test case with the “Make Appointment” header verification.
Katalon Studio provides a rich set of verification keywords to deal with that requirement easily. Once again, this kind of script can be done in both Manual and Script mode.
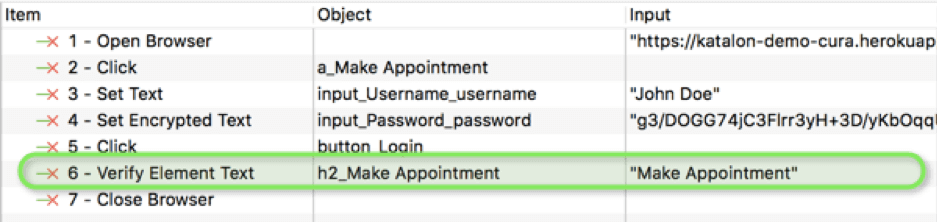
WebUI.verifyElementText(findTestObject('Object Repository/Page_CURA Healthcare Service/h2_Make Appointment'), 'Make Appointment', FailureHandling.STOP_ON_FAILURE)
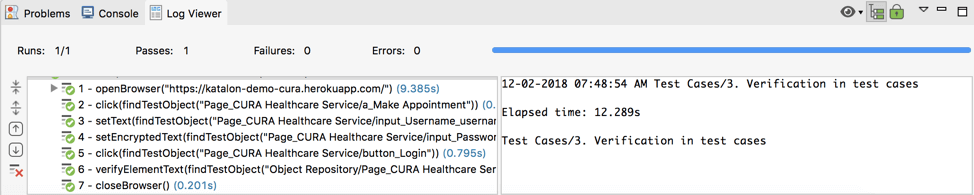
After that, you can check the execution results in the Log Viewer. Refer to this documentation to learn how to view execution logs.
Step 4: Debugging the test case
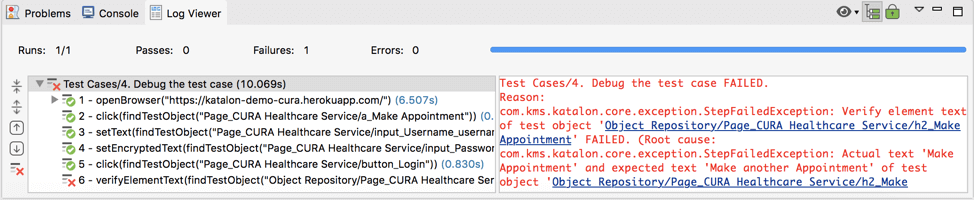
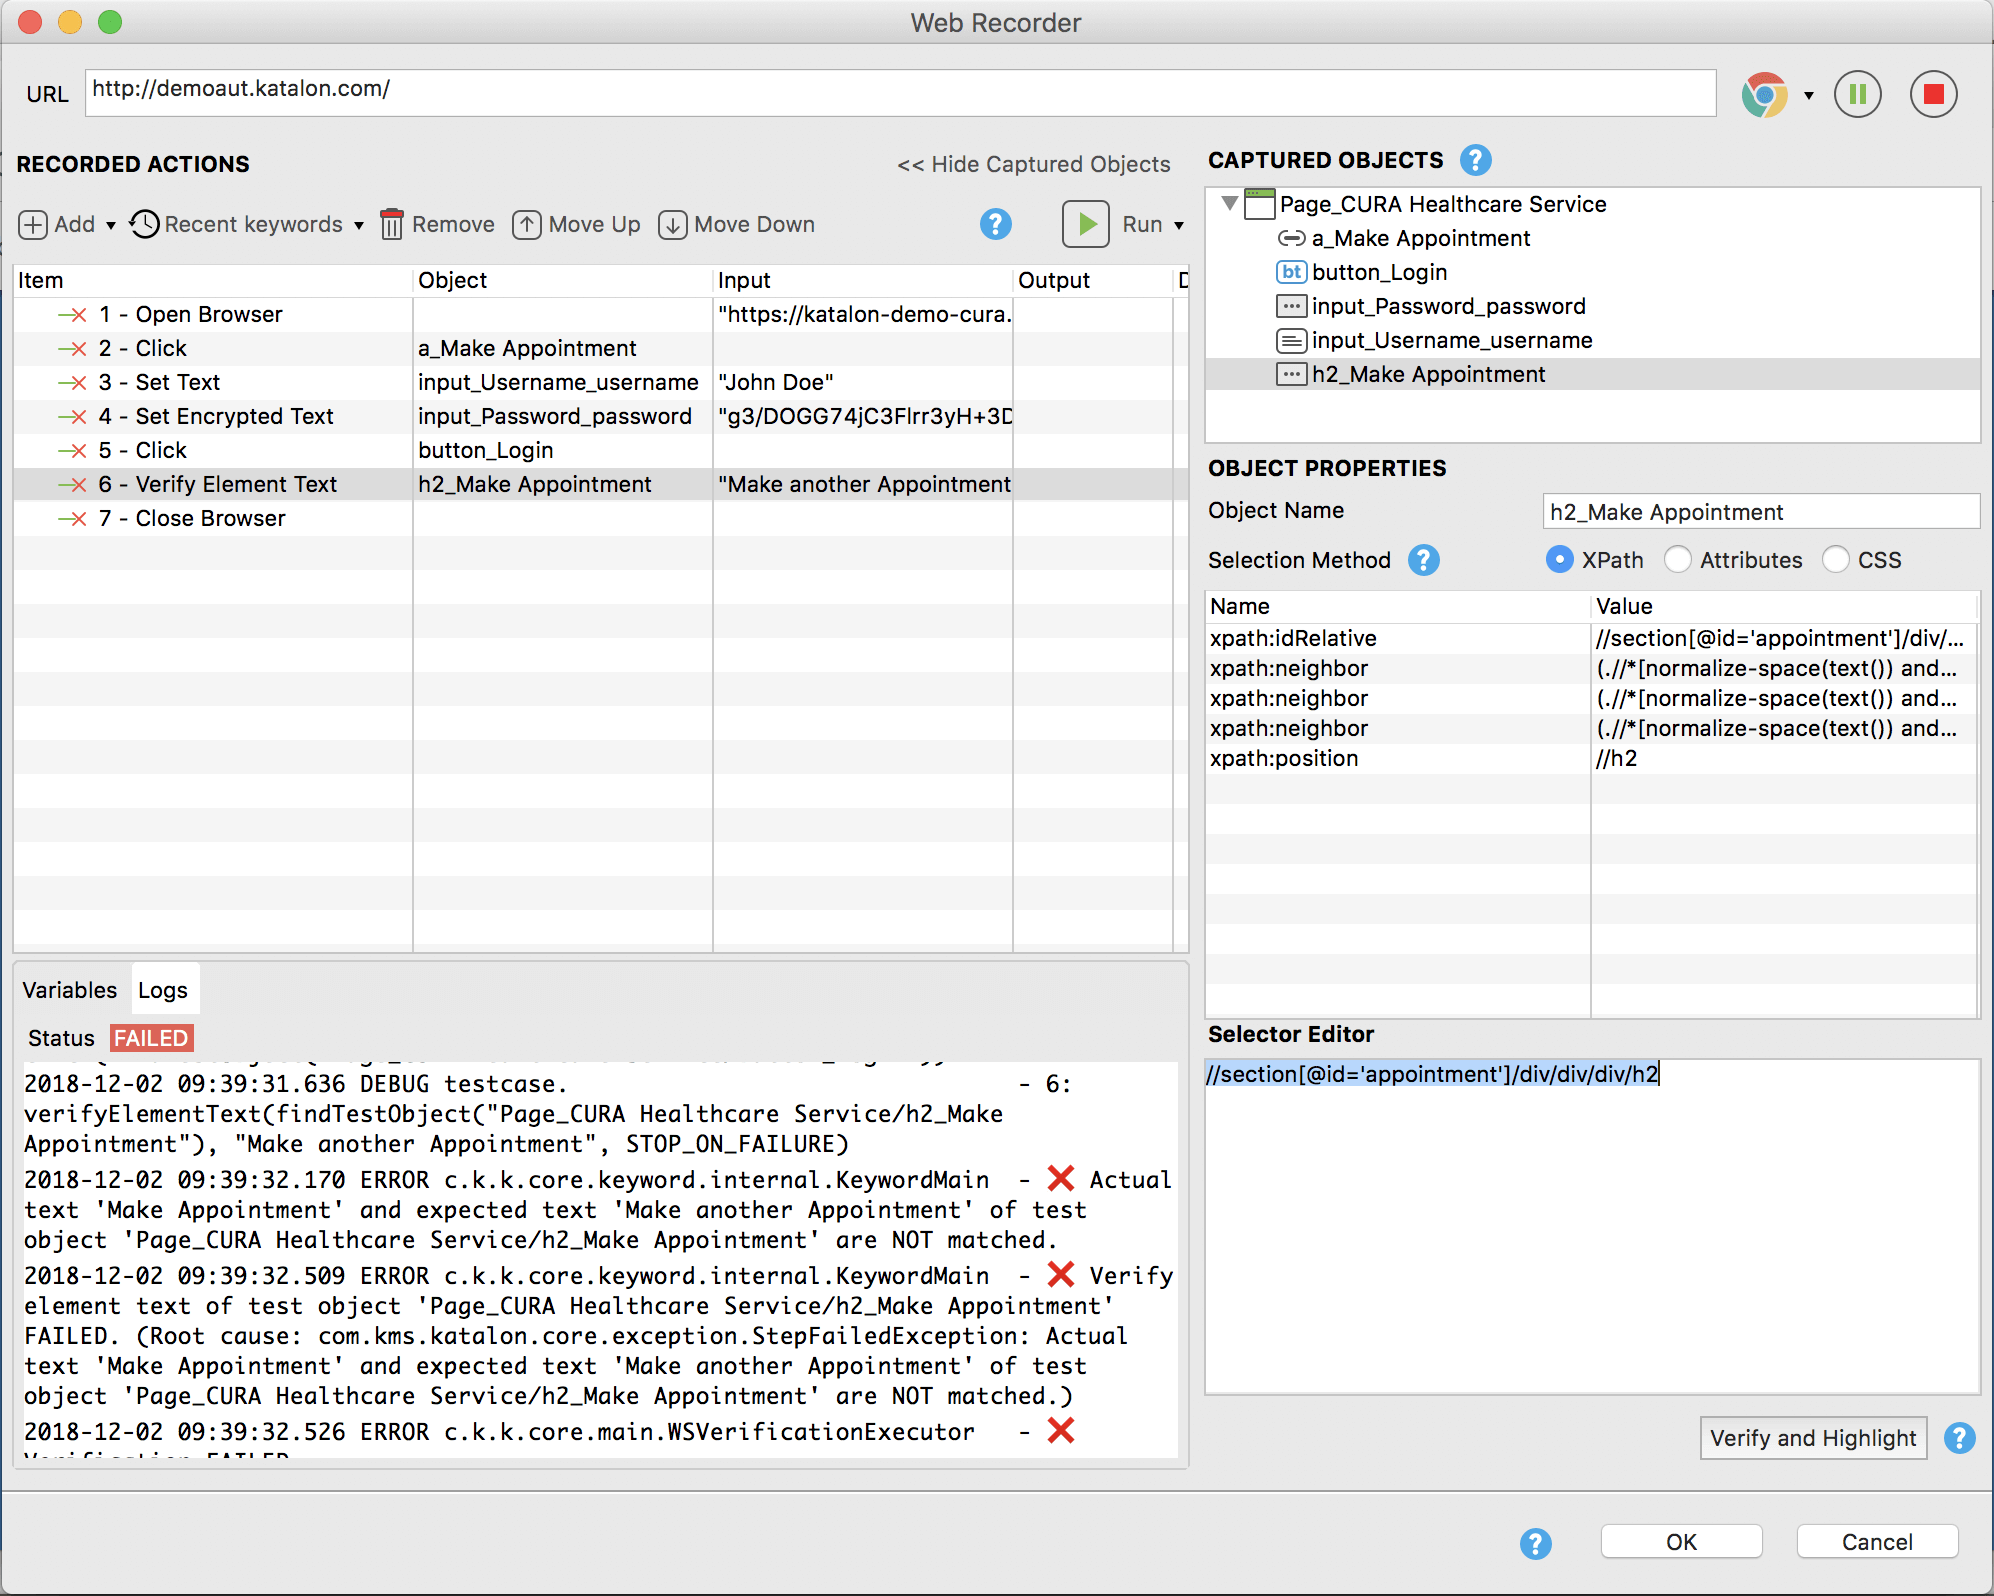
Let’s intentionally make the test case fail by changing the verification text to “Make another Appointment.” There are several ways to check for the failure reasons in Katalon Studio.
- Option 1: Investigate error logs
- Option 2: Debug mode

Katalon Studio provides a debug mechanism that works the same as the code debug mechanism in advanced developer IDE to investigate complex scenarios.
- Option 3: Manual debug
The ‘Recording’ feature of Katalon Studio has its method to debug as well. You can continue to record the failed test case, run the error test step, then investigate and fix the issue directly in the recording mode. Here’s an example:
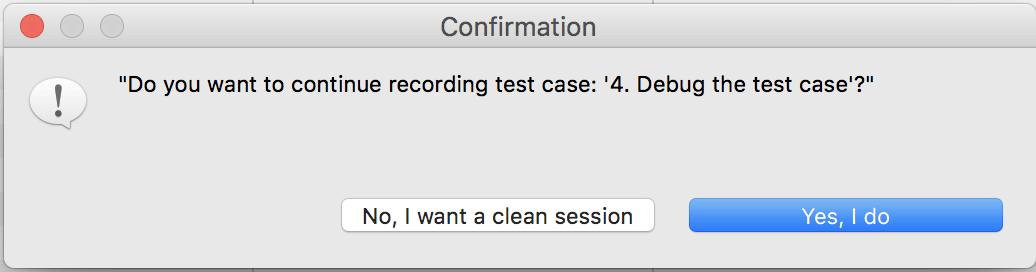
When the test case failed, the window below will show up. Click “Yes, I do” to continue to record the failed test cases.
Then, you can investigate and fix the issue directly in the recording mode.
Step 5: Plan the test case in a test suite
- Right-click on Test Suites -> New -> Test Suite
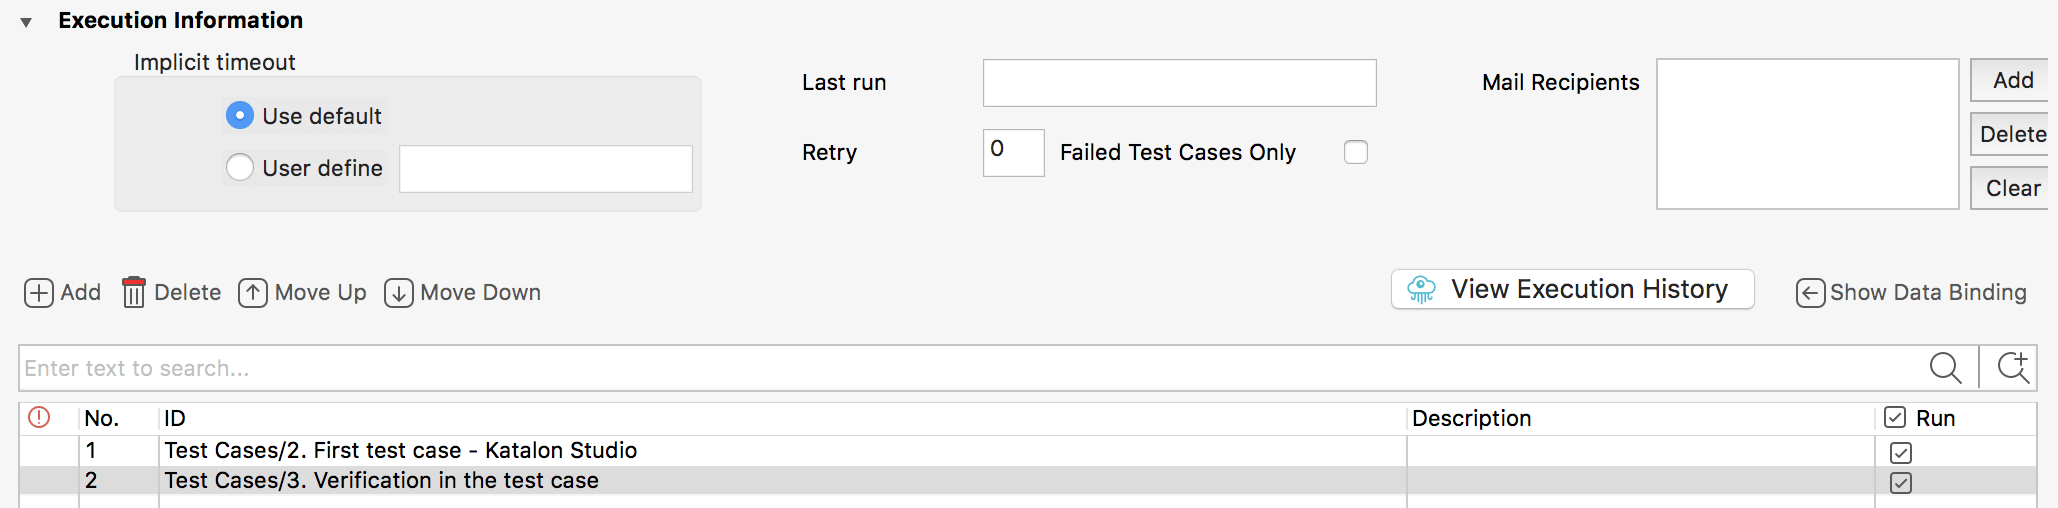
To plan test cases with several configurations (e.g., retrying on failure, email sending or data-driven binding), you can use a test suite. Additional configurations for a test suite execution can be managed by expanding the Execution Information section – as in the example below:
Refer to this doc for more details.
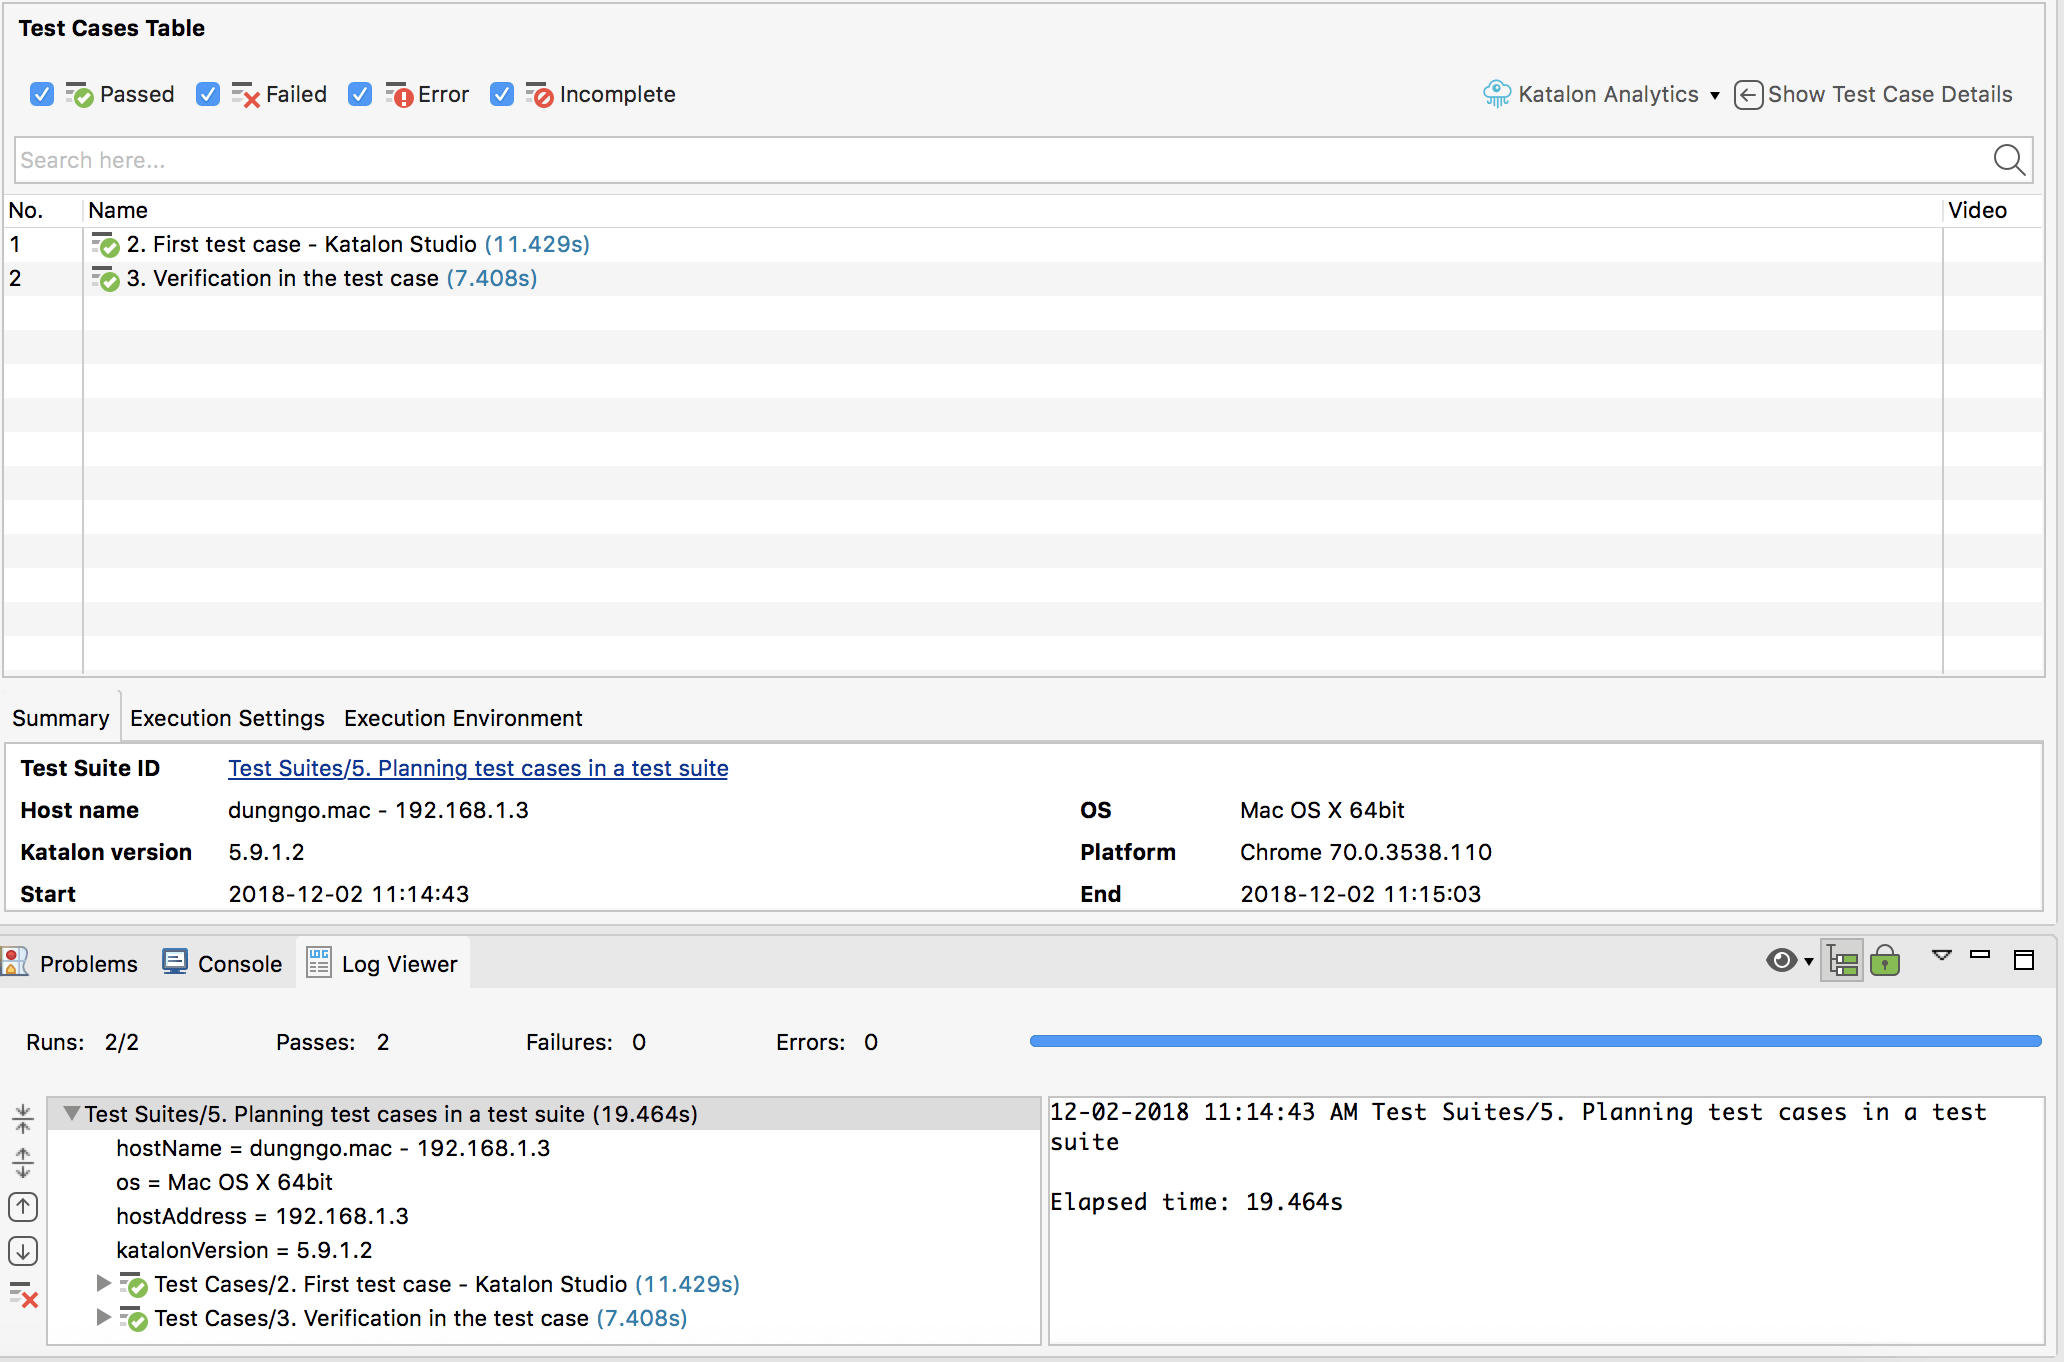
Step 6: Execute the test suite and view the result
- Select the Test Suite -> Click Run
Here’s how you can execute a test case in the designed test suite:
- Once planned, the test suites or test suite collections can be executed not only directly in Katalon Studio, but also by command line.
Together with the standard JUnit format of the execution results and pre-built Docker images, these features will give you full flexibility to integrate Katalon Studio into a CI/CD pipeline with tools such as Jenkins or CircleCI.
We hope this tutorial will help you understand all the steps and concepts needed to start your Web testing project with Katalon Studio. Happy testing!
>>> Checkout Katalon Tutorial List <<<
⇓ Subscribe Us ⇓
If you are not regular reader of this website then highly recommends you to Sign up for our free email newsletter!! Sign up just providing your email address below:
Happy Testing!!!

1 thought on “Start your Web testing project with Katalon Studio”
Any free automation testing tool for windows applications.. Your help is really appreciated.