Test recording is the simplest, cheapest, and most effective method for new automation testers to start learning test automation. However, it’s quite a tedious and time-consuming process to identify objects on applications. To help you out of this difficulty, Katalon Studio provides a function called Web Recorder Utility that captures your actions being performed on the app and converts them into runnable code in the back-end.
With the Web Recorder Utility function, you can quickly automate a few functionalities of your application and save time by recording actions that have to be performed many times in iterative builds. Furthermore, this function also supports recording and running the same tests on multiple browsers.
Make sure you already downloaded Katalon Studio at www.katalon.com
Record Test with the Record Web function
Scenario: To make an appointment
- Launch the application under test (Example: http://demoaut.katalon.com/)
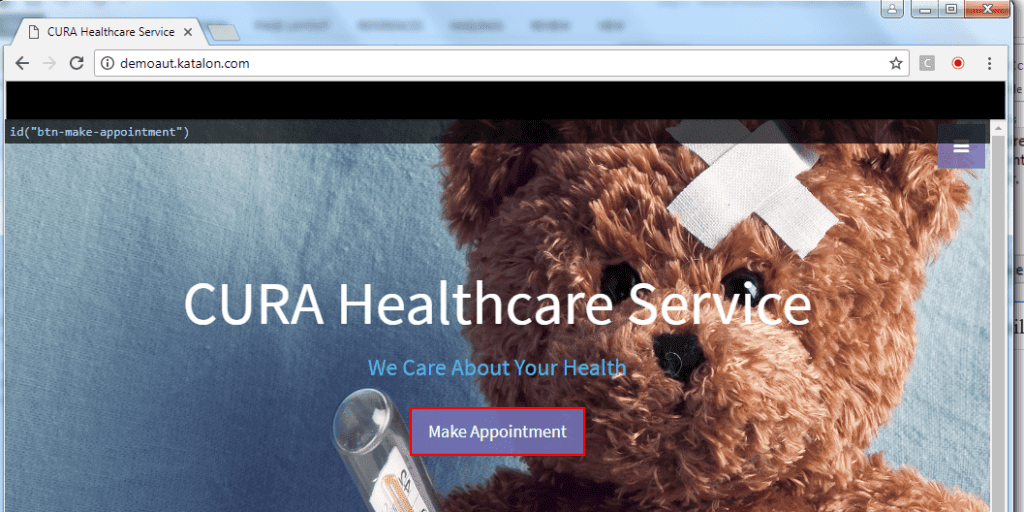
- Click the “Make Appointment” button
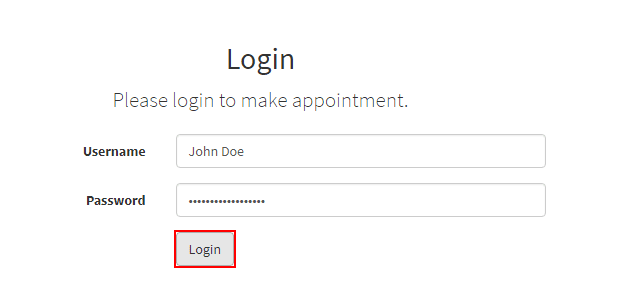
- Provide a valid username, password. And then, click “Login”
- Make an appointment
To familiarize yourself with the Record & Playback feature for Web UI tests, please follow the below steps:
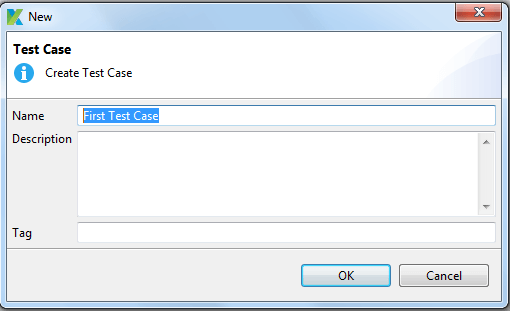
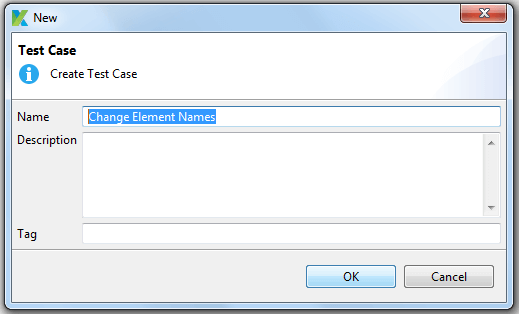
Step 1: Launch Katalon Studio and select New -> Test Case on the main toolbar.
Provide the test case name and click OK to create an empty test case.
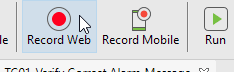
Step 2: In the main toolbar, click “Record Web.“

After that, the Record dialog will be shown as follow:
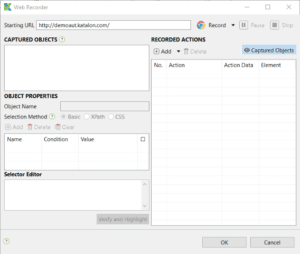
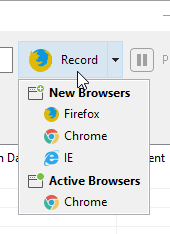
Step 3: Select a browser in the drop-down list. Then click “Record” to start recording the test case.

Step 4: Click on the “Make Appointment” button after the application has been launched, . After that, you will be directed to the Login page.
Step 5: Provide a valid username and password, then click “Login”.
Step 6: After the Make Appointment page has been loaded, in the Facility dropdown menu, choose the value “Hongkong CURA Healthcare Center”.
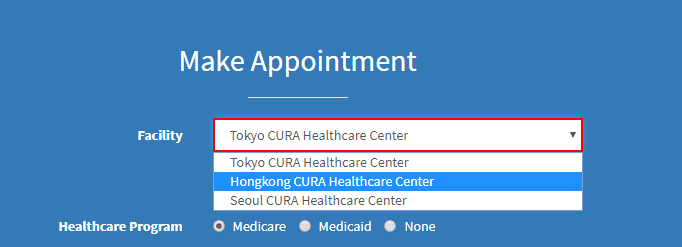
Step 7: Click on the “Apply for hospital readmission” checkbox.
Step 8: Move to the “Healthcare program” section and select the “Medicaid” checkbox.
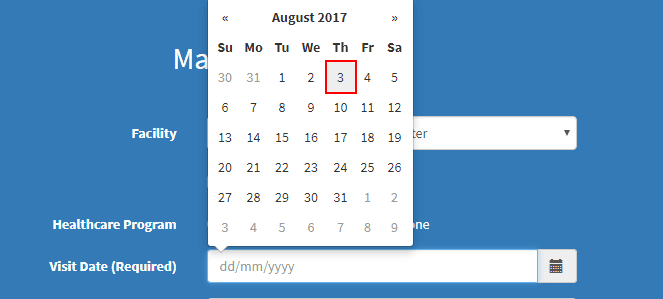
Step 9: In the “Visit Date (Required)” section, click on the calendar icon and select a day.
Step 10: Enter text in the Comment field.
Step 11: Click the “Book Appointment” button.
Notes:
- The recording can be stopped anytime simply by clicking the “Stop” button.
- For captured objects, you can select the “Selection Method”.
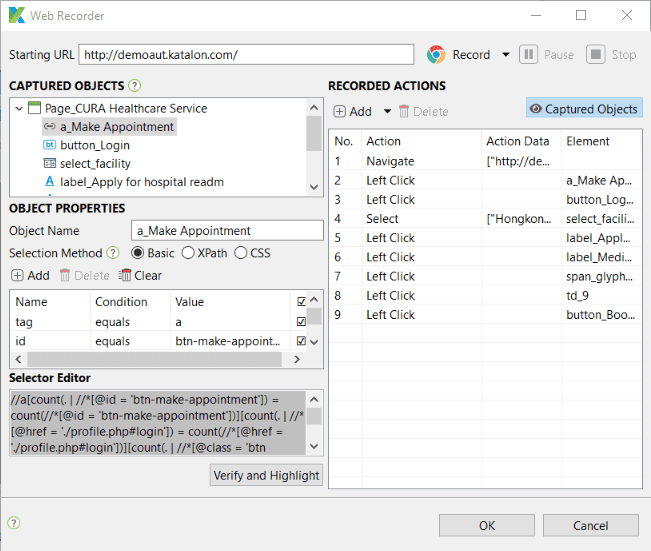
Step 12: To save the recorded actions into Katalon Studio, click “OK” after the recording is done.
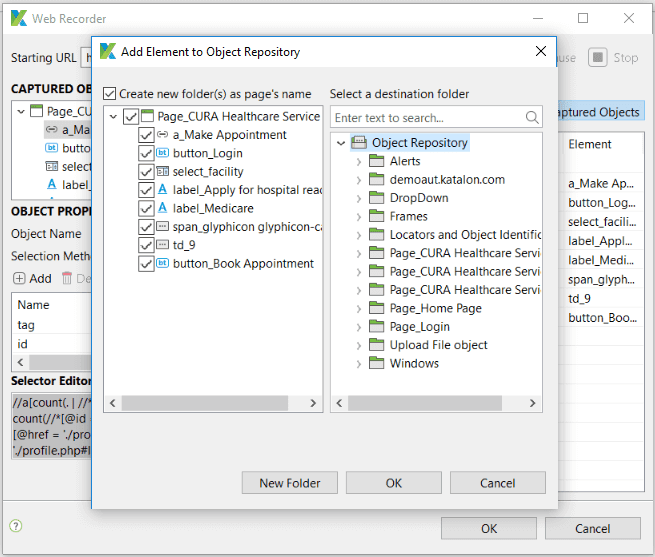
You will be prompted to save captured objects to the “Object Repository” folder, which can be reused whenever needed. You can also create a folder to maintain page objects in the desired structure. Click “OK” to continue.
Step 13: Recorded objects and actions are saved in the test case, as shown below.
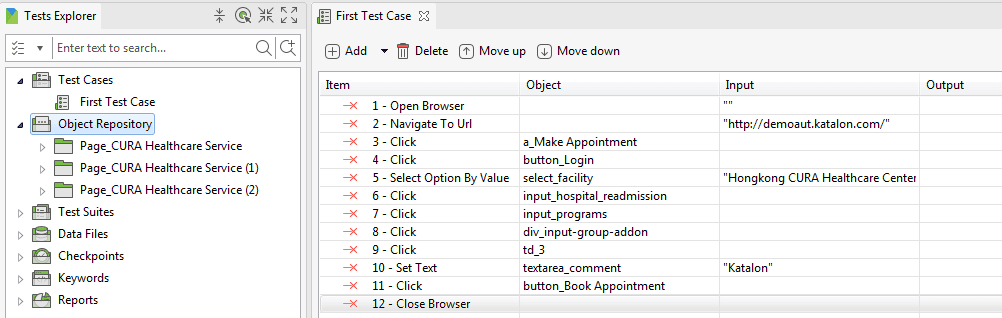
Click “Run” to execute recorded test cases in your desired browser.
Script Code for Record and Playback
WebUI.openBrowser('')
WebUI.navigateToUrl('http://demoaut.katalon.com/')</p>
WebUI.click(findTestObject('Page_CURA Healthcare Service/a_Make Appointment'))
WebUI.click(findTestObject('Page_CURA Healthcare Service (1)/button_Login'))
WebUI.selectOptionByValue(findTestObject('Page_CURA Healthcare Service (2)/select_facility'), 'Hongkong CURA Healthcare Center',
true)
WebUI.click(findTestObject('Page_CURA Healthcare Service (2)/input_hospital_readmission'))
WebUI.click(findTestObject('Page_CURA Healthcare Service (2)/input_programs'))
WebUI.click(findTestObject('Page_CURA Healthcare Service (2)/div_input-group-addon'))
WebUI.click(findTestObject('Page_CURA Healthcare Service (2)/td_3'))
WebUI.setText(findTestObject('Page_CURA Healthcare Service (2)/textarea_comment'), 'Katalon')
WebUI.click(findTestObject('Page_CURA Healthcare Service (2)/button_Book Appointment'))
WebUI.closeBrowser()
Rename Page Folders and Elements while Recording
To reuse and maintain the objects, you need to add test objects in the folder corresponding to the page to organize your test scripts in page object pattern.
Scenario: Login with valid data
- Launch the application under test (Example: http://demoaut.katalon.com/)
- Click the “Make Appointment” button
- Provide a valid username, password, and then click “Login”
Step 1: Launch Katalon Studio and select “First Test Case” on the main toolbar. Enter the test case name and click “OK” to create an empty test case.
Step 2: On the main toolbar, click “Record Web”.
To start recording the test case, select a browser (Firefox, Chrome, IE) and then click the “Record” button.
Step 3: Click on the “Make Appointment” button after the application has been launched, . After that, you will be directed to the Login page.

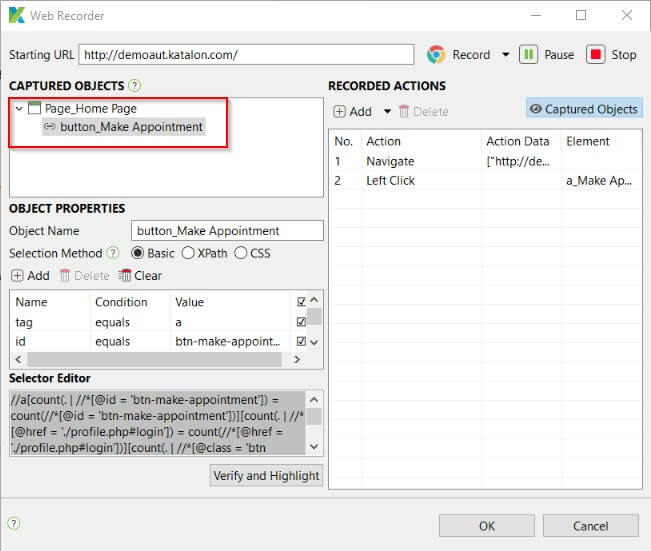
Step 4: Change the page name from “Page_CURA Healthcare Service” to “Page_Home Page.”
Step 5: Select the “a_Make Appointment” element in the “Captured Objects” frame
Step 6: Change the element name from “a_Make Appointment” to “button_Make Appointment.“
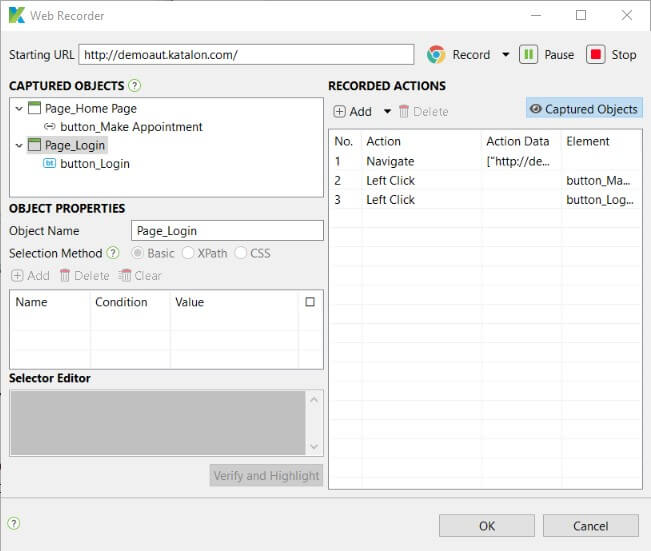
Step 7: Go back to the recording browser and continue to record. Click “Login”.

Step 8: Repeat these above instructional steps to change the name of the object Login and its folder.
Step 9: Change the Page name from “Page_CURA Healthcare Service” to “Page_Login.”
Step 10: Click “Stop” to stop recording. To save recorded actions into Katalon Studio, click “OK.”
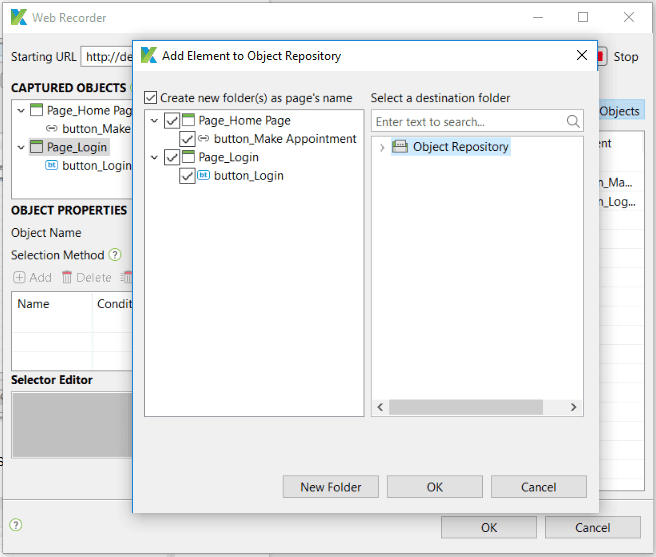
Step 11: You will be prompted to save the captured objects to “Object Repository” folder, which can be reused whenever needed. You can also create a folder to maintain page objects in your desired structure. Click “OK” to continue.
Step 12: Recorded objects and actions are saved in the test case as shown below.
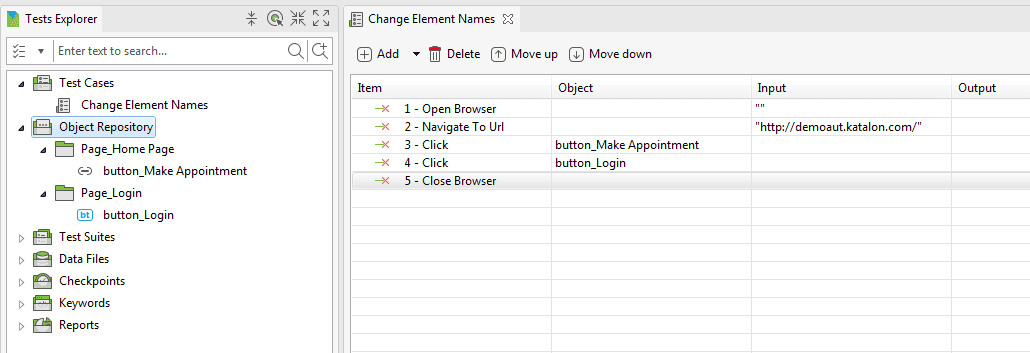
Click “Run” to execute the recorded test cases in your desired browser.
Source Code:
import static com.kms.katalon.core.testobject.ObjectRepository.findTestObject</p>
import com.kms.katalon.core.webui.keyword.WebUiBuiltInKeywords as WebUI
WebUI.openBrowser(”)
WebUI.navigateToUrl(‘http://demoaut.katalon.com/’)
WebUI.click(findTestObject(‘Page_Home Page/button_Make Appointment’))
WebUI.click(findTestObject(‘Page_Login/button_Login’))
WebUI.closeBrowser()
Conclusion
The above steps are how you can record the actions being performed using Katalon Studio. Recording your tests helps save time, but note that not all actions can be recorded. Some scenarios such as Web Table handling, switching to multiple frames, switching to windows, handling captcha, image recognition, and video playbacks cannot be validated.
>>> Checkout Katalon Tutorial List <<<
⇓ Subscribe Us ⇓
If you are not regular reader of this website then highly recommends you to Sign up for our free email newsletter!! Sign up just providing your email address below:
Happy Testing!!!

3 thoughts on “Creating test cases using Record and Playback”
This is amazing tool that I ever used. I really liked it.
Thanks for the Katalon tutorials. I want to confirm with language Katalon support, Is it possible to modify based on language I know.
This is great tool designed for fresher to experience QA. It will the future of QA for automation.
I am using this tool since long time, I will try to give solutions if you need.