Introduction
In the last chapter, we discussed writing requirements in Testlink tool. In this chapter, we are going to discuss linking requirement to a test case and Executing A Test Case in Testlink tool. Linking requirement to test cases is a very important feature in Testlink tool which helps to track down the test coverage based on requirements. Also, you can verify in the test report which all requirements are not covered and those uncovered requirements can be appended to test suites which can ensure maximum test coverage.
Steps to Link Requirements To Test Case In Testlink:
We can link the requirement to a test case in Testlink after following these steps.
Step 1: Bring up the Testlink application
Open the XAMPP console and click on Start buttons for Apache Web Server and MySQL. After Apache Web server and MySQL database are started, you can see their status on XAMPP control panel as shown below. Apache and MySQL elements on XAMPP control Panel have turned green which demonstrate the port number.

Note: When you want to stop or restart the Apache Web Server and MySQL database then you can simply click on the Stop button to complete the required action.
Step 2: Login to the TestLink application with admin or appropriate role
Make sure that the role with which you are going to login into Testlink tool should have appropriate access to write requirements. Once Apache Web server and MySQL database are up and running, you can access the TestLink application at the below URL on your local machine.
http://localhost/testlink-1.9.16/login.php
Shown below is the login page for TestLink tool. Enter username and password as admin and admin respectively in order to log into the application.

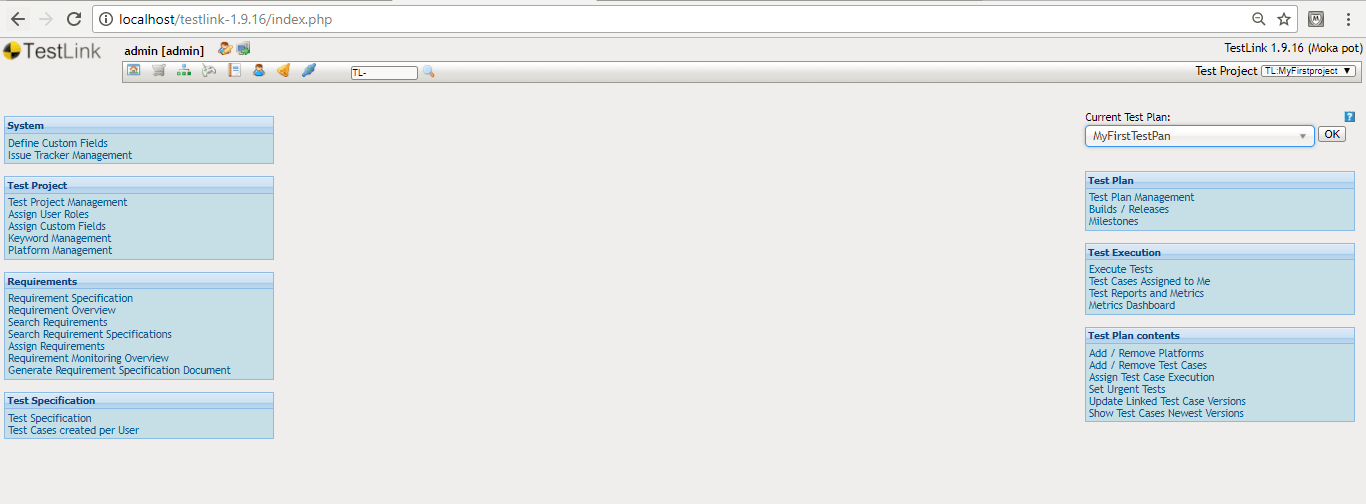
After successful login, it will take you to the home page of the TestLink tool as shown below.
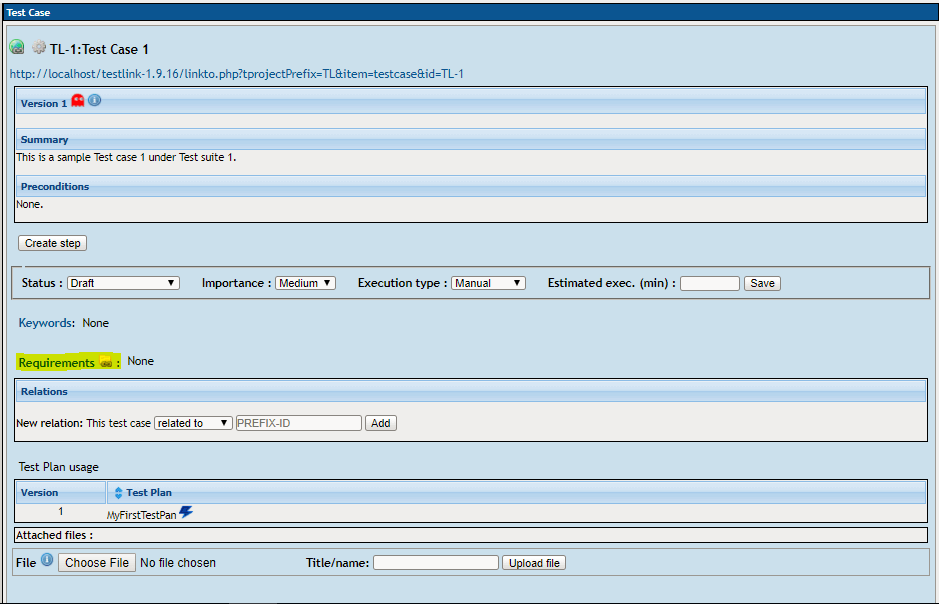
Step 3: On the home page click on the “Test specification” link which will open up a page from where select a single Test Case “TL-1: Test Case 1” from the left-hand panel as shown below.

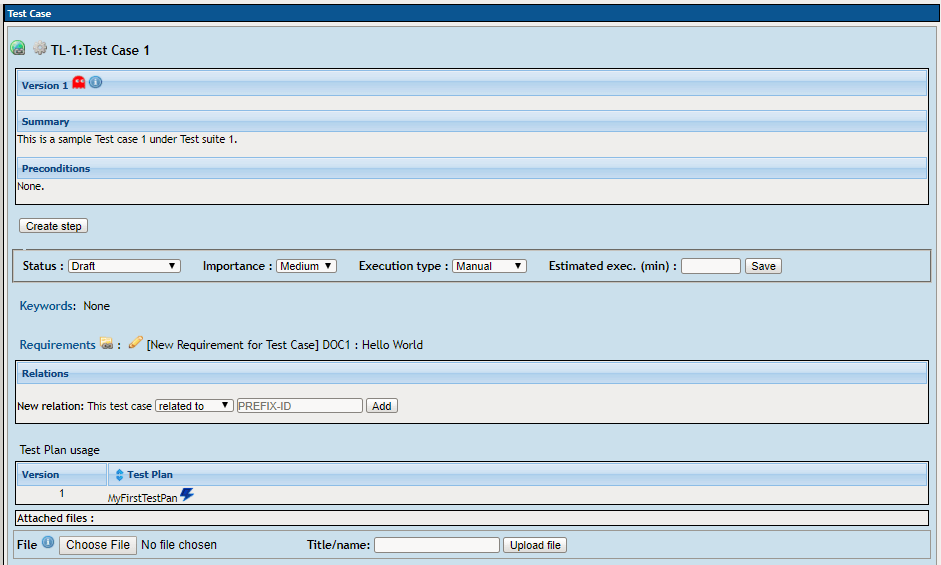
Step 4: On the right-hand side panel, a Test case page will get opened where you will notice a “Requirements” icon to unlink/unlink a requirement to a test case as shown below. Click on this link.
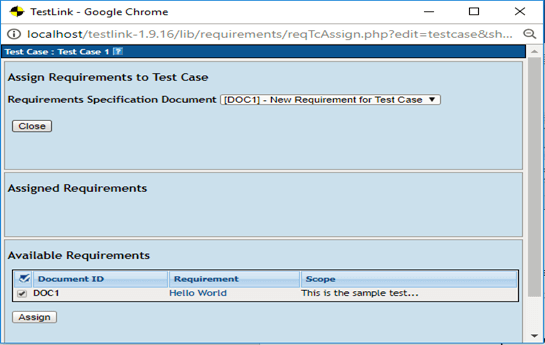
Step 5: When you hit the “Requirements” icon link, it will open a small pop-up window where you can check the checkboxes for the available requirements. Here, we are going to link “Hello World” requirement to the current test case “TL-1: Test Case 1”. After checking the checkbox, click on the “Assign” button to complete the assignment of the requirement to a test case.
Step 6: Next, you can notice that “Hello World” requirement is now appearing under Assigned requirements as shown below. Anytime, the requirement can be unassigned by checking the checkbox of that requirement and clicking in the “Unassign” button as shown below.
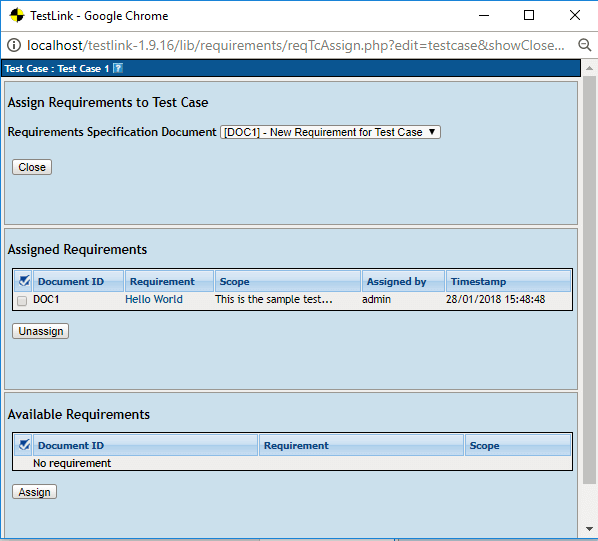
When you click on the “Close” button then the popup will be closed and you can notice that the requirement has successfully assigned to the Test case page as shown below.
Executing A Test Case In TestLink Tool:
TestLink tool allows executing a test case with which we can change the status of a test case. TestLink tool has the available status as “blocked” “Passed”, or “failed”. The default status of a test case is “not run” status and once this status has changed and updated to “blocked” “Passed”, or “failed”, it cannot be changed back to “not run” status again. The following are the steps to execute a test case in TestLink tool.
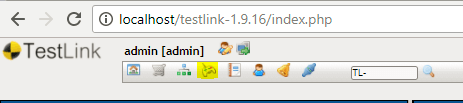
Step 1: From the top navigation bar present on the page, click on the “Test Execution” link (highlighted and shown below). It will open a new “Execute Tests” panel.
Step 2: Shown below is “Execute Tests” panel where you can pick a test case which you want to run from the left side panel.
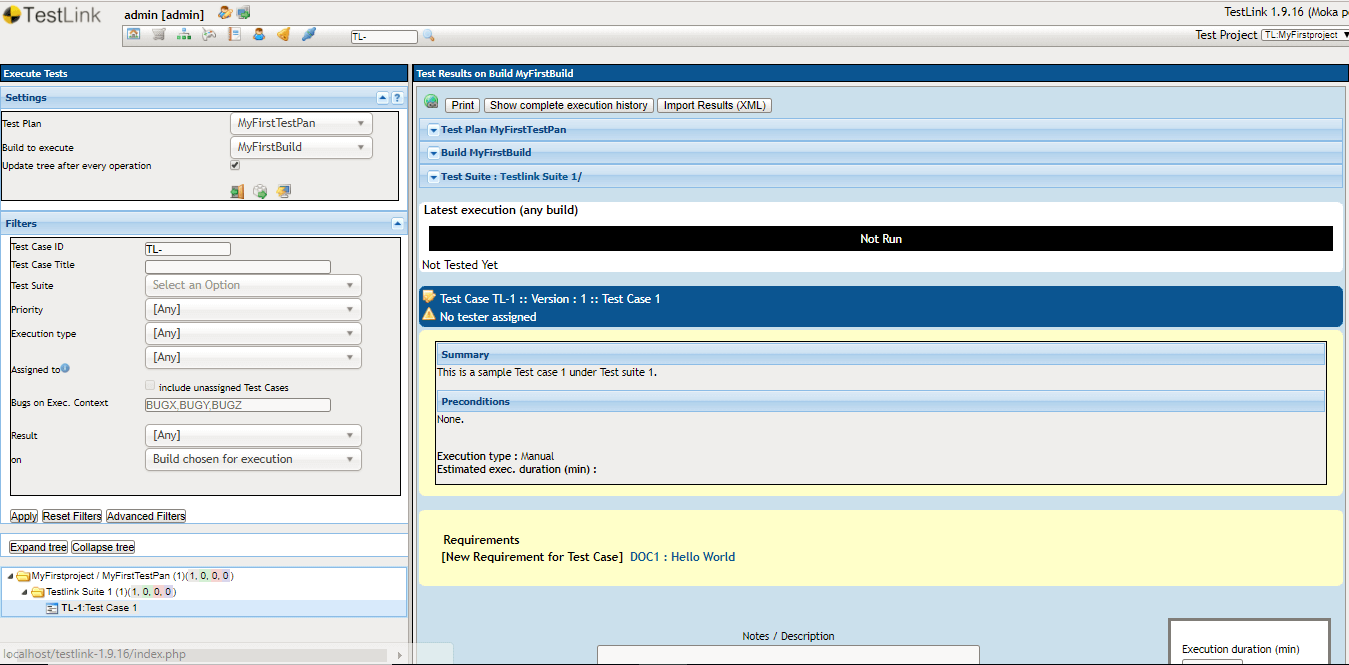
Step 3: Your test case is required to have stepped into it for execution. If you haven’t added any step to your test case, then take a step back and add at least one step to your test case which you want to execute. This step will be required in order to execute your test case. In the example below, we have added step “execute” to the test case “TL-1: Test Case 1”. When you are preparing to execute the test case then you need to enter the execution note to one or more steps associate with the current test case and you have to select an appropriate status (here we have selected “Passed” as shown below).
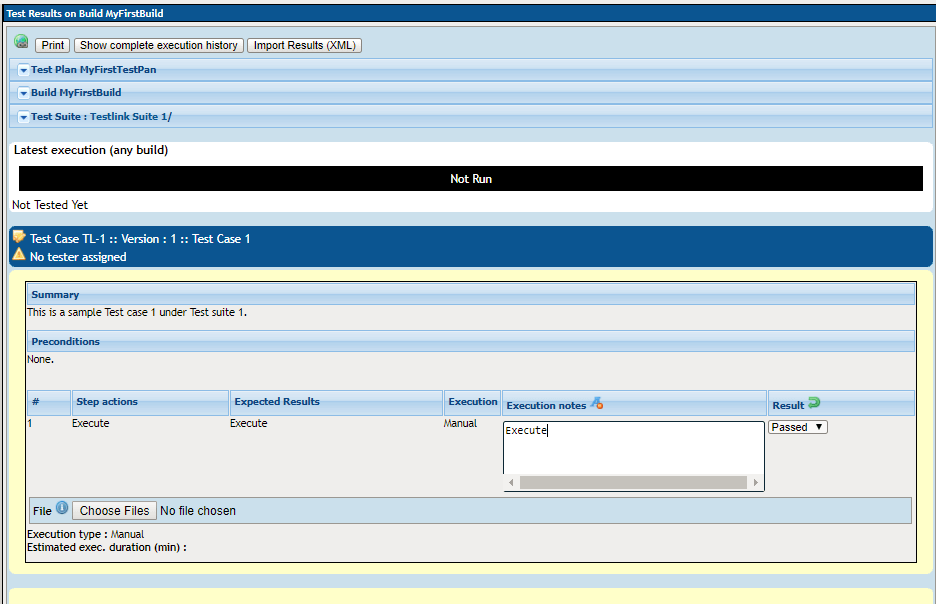
At the bottom of the same page, you need to enter Notes or description about the attached requirement and once it is completed you need to click on the execution icons present on the right-hand side of “Notes / Description” field as shown below.
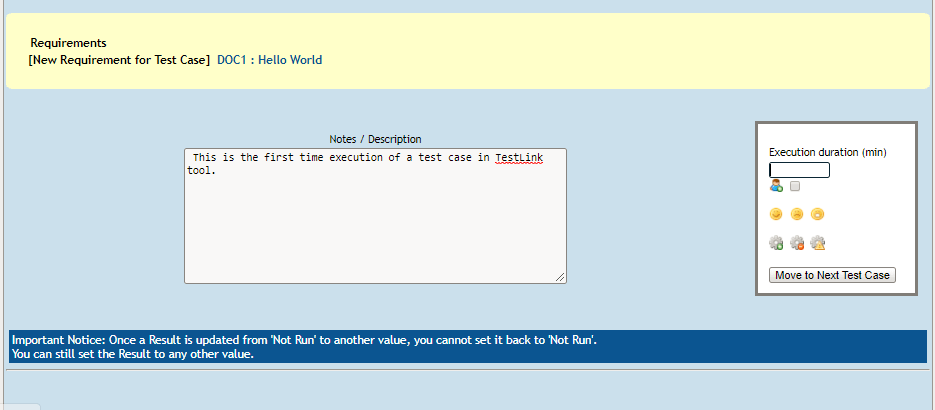
Using the icons below, you can quickly execute the test case and assign it the status as “blocked” “Passed”, or “failed”.
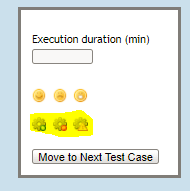
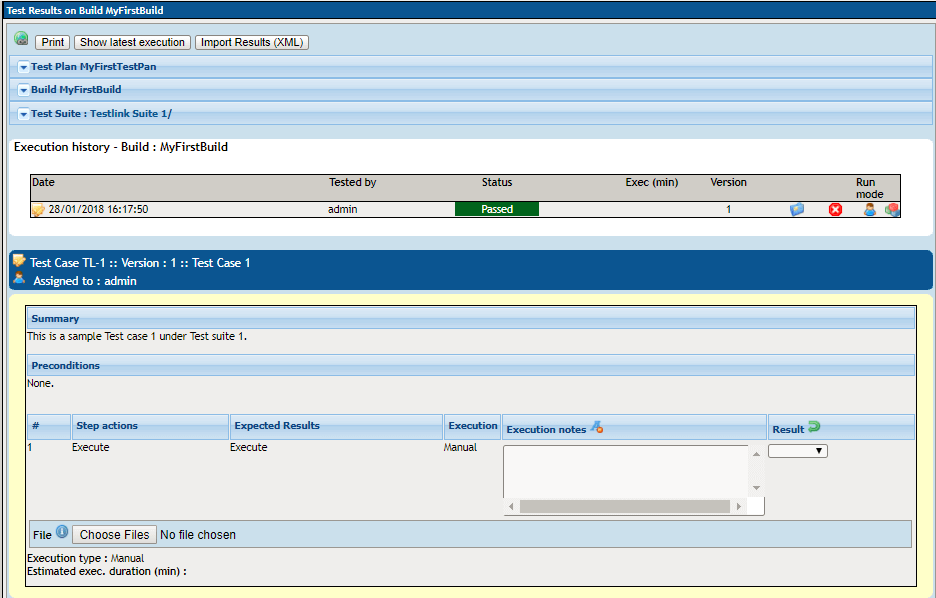
Since we have clicked on the “Passed” execution link. Our current test case has executed successfully and it has been assigned status as “Passed” as shown below.
Explanation of Execution History:

When the test case has executed successfully, we can see the execution history on the same page as shown above. We may also notice the following icons which serve the specific purpose as explained below.
- Attachment Icon: When it is clicked, it allows to attach documents to the current execution.
- Delete Icon: When it is clicked, we can delete this execution by clicking the delete button.
- “human” icon: When we mouse hover over the “human” icon, there we may notice whether it was executed manually or automatically.
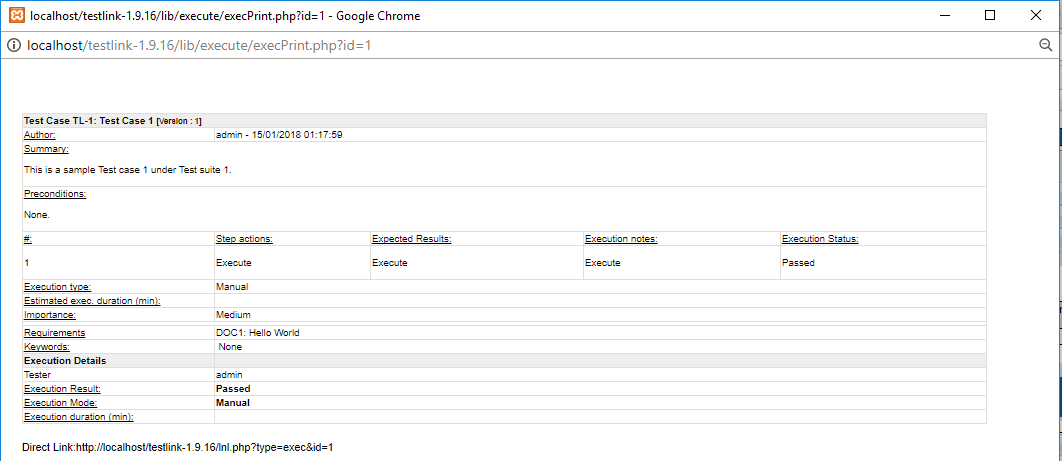
- Print View Icon: The last icon will provide the complete print view of the test execution step when it is clicked as shown below.
Conclusion:
In this chapter, we discussed linking of a requirement to a test case and later we executed that linked test case and marked its status as “Passed” in TestLink tool.
If you are not a regular reader of this website then highly recommends you Sign up for our free email newsletter!! Sign up just providing your email address below:
Happy Testing!!!
