Introduction
In the last article “Getting Started With TestLink And Its Advantages” we learned about TestLink tool and how it can be downloaded and installed on the web server in order to get it start working as a test management tool. We were able to successfully install XAMPP application for windows which has Apache Web Server and MySQL database. Later after starting Apache Web Server and MySQL database, we deployed TestLink web application which we downloaded from TestLink site. After successful deployment, we were able to access TestLink installation link at localhost for default port 80. Hence, the TestLink one-time installation URL for this tutorial will be as given below.
http://localhost/testlink-1.9.16/
Setting Up MySQL Database:
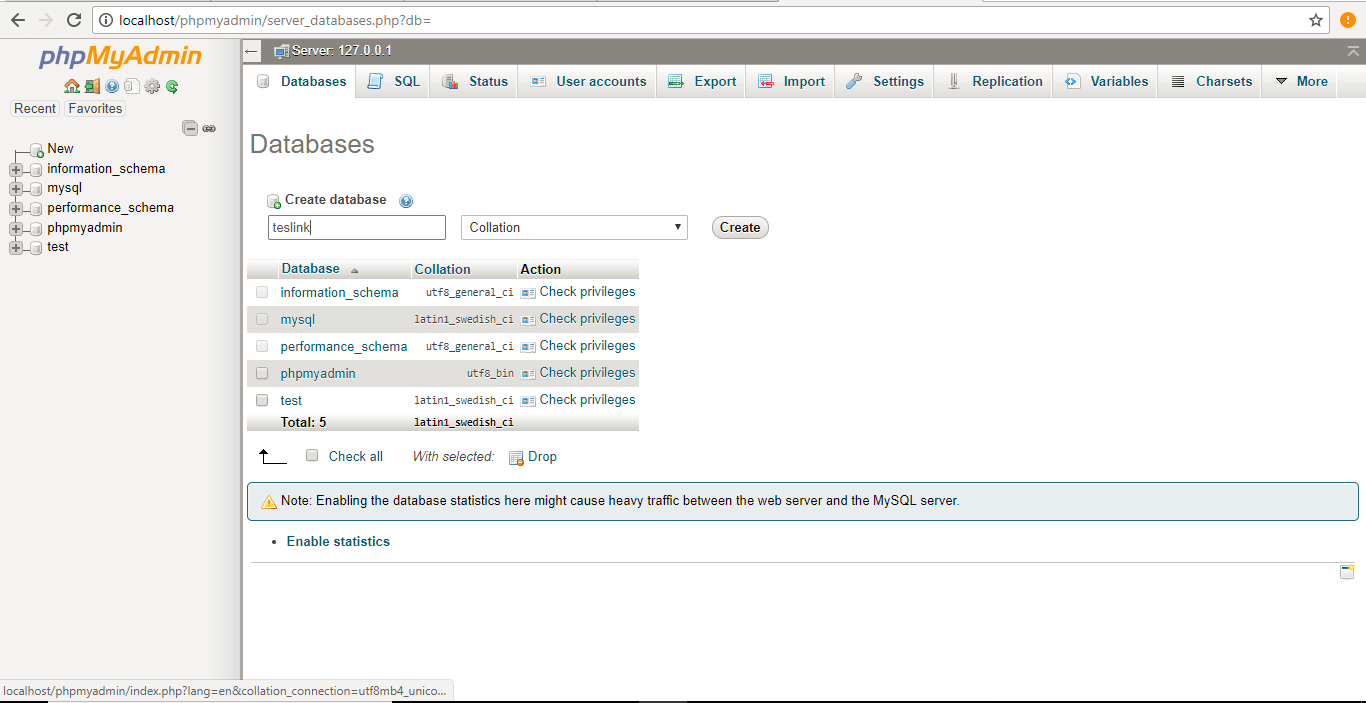
MySQL database admin console can be accessed through below link. We can create the database as ‘testlink’ by entering this value under Create database and hit the create button. (May interested in MySQL installation article)
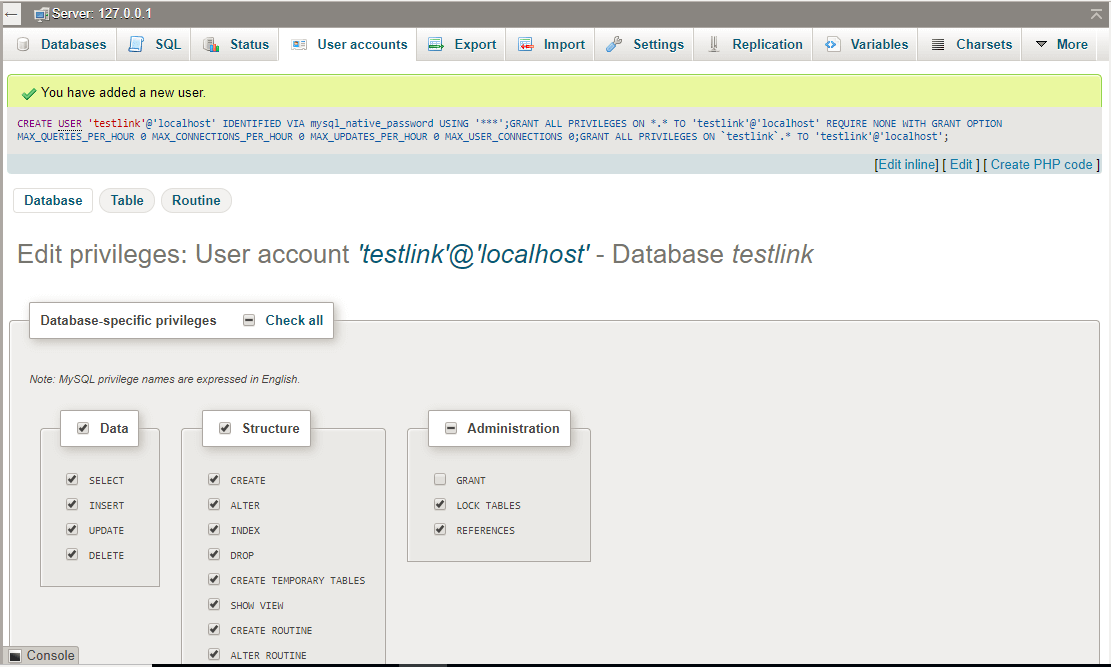
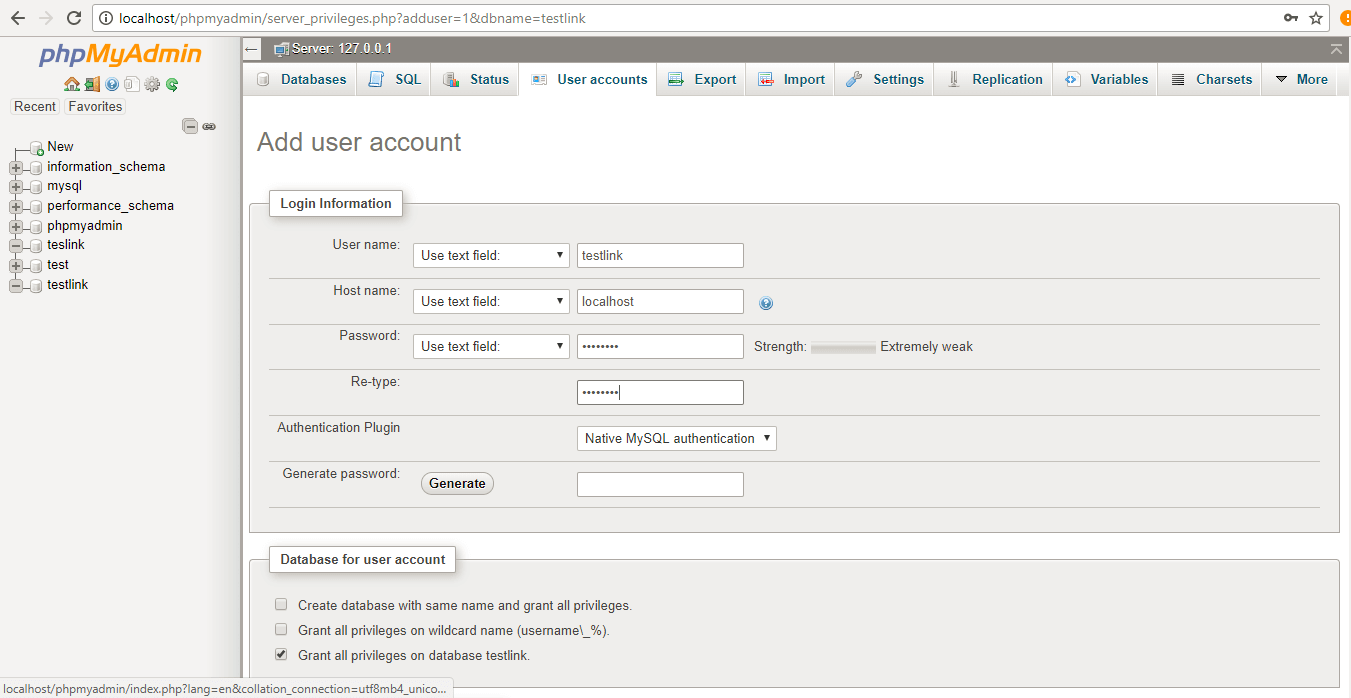
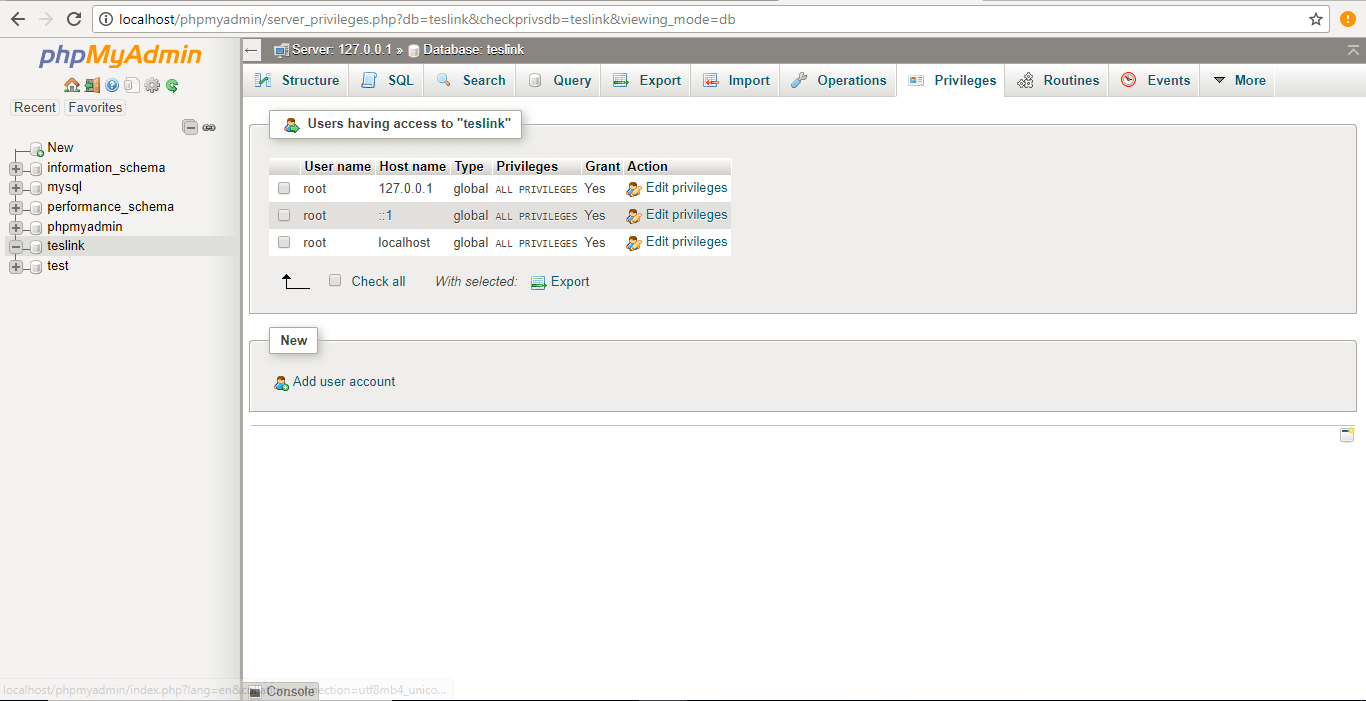
Next, we have to add a user account. Navigate to ‘Privileges’ tab and hit the link ‘Add user account’ as shown below. Enter username and password as testlink/testlink and host as localhost. We want to provide all database privileges to the ‘testlink’ user. Therefore, check the ‘Global Privileges’ checkbox and hit the ‘Go’ button to complete the creation of testlink user to the testlink database. After successful creation of the user, the screen shown below will appear with the message as ‘ You have added a new user.’. At this point User account, ‘testlink’@’localhost’ – Database testlink are created successfully in MySQL.
TestLink Installation:
When we hit the above URL in any browser, it will automatically direct you to the TestLink installation URL as given below. This will take place for the first time only.
http://localhost/testlink-1.9.16/install/index.php
Below are the steps which should be carried out in order to complete the TestLink installation.
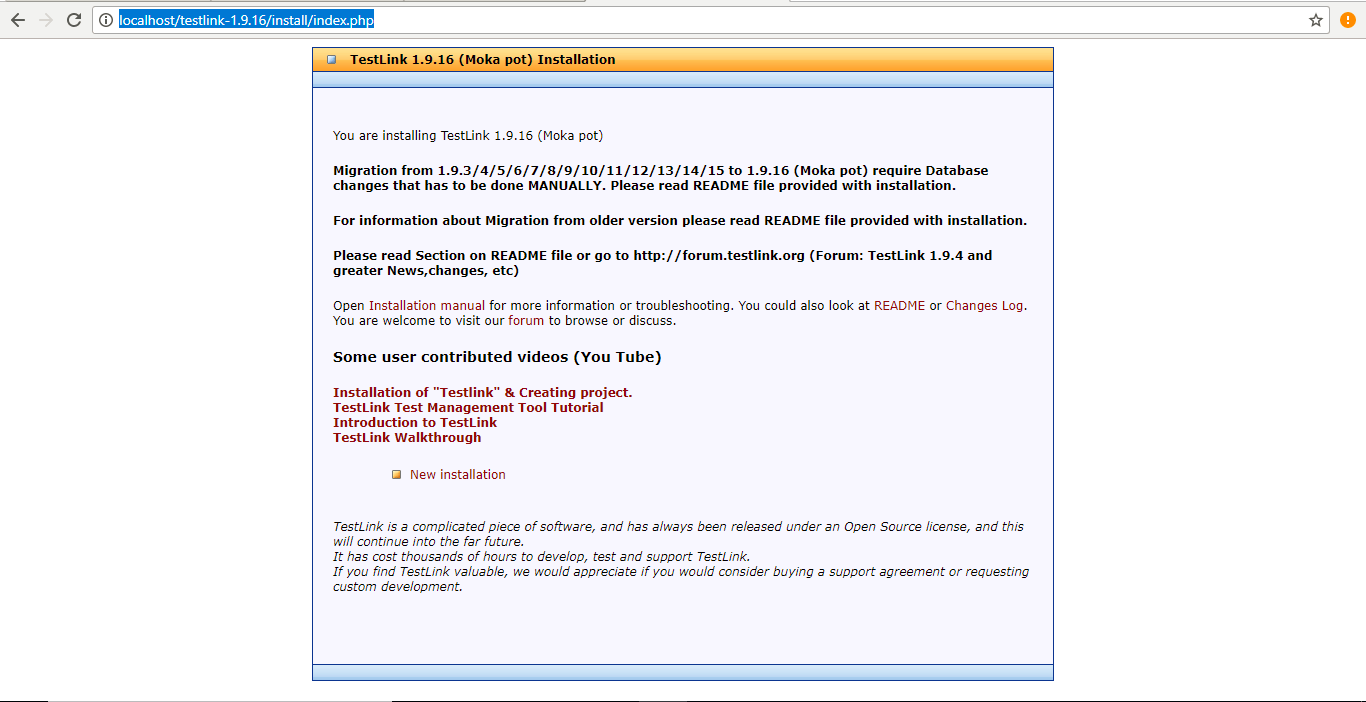
Step 1: Click on the ‘New installation’ link present on the screen. It will take you to the license agreement page as shown below.
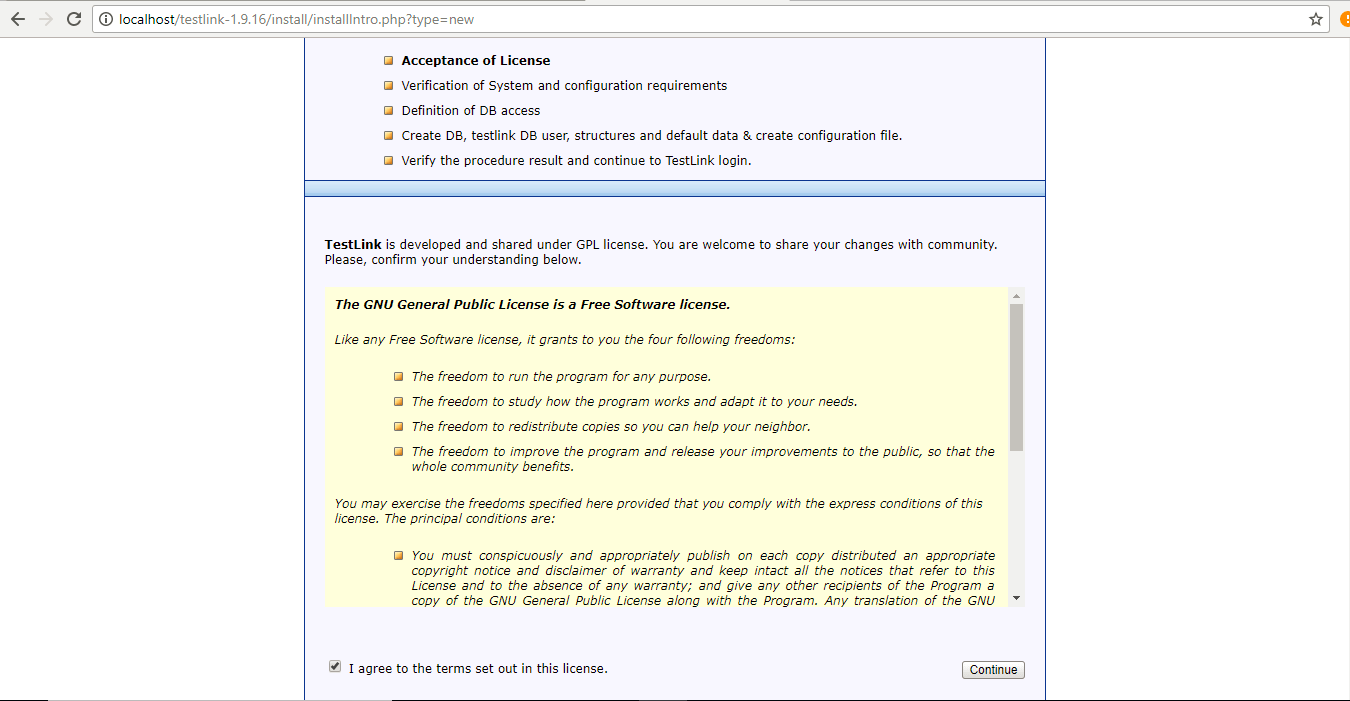
Step 2: Acceptance of License: Check the checkbox present at the bottom of the page with the message as ‘I agree to the terms set out in this license.’ and click on the Continue button.
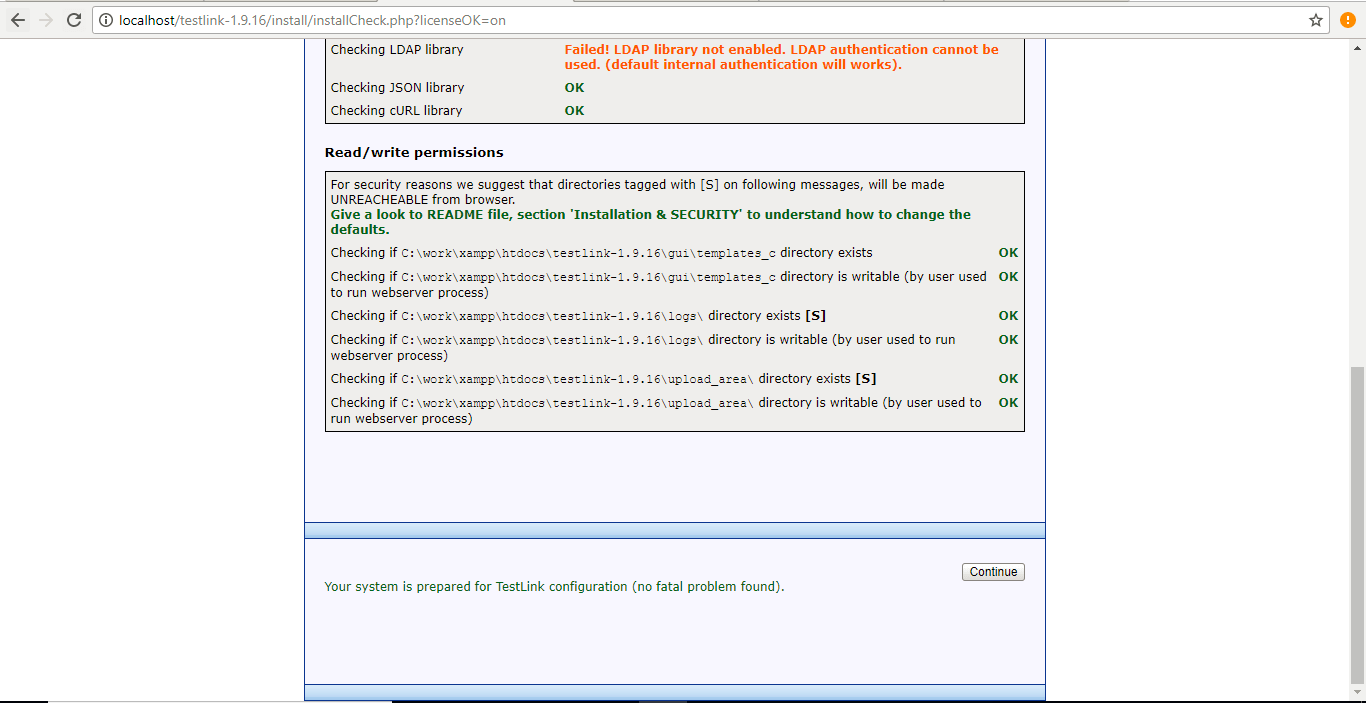
Step 3: Verification of System and configuration requirements: At this step, the TestLink will automatically carry out its number of checks to make sure that everything is ready to start the setup as shown below. You may need to edit ‘config.inc.php’ file to update the path for the following two variables.
| Variable | Path Value |
| $tlCfg->log_path = | TL_ABS_PATH . ‘logs’ . DIRECTORY_SEPARATOR; |
| $g_repositoryPath = | TL_ABS_PATH . ‘upload_area’ . DIRECTORY_SEPARATOR; |
After assigning values to these variables, click on the continue button to proceed further as shown below.
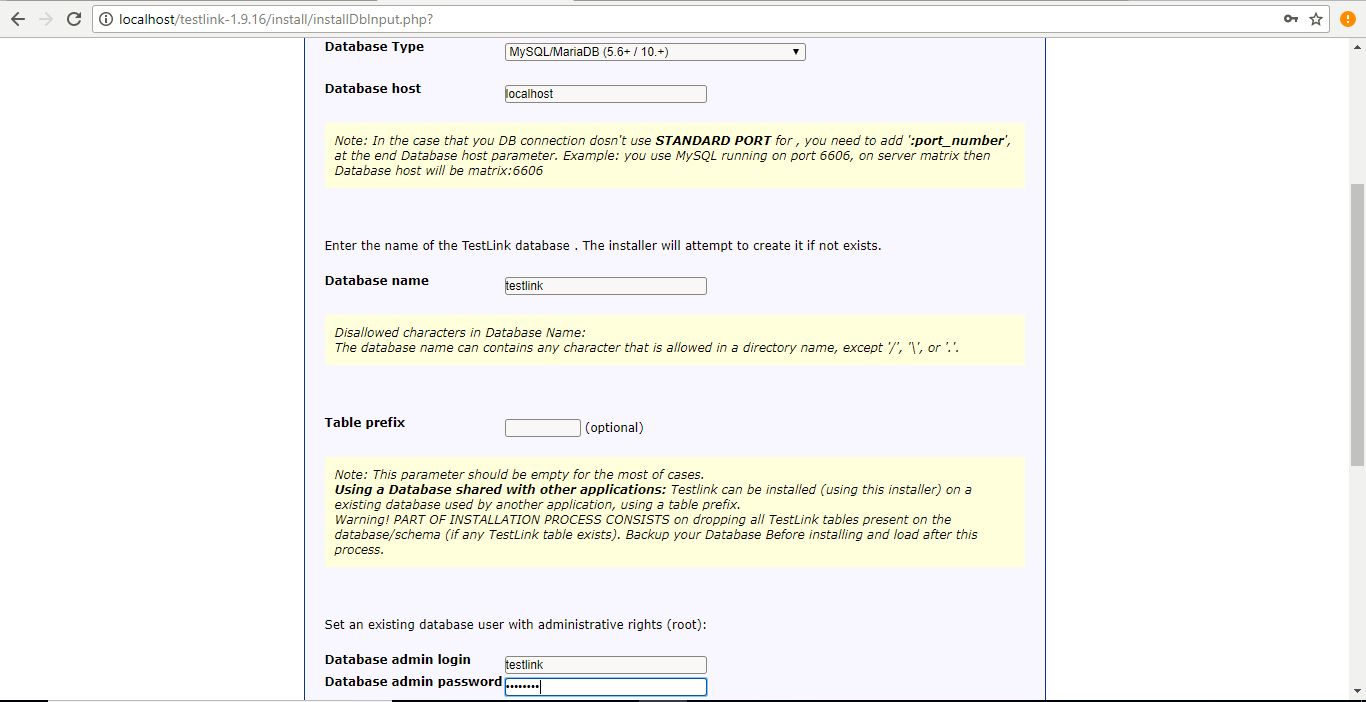
Step 4: Definition of DB access: At this point, you need to select MySQL database and need to provide the hostname, database name, database username, and password. Here, we are going to enter the database details which we have created earlier in this tutorial as shown below. After filling up the details, hit on the ‘Process TestLink Setup!’ button to proceed further.
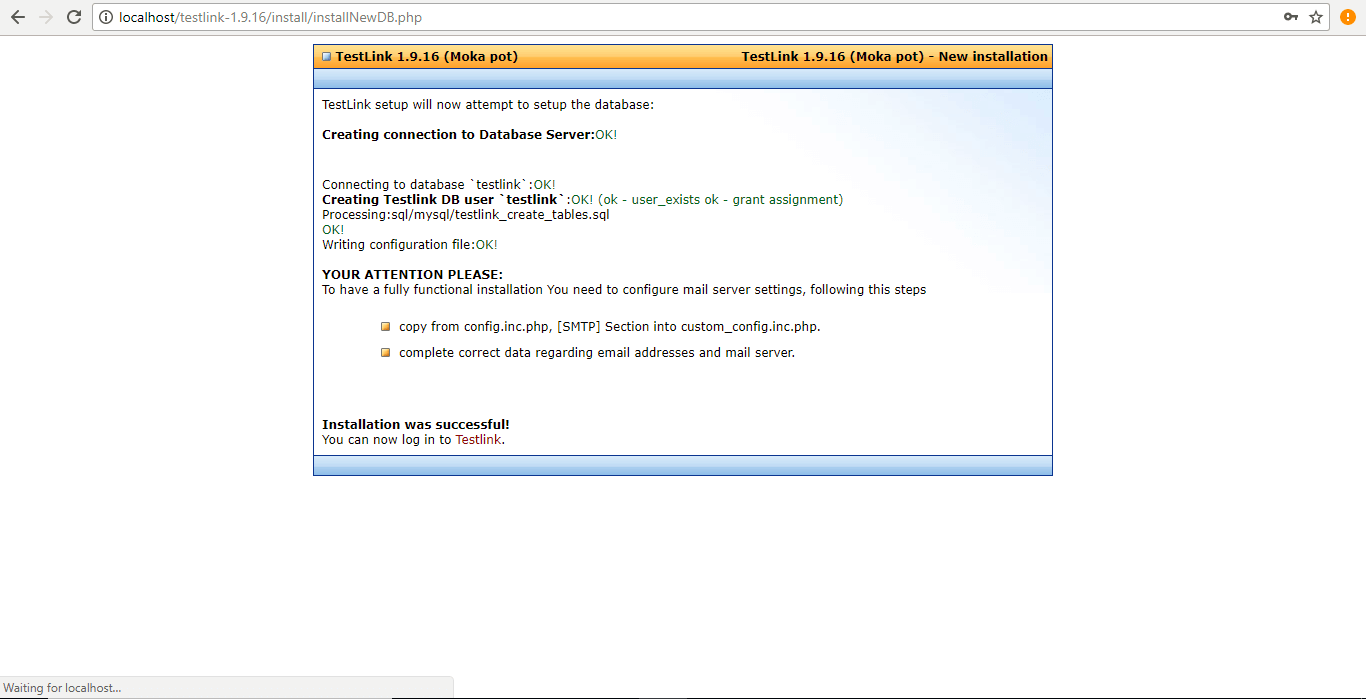
Step 5: Create DB, TestLink DB user, structures and default data & create a configuration file: At this step, the TestLink setup will display the message creating a connection to the database was OK! And it was able to execute the create table scripts present in the file ‘sql/mysql/testlink_create_tables.sql’. It will also prompt you that you can provide SMPT details in ‘config.inc.php’ file to set up emails. At last, it will provide you a TestLink link with the message as ‘Installation was successful!’ shown below.
Step 6: Verify the procedure result and continue to TestLink login: Click on the Testlink login URL which was generated at the last step. After the click, you will a login screen as shown below.
http://localhost/testlink-1.9.16/login.php
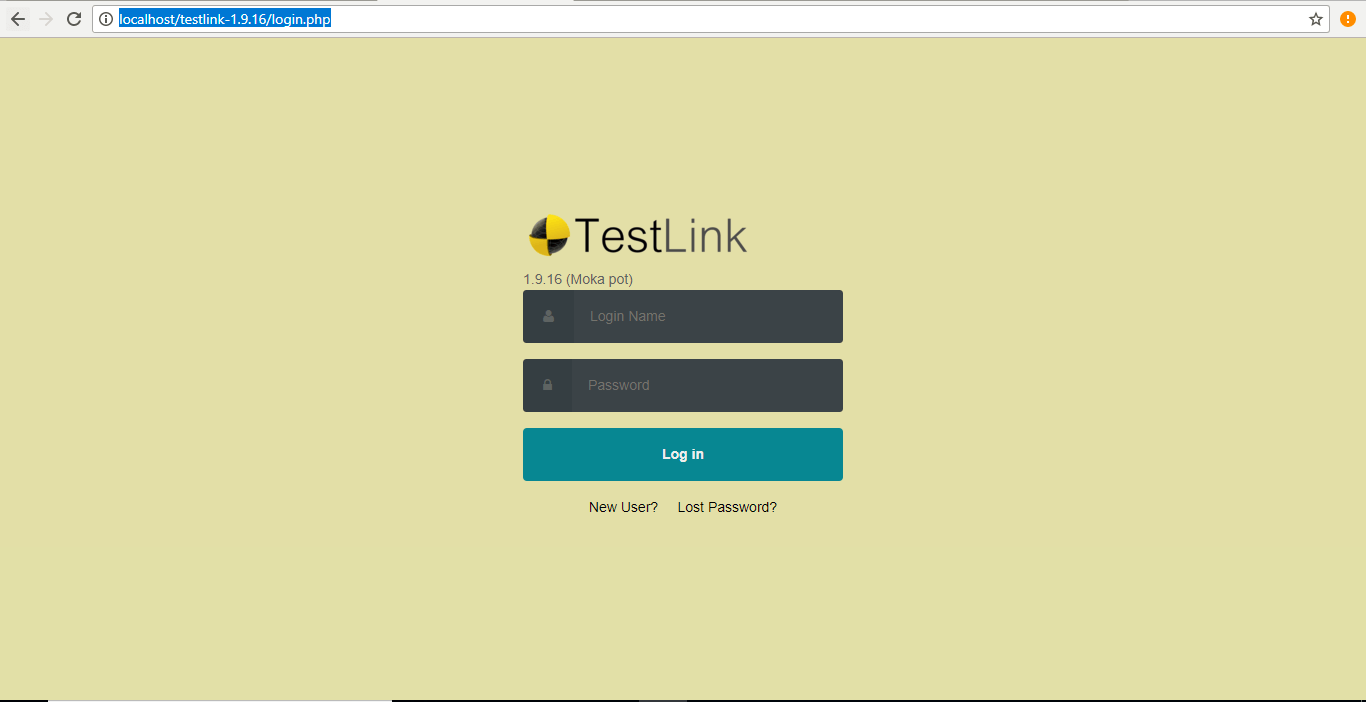
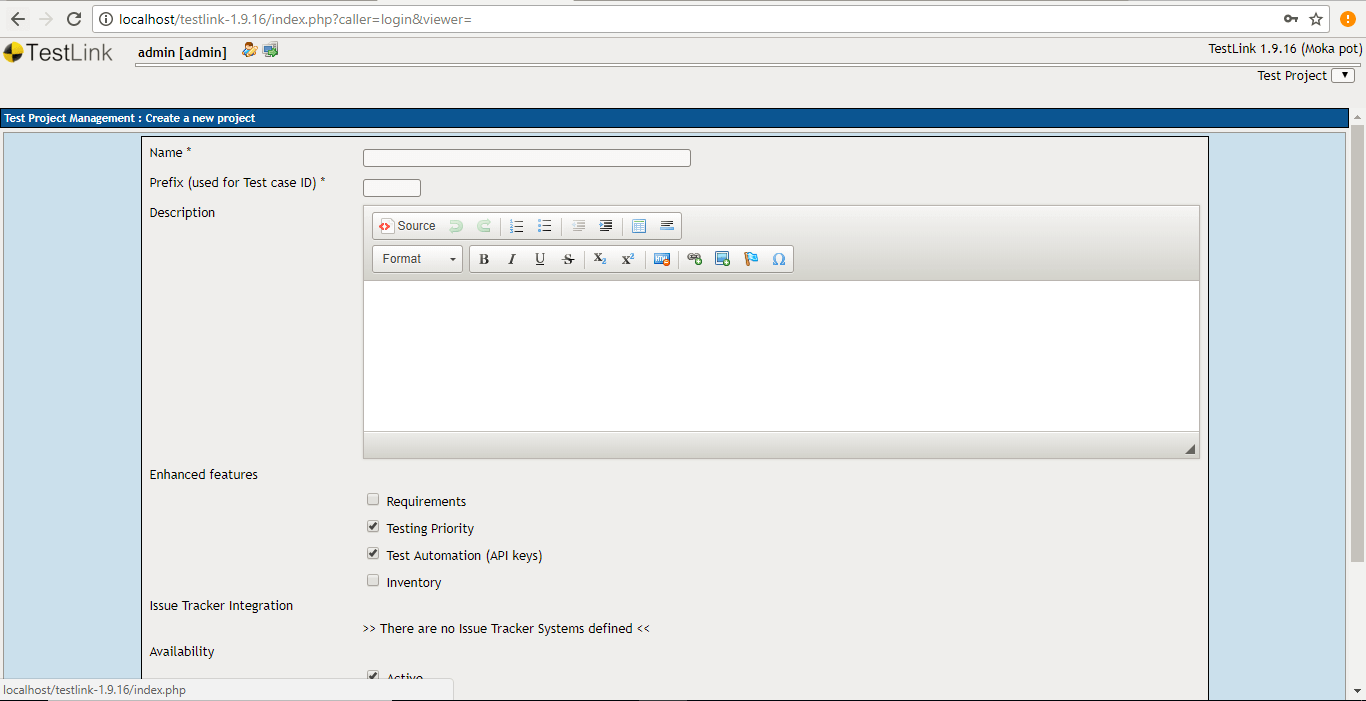
You can login into TestLink by simply entering the username and password as admin and admin respectively. After successful login, it will take you to Test Project Management where you can create a new project as shown below.
Creation of A New Test Project:
Creating a new test project in TestLink is very simple. You need to fill up the following details in the above form.
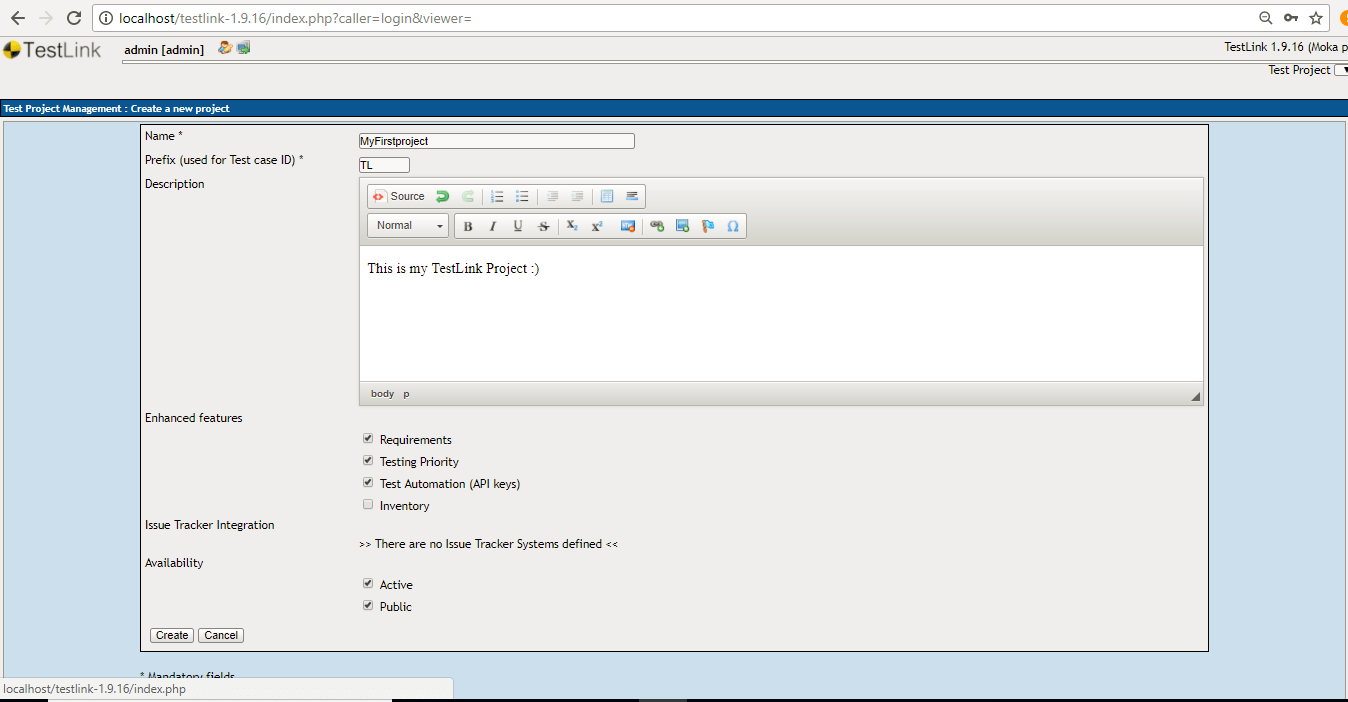
Name: here, you need to provide a name to the project say ‘MyFirstproject’. It is a mandatory field.
Prefix (used for Test case ID): You need to provide a prefix which will be used for Test case ID number. It is a mandatory field. Here you can provide value as ‘TL’.
Description: It is an optional field where you can provide project summary as a description. It will help another user if they want to understand the project details.
Enhanced Features: Here, you need select the checkboxes for the features you want to use for this project. The features available are Requirements, Testing Priority, Test Automation (API keys) and Inventory. Select the features which are applicable to your needs.
Issue Tracker Integration: It will display if any Issue Tracker Integration exists where we can perform the integration as discussed earlier.
Availability: Here, it will ask about the availability of the project. Whether you want to make the created project as Active as well as Public. You have to select the checkboxes in order to select the options.
Lastly, when you are done filling up these details then hit the Create button present at the bottom to complete the Test project creation. In case, you have decided not to create the project the simply click on the cancel button to cancel the current project creation.
At this point, we have filled up all the required details that we just discussed for the new test project creation as shown below.
When you hit the create button as seen in the above screenshot, it will create your new test project with the name as ‘MyFirstproject’ as shown below.
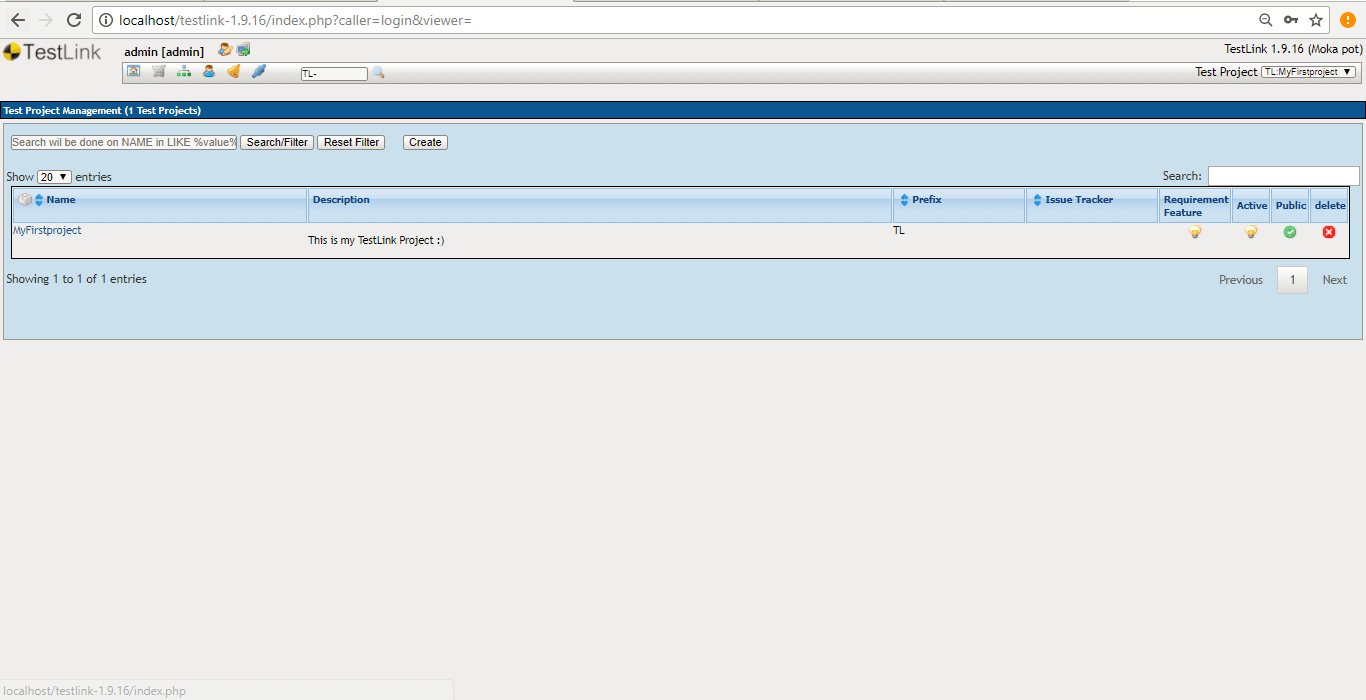
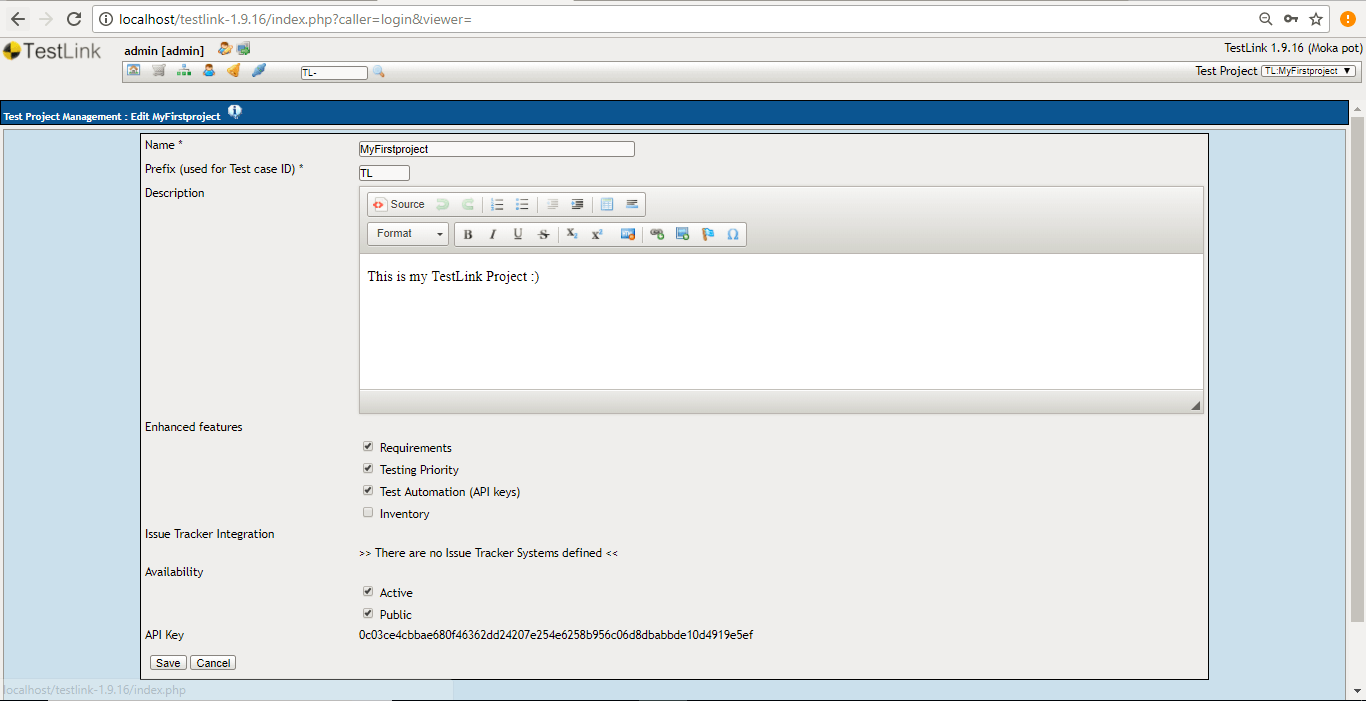
In the above screenshot, we can see that ‘MyFirstproject’ has created with the visible description, issue tracker, prefix, requirement feature, active, public and delete details. Anytime you can update the project details by clicking on the ‘MyFirstproject’’ link shown above. It will permit you to make change the project details and hot the save button to persist these changes. Also, at the bottom, you can see API key as shown in the below screenshot.
Conclusion
In this article, we discussed the TestLink installation and used the tool to create a new test project with the name as ‘MyFirstproject’.
In next article: Tutorial 3 – How To Create Build Creation In TestLink
Check out all TestLink articles published on STC:
TestLink Tutorial Series For Beginner to Advanced!!
Happy Testing!!!
