Introduction
In the last chapter, wediscussed linking requirement to a test case and executing that test case in Testlink tool. In this chapter, we are going to discuss generating Test Reports in Testlink tool. Generating a test report in TestLink tool is very simple and the tool supports the following test report formats.
- HTML
- MS Word
- MS Excel
- OpenOffice Writer
- OpenOffice Calc
Steps to generate a Test Report in Testlink tool
We can easily generate a test report in Testlink tool after following these steps.
Step 1: Bring up the Testlink application
Open the XAMPP console and click on Start buttons for Apache Web Server and MySQL. After Apache Web server and MySQL database are started, you can see their status on XAMPP control panel. Apache and MySQL elements on XAMPP control Panel has turned green which demonstrate the port number.

Note: When you want to stop or restart the Apache Web Server and MySQL database then you can simply click on the Stop button to complete the required action.
Step 2: Login into the TestLink application with admin or appropriate role
Make sure that the role with which you are going to login into Testlink tool should have appropriate access to write requirements. Once Apache Web server and MySQL database are up and running, you can access the TestLink application at the below URL on your local machine.
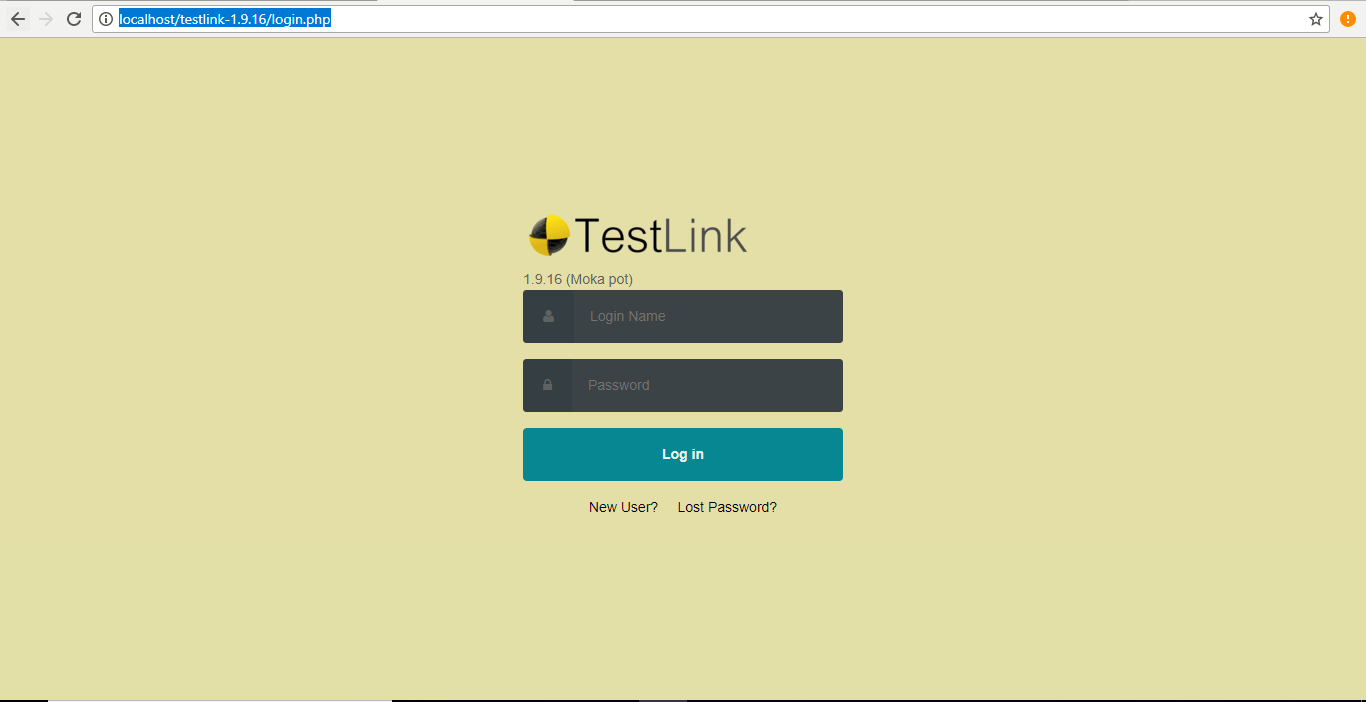
http://localhost/testlink-1.9.16/login.php
Shown below is the login page for TestLink tool. Enter username and password as admin and admin respectively in order to log into the application.
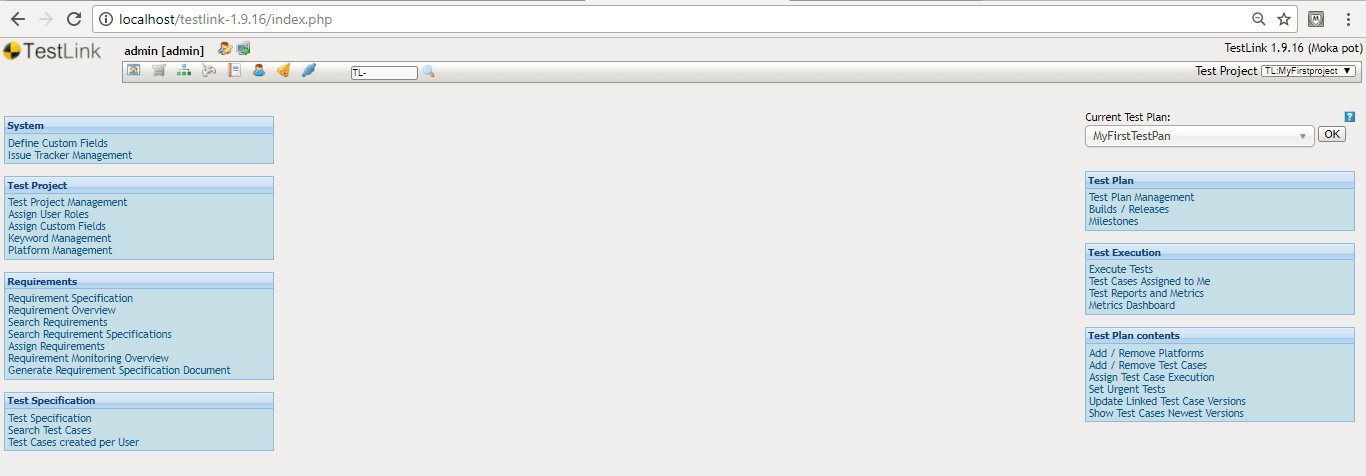
After successful login, it will take you to the home page of the TestLink tool as shown below.
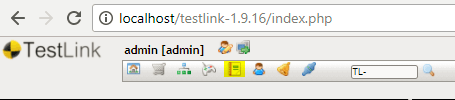
Step 3: At the top left corner of the home page, you will notice a “Test Report” icon on the header as shown below (highlighted icon). Click on this “test report” icon.
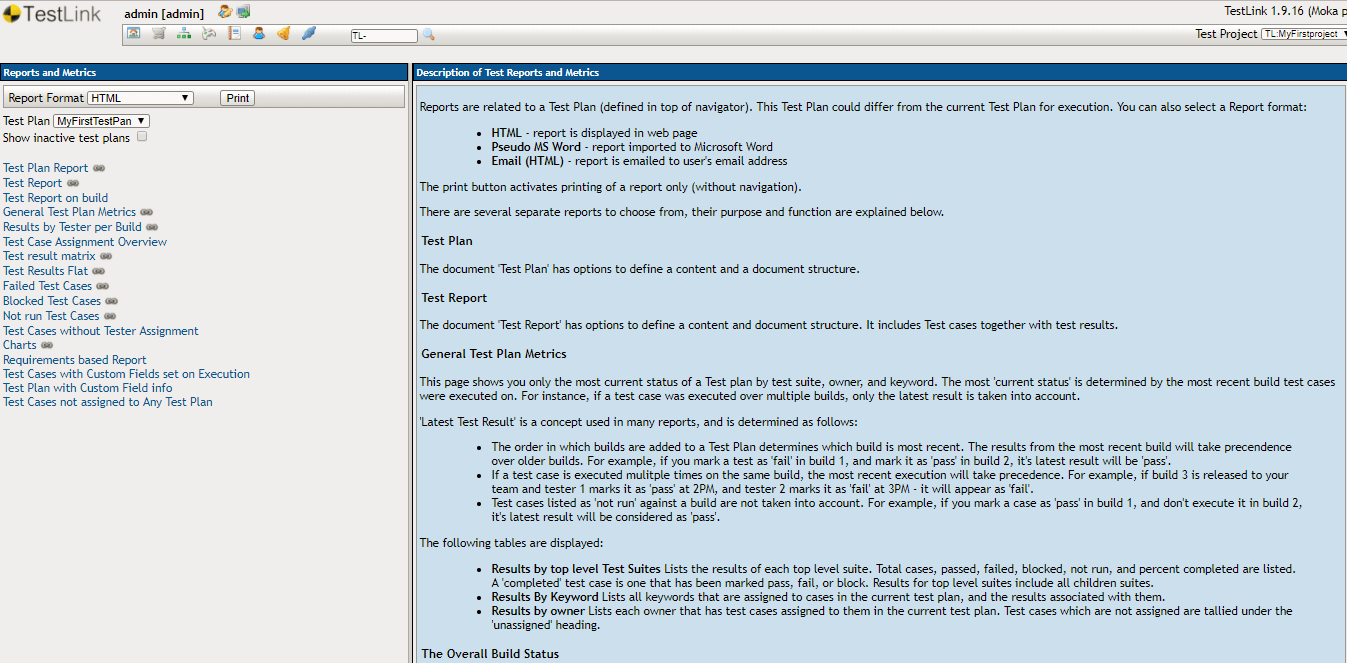
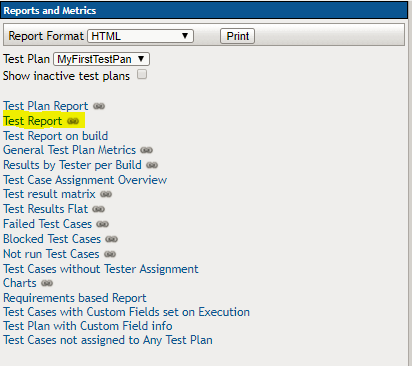
Step 4: It will open “Reports and Metrics” panel where on the left-hand side of the panel has links to generate various reports and on the right-hand side panel you will find the description of those reports as shown below.
Step 5: Click on the “Test Report” link present on the left-hand side of the panel (highlighted and shown below).
Step 6: It will open up “Test Report” panel on the right-hand side of the panel where you can observe Test report – Document options along with a number of checkboxes which are present opposite to these options as shown below. You just simply need to check that checkbox which you want to include in the Test report. The available options are as follows.
- Table of Contents: When you enable this option by checking the checkbox, then it will display a table of contents in the Test report.
- Header Numbering: When you enable this option by checking the checkbox, then it will display header numbering in the Test report.
- Test Suite description: When you enable this option by checking the checkbox, then it will display test suite description in the Test report.
- Test Case Summary: When you enable this option by checking the checkbox, then it will display test case summary in the Test report.
- Test Case Scenario: When you enable this option by checking the checkbox, then it will display test case scenario in the Test report.
- Test Case Author: When you enable this option by checking the checkbox, then it will display test case author in the Test report.
- Test Case Keywords: When you enable this option by checking the checkbox, then it will display test case summary in the Test report.
- Test Case Custom Fields: When you enable this option by checking the checkbox, then it will display test case custom fields in the Test report.
- Test Case Related Requirements: When you enable this option by checking the checkbox, then it will display test case related requirements in the Test report.
- Execution Notes: When you enable this option by checking the checkbox, then it will display execution notes in the Test report.
- Step Execution Notes: When you enable this option by checking the checkbox, then it will display step execution notes in the Test report.
- Test results: When you enable this option by checking the checkbox, then it will display test results in the Test report.
- Step Execution Results: When you enable this option by checking the checkbox, then it will display step execution results in the Test report.
- Build Custom Fields: When you enable this option by checking the checkbox, then it will display build custom fields in the Test report.
- Metrics: When you enable this option by checking the checkbox, then it will display metrics in the Test report.
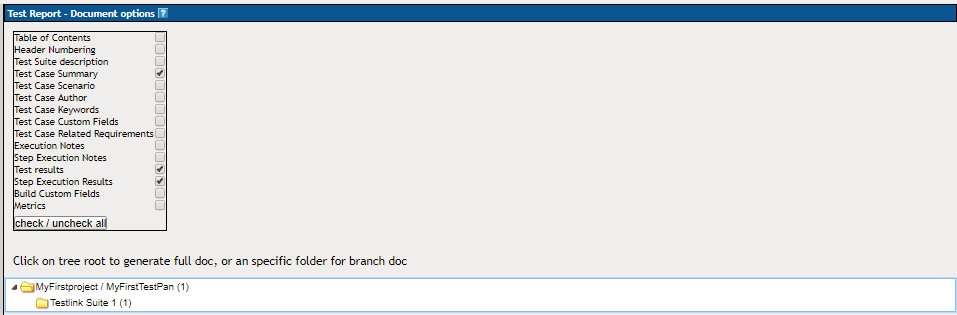
Step 6: Select as many checkboxes for the options which you want to display in your test report. Anytime, you can use the option “check/uncheck all” which is present at the bottom in order to check and uncheck all the checkboxes respectively when clicked. As an example, we have just checked four checkboxes. They are a table of contents, test case summary, test results, and step execution results. Next, click on the tree root in order to generate full doc or a specific folder for branch doc which is present at the bottom. Here, we have clicked on “Testlink suite 1” to generate the test report.
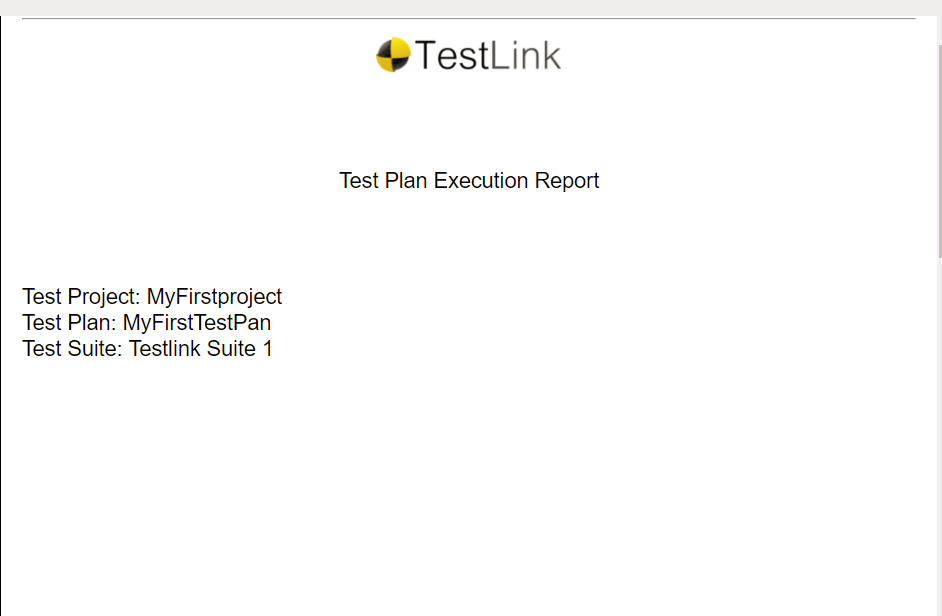
Step 7: The report has generated successfully and it can be seen on the right-hand side of the panel as shown below page by page.
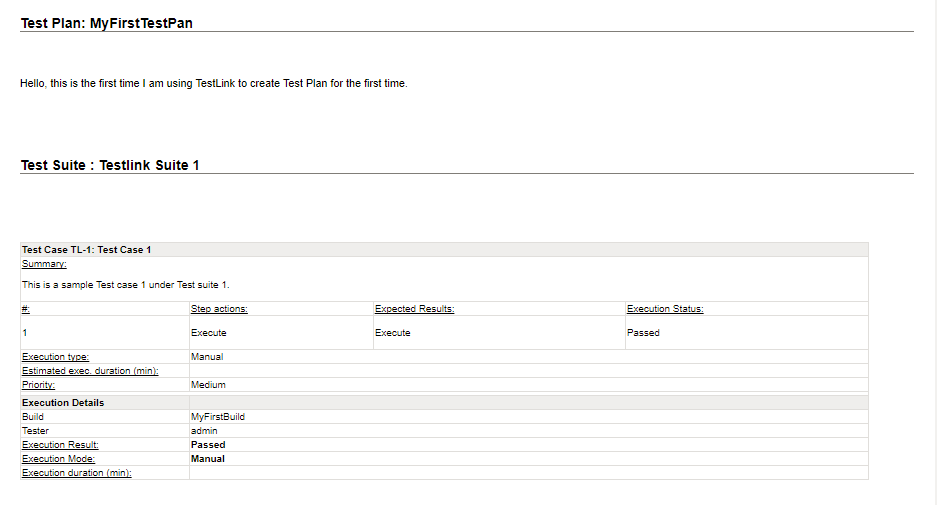
Page 1: This is how our report will look on the 1st page.
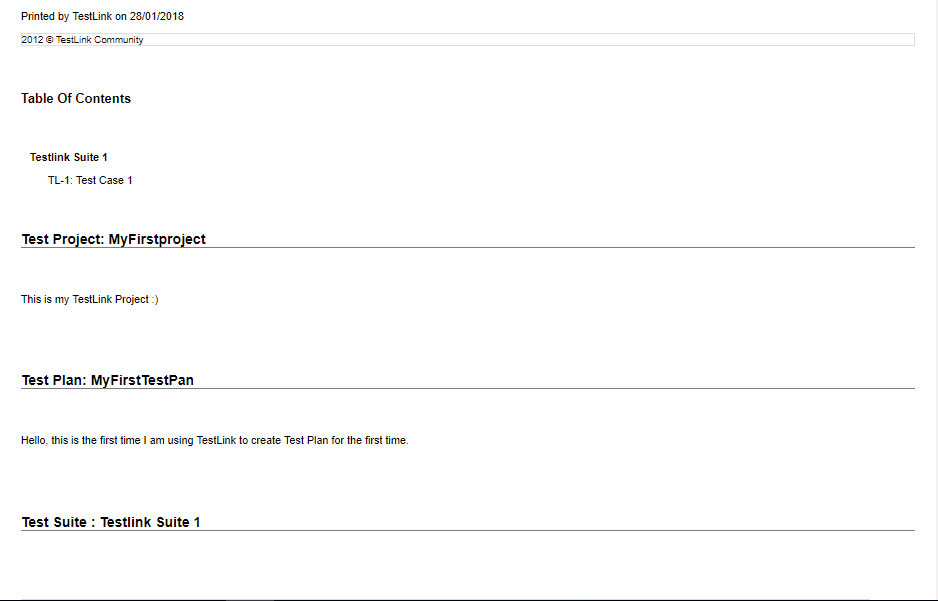
Page 2: This is how our report will look on the 2nd page.
Page 3: This is how our report will look at the last page.
This report will grow as long as you enable more option by checking the checkboxes as discussed earlier in this chapter. Depending on the organization need, we can customize our test report by simply playing around with the checkboxes for the available options.
Conclusion:
In this chapter, we discussed about the creation of test report in details and generated a sample test report for the Test Suite which we have created in the earlier chapter of this tutorial.
